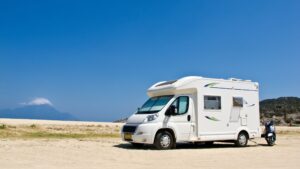

If you own a motorhome, you already know that cleaning it regularly is not just about shine, it’s about protecting it from damage and keeping its long-term value. When dirt, algae, bird droppings, or leaves are left sitting on the bodywork, they trap moisture that quickly leads to mildew, rust, and chemical spots. Add heat and UV exposure, and panels, paint, and plastics begin to fade or stain much sooner than you’d expect.
Regular cleaning changes all of that. A motorhome that’s cared for feels fresher to travel in and holds a higher resale price when it’s time to sell. Most owners find that a full exterior clean takes about 60 to 90 minutes, and on larger vans or those with more buildup, it can stretch closer to two hours. Choosing a cool, overcast day makes the job easier, since water won’t dry too fast and leave streaks. Starting from the roof and working down panel by panel is the best way to avoid re-dirtying the surfaces you’ve already cleaned.
By making cleaning part of your seasonal routine, deep washes at the start and end of each season, with quick touch-ups in between, you extend the life of your motorhome and keep it ready for every road ahead.
In this guide, we’ll focus on how you can clean your motorhome step by step, protect its condition, and make the whole process easier over time.
Why is Regular Motorhome Cleaning Important?
Cleaning your motorhome on a consistent schedule is one of the simplest ways to protect its condition and save money over the long run. Dirt, algae, and bird droppings left on the motorhome roof or panels do more than spoil the shine; they trap moisture that encourages rust, mildew, and chemical staining. Add in the constant action of UV light and heat, and you have a combination that can damage paint, plastics, and even rubber seals. When you clean your motorhome regularly, you slow this process, preserve the protective layers of paint and wax, and prevent streaks and residue that are difficult to remove later.
Neglecting the job often leads to oxidized fiberglass, where surfaces fade to a chalky finish that requires cutting compounds and polishing to restore. Hinges, locks, graphics, and gelcoat also last longer when you keep grime and dust from building up. Even seals around windows and doors benefit from proper cleaning products and a protective solution, helping them stay supple instead of cracking. Many storage sites and campgrounds also require a clean vehicle, so regular attention prevents delays or questions about condition when you arrive.
- Appearance: Preserves shine and keeps the motorhome exterior looking closer to new, improving the overall image on the road or at a holiday site.
- Longevity: Protects seals, locks, hinges, and panels from dirt, algae, and debris that accelerate wear and damage.
- Value retention: Prevents oxidation, rust, and stubborn streaks so you maintain higher resale value when compared with neglected vans.
How Does Cleaning Retain Motorhome Value?
Regular motorhome cleaning is directly linked to what you can ask for when you sell your vehicle. Buyers are willing to pay more for a well-kept camper van because it signals care and reduces their risk of surprise repairs. A clean motorhome exterior and interior, backed by records of seasonal washes, tells potential customers that you followed best practices. Vehicles that look “above market average” in condition can command a noticeable premium over similar vans that show grime or oxidation.
- Condition premium: Gleaming paintwork and maintained seals reduce signs of neglect, often adding 5–10% to the achievable sale price in real-world listings.
- Maintenance proof: Documented start- and end-of-season deep cleans, combined with wax protection, show commitment to care.
- Time benchmarks: A standard 60–90 minute wash or a thorough 90–120 minute wash and wax demonstrate attention to detail that reassures buyers.
- Cost savings: Biannual deep cleans and monthly light washes help you avoid expensive refinishing, such as cutting back chalky gelcoat with chemicals and repeated waxing.
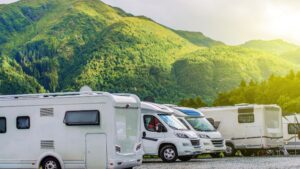
When Should You Clean Your Motorhome?
Cleaning too late after grime has settled allows dirt, algae, and residue to harden on the motorhome exterior, while cleaning too soon in harsh sunlight can leave streaks on panels and windows. The best practice is to plan washes on cool, overcast days when water dries slowly. This gives you more control and prevents spotting. If the only option is a sunny or windy day, work panel by panel, rinsing immediately so soap and cleaning solution do not dry on the surface.
Frequency depends on how you use your vehicle. A camper van used on dusty or muddy roads should be cleaned after each trip to avoid damage to paint and rubber seals. Full-time touring often requires monthly washes to maintain condition. At minimum, aim for two deep cleans per year, once at the start of the season to remove winter grime, and once at the end before storage. Plan 60 to 90 minutes for a standard job, though larger vans with more exterior surface may take up to two hours including drying and waxing.
Recommended schedule for motorhome cleaning:
- After trips: Wash to remove dirt, mud, and insects that can stain or scratch.
- Monthly use: Light exterior wash and interior vacuum cleaner routine for cleanliness.
- Twice yearly: Full step by step guide, roof, sides, seals, solar panels, wheels, and protective wax for long-term shine.
Where Should You Clean Your Motorhome?
The place you choose for motorhome cleaning matters almost as much as the method. A safe location with proper drainage protects both the vehicle and the environment. Dedicated motorhome wash bays or specialist cleaning stations are ideal, since they provide gantries or stairs for secure roof access. These services also use cleaning agents suited for paint, panels, and acrylic windows. Avoid automatic truck washes, as the brushes can be too harsh and detergents too aggressive for motorhome exterior materials.
Campsites sometimes allow cleaning on fully serviced pitches, though it is important to check the rules first. Always confirm that the use of cleaning products, hosepipes, and buckets is permitted. At home, a wide driveway is usually sufficient, as long as you have a stable step ladder and a telescopic brush for reaching the motorhome roof and roof surface. Make sure the ground is level to ensure ladder safety and reduce risk of scratching paint.
Best places for motorhome cleaning:
- Specialist bays: Provide access to roof areas and safe platforms.
- Home driveway: Practical if you have space for ladders and proper equipment.
- Campsites with facilities: Convenient when rules allow exterior washing.
- Avoid: Wild cleaning near waterways where chemicals or residue can flow directly into soil.
What Tools and Cleaning Supplies Need For A Motorhome?
The right tools simplify the process and protect your vehicle from unnecessary damage. Having everything ready before you begin allows you to move through the job without interruption. Organizing your kit ensures you always use the proper cloth or brush for the right surface, preventing scratches on paint or glass.
- Ladder: A stable, self-supporting platform to safely reach the roof and roof surface.
- Brush: A telescopic, long-reach soft brush that can connect to a hose for rinsing.
- Buckets: Two buckets for the two-bucket method, one with shampoo solution and one for rinsing dirt.
- Microfiber cloths: Wash mitts and drying cloths to reduce streaks on paint and windows.
- Shampoo: A pH-neutral motorhome shampoo that removes grime without damaging protective wax.
- Window cleaner: Acrylic-safe products such as Autoglym Fast Glass to prevent scratching.
- Wheel cleaner: Gentle formulas with non-abrasive pads for wheels and tires.
- Black-streak remover: Effective on common residue from seals and runoff.
- Rubber-seal lubricant: Keeps seals flexible and improves long-term security around doors and windows.
- Protective wax or ceramic spray: Adds shine and repels water, bird droppings, and dust.
Optional items for added efficiency:
- Backpack sprayer for quick application of cleaning solution.
- Floor mop with squeeze lever for the roof surface.
- Small brushes or toothbrushes for seals, vents, and ventilation grilles.
- Overwintering spray for easier cleaning after storage.
Safety essentials:
- Ladder stabilization and anti-slip footwear to avoid accidents.
- Foam or pipe insulation to protect paint when ladders rest against the motorhome exterior.
Do You Need To Prepare Your Motorhome Before Cleaning?
Yes, preparation is one of the best practices to make motorhome cleaning safer and more effective. Before you start rinsing the motorhome exterior, you should think about where the water will drain, which areas need protection, and what cleaning products you will use. Simple actions like parking on level ground, securing accessories, and checking the owner’s handbook can save you from mistakes that damage paint, seals, or panels. If you clean your motorhome without preparation, you risk letting water seep into vents, scratching surfaces with dirt, or wasting time waiting for supplies.
Steps to prepare your vehicle include:
- Parking: Place the motorhome on level or slightly sloped ground to help water runoff, engage the handbrake, and use wheel chocks for security.
- Power: Switch off electrical systems before cleaning to protect interior parts and water tank connections.
- Supplies: Gather buckets, microfiber cloth, brush, shampoo, window cleaner, and ladder so everything is ready for the job.
- Checks: Review the handbook for any restrictions, as some rubber seals and finishes require specific pH ranges.
- Accessories: Remove or secure items such as bike racks and loose gear, and close windows and vents before the first rinse.
How to Prepare Your Motorhome for a Cleaning?
Pre-cleaning preparation goes beyond gathering cleaning agents and tools, it also involves protecting delicate areas of your camper van and motorhome roof. The way you position your vehicle and ladder affects both safety and the quality of the finish.
- Positioning: Park slightly uphill if possible so dirty water drains off the roof surface instead of pooling. Place the ladder securely, and ask someone to steady it if available.
- Protection: Use foam or towels at ladder contact points to protect paint edges, and avoid placing weight on trims or fragile panels.
- Windows and vents: Keep rooflights and ventilation grilles closed during the first rinse. When cleaning around seals, open carefully and wipe frames with a microfiber cloth, avoid blasting water directly at joints.
- Accessories: Unclip fridge vents for separate cleaning, and temporarily remove detachable accessories such as bike racks to reach hidden grime.
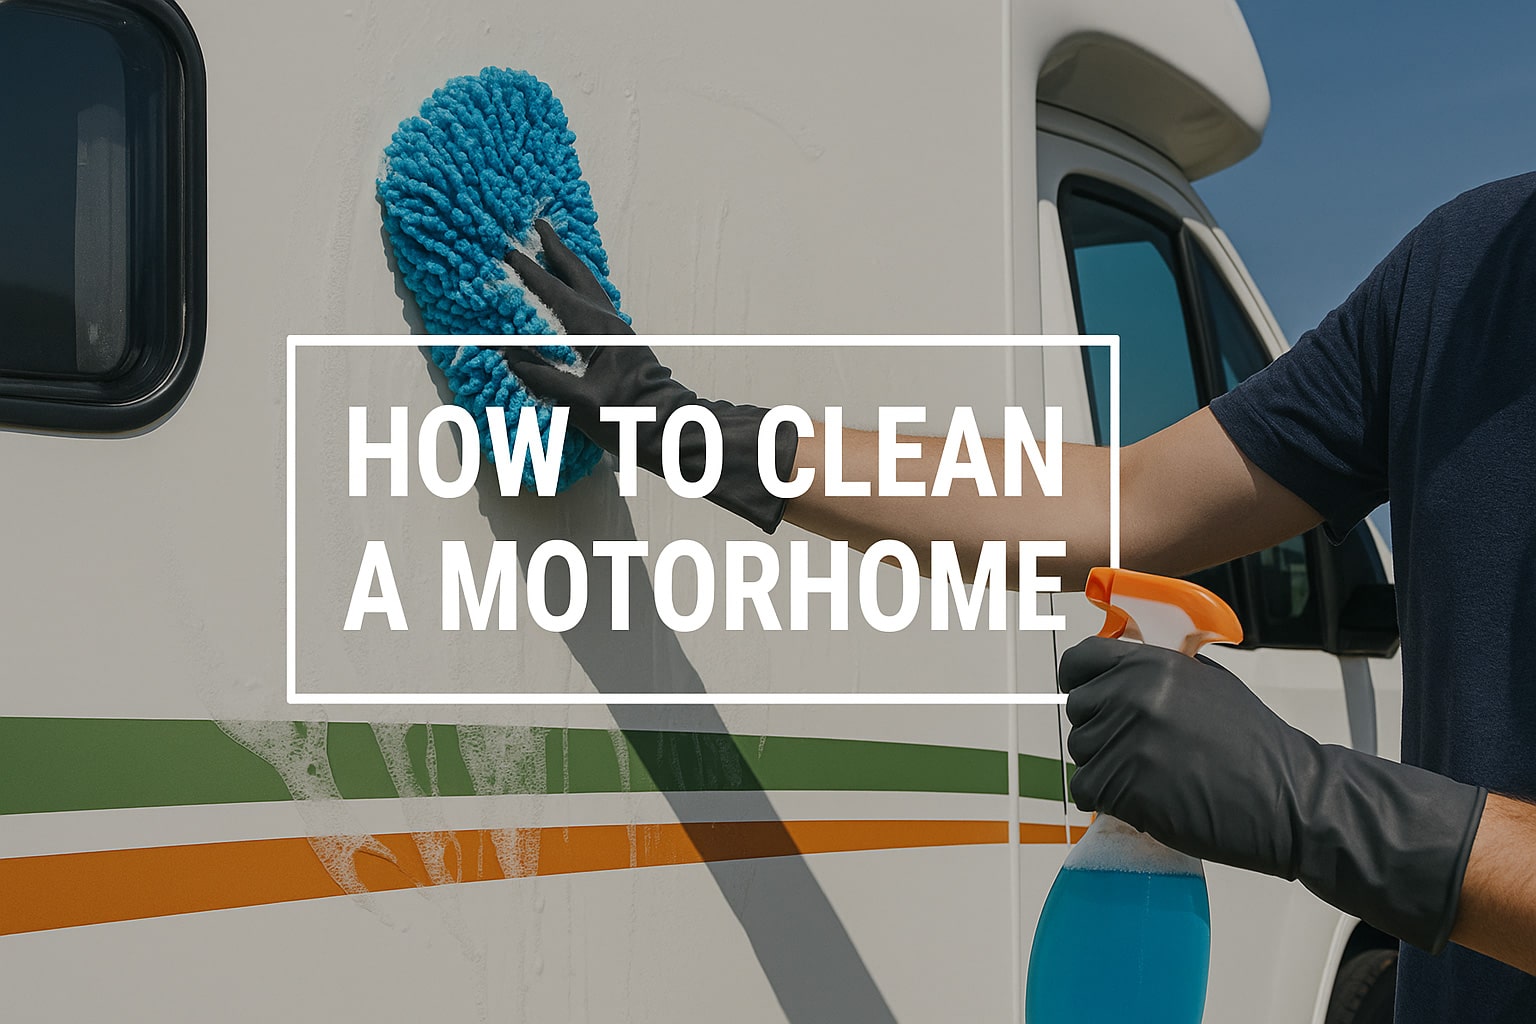
How to Clean the Exterior of a Motorhome?
Cleaning the motorhome exterior is best done in a clear sequence so you do not spread dirt back onto freshly cleaned panels. Think of it as a step by step guide, moving from the motorhome roof down to the wheels. Start with a low-pressure rinse using a hosepipe to remove loose dirt and bird droppings. Avoid using a pressure washer directly on seals, windows, or vents, as the force of water can cause leaks or damage. Once rinsed, prepare two buckets, one filled with shampoo solution and the other with clean water. This two-bucket method minimizes scratching by keeping your brush or sponge free from grit. Work in small circular motions using a microfiber cloth or soft brush, and never use washing up liquid because the chemicals can corrode finishes.
After the roof, move to the body panels, decals, rubber seals, and doors. Use an acrylic-safe window cleaner like Autoglym Fast Glass on windows and mirrors to avoid scratching. Dry each section with a microfiber drying cloth or squeegee to prevent streaks and water spots. Finally, finish with wheels and tires, as this prevents brake dust or grime from splashing onto clean panels. Once dry, apply a thin protective coat of wax or ceramic spray. Twice yearly application provides a barrier against dirt, rain, and UV damage, making future washes quicker and preserving paint quality.
Cleaning The Roof And Roof Lights
The roof often carries the heaviest grime because it traps algae, dust, and debris. Begin by soaking the roof surface with warm water and pH-neutral shampoo to soften residue. Use a telescopic brush or mop with gentle bristles, rinsing often so you are not grinding grit into the material. Always work safely from a stable ladder, wearing anti-slip footwear, and avoid leaning directly on rooflight trims.
- Soak first: Let water loosen dirt before applying cleaning agents.
- Use proper equipment: Choose a long-reach brush or microfibre cloth with a bucket of cleaning solution.
- Take precautions: Protect yourself with stable ladder placement and ask someone to steady it.
- Treat oxidation: If your fiberglass or GRP roof shows chalky oxidation, polish lightly, and if needed use a mild cutting compound before waxing.
- Detail around vents: Use small brushes around roof vents and rooflight seals, rinsing away residue from chemicals to avoid staining or leaks.
Can You Stand On The Motorhome Roof?
Standing on the motorhome roof is not always safe. Unless the manufacturer states it is designed for weight, avoid climbing directly onto it. Many roofs are not built for concentrated loads and become slippery when wet, increasing fall risk.
- Check manufacturer instructions: Only stand on the roof if permitted in the handbook.
- Spread weight: If absolutely necessary, use a wide board to distribute pressure evenly across the roof surface.
- Safer alternative: Rely on long-reach tools from a ladder or gantry instead of stepping directly on panels or around rooflights.
How Should You Clean Roof Vents And Roof Lights?
Roof vents and lights require delicate handling because plastics and seals are more vulnerable to heat and chemicals. Avoid boiling water and harsh solvents that can warp or cloud the material. Warm soapy water and a microfiber cloth are the safest combination.
- Rinse gently: Keep grit off cloths to prevent scratching.
- Work with care: Detail around seals with small brushes rather than blasting water with a pressure washer.
- Dry properly: Use a soft microfiber towel to prevent streaks and water spots from forming on clear surfaces.
How To Clean Motorhome Solar Panels?
Solar panels on your motorhome roof are essential for powering appliances, but their performance drops quickly if dust, algae, or bird droppings block sunlight. Cleaning these panels requires care, since harsh chemicals or the wrong tools can scratch the surface or damage seals. Always use a separate soft cloth or mitt dedicated to panels so you do not transfer grit from other parts of the motorhome exterior.
- Warm water and cloth: Use warm water with a clean microfiber cloth or sponge; never use abrasive pads that can scratch the glass surface.
- Remove debris: Brush out dirt and leaves that build up under mounting frames; pay attention to cables and grommets to avoid loosening connections.
- Avoid high pressure: Do not use a pressure washer near panel seals—gentle rinsing is the safest method.
- No wax film: If you use a wash and wax cleaning solution on the motorhome exterior, clean panels separately to prevent residue that reduces light transmission.
- Frequency: Include panels in your roof routine at least once per year, or more often if your camper van is parked under trees or in dusty areas.
How To Wash The Exterior Body Panels?
The motorhome body panels face constant exposure to road film, insects, and grime, so cleaning them correctly is important for both appearance and condition. Start by giving the panels a gentle pre-soak with water to loosen dirt before you apply any cleaning agents. Use the two-bucket method with a soft brush or microfiber cloth, one bucket for shampoo solution and one for rinsing your cloth, to keep grit from scratching the surface. Always choose a pH-neutral shampoo designed for motorhome cleaning instead of washing up liquid, which can strip wax and damage finishes.
- Pre-soak: Rinse panels thoroughly with a hose to loosen dirt and dust.
- Two-bucket method: Apply a cleaning solution using a microfibre cloth in soft circular motions to prevent micro-abrasions.
- Bug removal: For heavy insect marks, apply a specialist bug remover to the front panels, let it dwell briefly, then wipe gently.
- Rinse and dry: Always rinse from top to bottom and finish with a microfiber drying cloth, squeegee, or chamois to avoid streaks.
- Protective finish: Apply a thin coat of wax twice a year to maintain shine, prevent algae buildup, and protect paint from UV damage.
Removing Black Streaks
Black streaks on a motorhome exterior are a common issue caused by particles from rubber seals mixing with dirt, dust, and mineral-rich rainwater. These streaks run down panels and leave dark trails that ruin the vehicle’s clean image. While they look stubborn, the right products and regular care make removal straightforward.
- Cause: Black residue forms when degraded rubber seals combine with runoff from the roof and sides.
- Removal: Use a dedicated black-streak remover, let it dwell briefly, then wipe away with a microfiber cloth. Always check that the cleaner is safe for acrylic windows before applying.
- Prevention: Reduce buildup by cleaning your motorhome regularly, applying protective wax or overwintering spray to panels, and conditioning seals so they remain flexible. Using a breathable cover during storage also helps stop streaks from forming.
Treating Fiberglass Or Gel Coat Surfaces (Restoring Chalky Finishes)
Fiberglass and gel coat surfaces on a motorhome exterior often show chalky oxidation when they are not cleaned and protected regularly. This fading weakens the shine and gives panels a dull appearance, which can lower the vehicle’s condition rating. Restoring these surfaces requires a careful step by step guide that escalates treatment depending on severity.
- Identify oxidation: Look for dull or powdery surfaces on panels or roof areas exposed to UV and rain.
- Start with polish: Apply a non-abrasive polish using a microfibre cloth or sponge to restore luster.
- Escalate if needed: If polish is not enough, move to a mild cutting compound to remove deeper oxidation.
- Degrease surface: After correction, wipe panels with a clean cloth and a suitable cleaning solution to remove residue.
- Apply protection: Finish with multiple coats of wax or ceramic spray to slow re-oxidation and preserve shine.
Cleaning Decals And Graphics (Preserve Design Without Peeling)
Decals and graphics add character to a motorhome but are easily damaged by harsh chemicals and abrasive cleaning agents. Preserving them requires a gentler approach compared with the rest of the motorhome exterior. Always use soapy water and soft materials that protect both color and adhesion.
- Avoid abrasives: Stay away from stiff brushes or strong chemicals that can strip color or weaken adhesives.
- Use soft cloths: Apply warm soapy water with a microfiber cloth to lift dirt without scratching.
- Foam pads: Non-abrasive foam pads work well around raised edges where grime collects.
- Light pressure: Rub gently to prevent lifting or fading of graphics, especially on older decals.
- Rinse and dry: Always rinse thoroughly and dry with a microfiber towel to prevent streaks or water spots.
Bug And Tar Removal (Safe Products And Methods)
Front-facing panels and lower sides of your vehicle often collect insects and tar from the road, which can harden quickly if not cleaned. Tackling them requires the right cleaners and a patient method to avoid scratching paint or glass.
- Soften bug residue: Use warm soapy water to loosen insects before applying a dedicated bug remover. Let it sit briefly, then wipe gently with a microfiber cloth.
- Treat tar spots: Apply a tar remover directly to lower side panels, wait for it to dissolve the residue, and then wipe away.
- Avoid scratches: Never scrape tar or bug remains with sharp tools—always let the cleaning products do the job.
- Reapply protection: Since removers can strip wax, follow up with wax or ceramic coating to restore protection.
- Routine action: Address these issues promptly after trips so stains do not bake into the paint surface.
How To Clean Motorhome Wheels And Tires?
Wheels and tires collect brake dust, road grime, and tar more quickly than other parts of the motorhome exterior. If left untreated, these residues can cause corrosion, weaken protective coatings, and shorten the life of the rubber. Cleaning them should always come after you have washed the body panels, so you don’t splash dirt back onto clean surfaces. Using the right cleaning products and tools helps you avoid scratching alloy rims while restoring a fresh appearance.
- Initial wash: Rinse wheel arches and rims with a hosepipe, then apply body shampoo to loosen dirt.
- Use a wheel-safe cleaner: Apply a cleaner formulated for alloy or steel wheels, scrubbing spokes with a non-scratch brush.
- Focus on details: Pay attention to brake dust in tight areas and residue in ventilation grilles.
- Condition the tires: After rinsing, apply a protective tire dressing to clean and preserve the rubber.
- Mild alternative: A vinegar-and-water solution can help lift surface marks, but avoid strong acids that damage finishes.
How to Clean Motorhome Windows and Mirrors Without Scratching Them?
Windows and mirrors require extra care because they can be made of both acrylic and glass. Each material reacts differently to cleaning agents, so following best practices avoids scratching or leaving streaks. Always rinse first to remove dirt and dust, since rubbing grit directly against the surface is the most common cause of damage. Keep a separate microfiber cloth for acrylic compared with glass to prevent cross-contamination.
- Acrylic windows: Use an acrylic-safe window cleaner and a soft microfibre cloth. Avoid harsh chemicals such as acetone, isopropyl alcohol, or methylated spirits, which can cloud the surface.
- Glass surfaces: For the windscreen and mirrors, rinse with water, apply motorhome shampoo, and gently scrub with a suitable brush. Dry with a squeegee or microfiber towel to eliminate streaks.
- Final touch: Apply a rain-repellent product if desired, which improves visibility in wet conditions.
- Cloth separation: Always reserve different cloths for acrylic and glass to prevent scratches.
Removing Scratches From Acrylic Windows (Specialized Polish)
Acrylic windows can develop fine scratches from dust, debris, or improper cleaning methods. While deep gouges may not be repairable, light marks and hazing often respond well to careful polishing.
Techniques for scratch removal:
- Clean first: Wash the window thoroughly to remove all dirt and residue before polishing.
- Apply polish: Use an acrylic-specific fine abrasive polish sparingly, working in small sections with a microfiber cloth.
- Buff and repeat: Buff the surface gently, repeating the process until light scratches are minimized.
- DIY option: For very light scuffs, some owners use mild pastes, but always test in an inconspicuous area first.
- Limitations: Remember that deep scratches are permanent and cannot usually be corrected with polish.
How to Clean a Motorhome Awning and Exterior Accessories?
Awnings and exterior accessories on a motorhome take the brunt of weather, dust, and bird droppings. If they aren’t cleaned properly, mildew and staining can set in, reducing both appearance and durability. To clean your motorhome awning correctly, you need to roll it out fully, treat both sides, and make sure everything is completely dry before stowing. This keeps your awning ready for the next holiday trip without unpleasant odors or hidden grime.
- Roll out fully: Extend the awning completely so you can reach both surfaces without folds.
- Wash gently: Use water and a fabric- or vinyl-appropriate cleaning solution with a sponge or brush, scrubbing lightly to avoid damage.
- Clean hidden areas: Pay attention to the underside, joints, and mounting points where dirt collects.
- Dry thoroughly: Allow plenty of drying time before rolling back to prevent mold or mildew.
- Extra care: Apply a periodic mildew treatment to maintain condition and keep fabric secure over time.
How Should You Rinse And Dry A Motorhome After Washing?
Once the wash is complete, proper rinsing and drying protect the motorhome exterior from streaks, water spots, and damage. The way you handle this stage is just as important as scrubbing away grime, since leaving residue on paint or windows can undo the effort of a full clean. Always work methodically from the roof down to ensure dirt flows away.
- Rinse top-down: Use a low-pressure hosepipe to rinse the motorhome roof, panels, and doors, avoiding direct jets on rubber seals or ventilation grilles.
- Use microfiber cloths: Large microfiber drying towels or a squeegee remove water without scratching surfaces or glass.
- Avoid air-drying: Leaving the vehicle to dry naturally often results in streaks and spots on windows and paint.
- Optional tools: Some people use gentle blow dryers to push water out of hard-to-reach areas, preventing hidden residue.
Should You Power Wash A Motorhome?
Many owners wonder whether using a pressure washer is the quickest way to clean your motorhome. While it can seem tempting, this method carries risks that often outweigh the convenience. High-pressure jets can penetrate seals, damage windows, and force water into vents or the water tank area.
- General advice: Avoid using a pressure washer directly on sensitive areas such as rubber seals, roof vents, or windows.
- If used at all: Keep the nozzle at a safe distance and work at the lowest pressure setting to minimize damage.
- Better choice: Stick to body shampoo, microfiber cloths, and low-pressure rinsing, which align with cleaning best practices.
- Risk to condition: Older seals or fragile panels can fail under high pressure, leading to costly repairs.
How to Wax and Protect a Motorhome Exterior?
Applying wax or a protective coating creates a barrier against UV rays, rain, bird droppings, and the grime that causes black streaks. This action not only improves shine but also makes it easier to clean your motorhome in the future. Protective products like ceramic sprays or overwintering solutions are widely used because they bond well with paint and panels.
- Preparation: Make sure the vehicle is completely dry, including the motorhome roof and roof surface.
- Apply thin coats: Use a microfiber cloth, sponge, or applicator pad to spread wax, ceramic spray, or protective cleaner evenly across panels.
- Allow curing: Let the product set for the recommended waiting time to ensure a durable connection with the paint.
- Buff carefully: Polish with a clean microfiber cloth to achieve a smooth, streak-free finish.
- Maintenance cycle: Reapply at least twice per year, once before the main holiday season and again before storage, to keep protection active.
How To Clean The Interior Of A Motorhome?
Just like the exterior, the interior of a motorhome needs regular attention to stay fresh, hygienic, and comfortable for travel. A structured, room-by-room step by step guide makes the job more efficient and ensures you don’t miss hidden areas where grime builds up. Begin only after the exterior is complete, since dust and dirt often enter when doors and windows are open..
Interior cleaning sequence:
- Declutter: Remove loose items, rubbish, and reorganize storage areas.
- Ventilate: Open windows and doors to let fresh air circulate and reduce moisture.
- Dust high to low: Wipe lockers, ledges, and ventilation grilles using a microfiber cloth.
- Vacuum thoroughly: Use a vacuum cleaner with upholstery attachments for cushions, mattresses, and steps.
- Disinfect touch points: Pay attention to doors, handles, and switches with appropriate cleaning products.
- Appliances: Clean the refrigerator, sinks, and bathroom fittings with mild cleaning solution.
- Soft furnishings: Treat upholstery and curtains with fabric-safe cleaners.
- Floors and glass: Finish by mopping or wiping floors and using a window cleaner for interior windows.
Decluttering and Preparation
Before deep cleaning, you should take time to remove clutter. Loose items can get in the way, spread dirt, or become damaged during cleaning. Clearing space helps you work faster and reduces the risk of missing hidden areas.
- Empty storage: Remove contents from cupboards, drawers, and floor hatches. Sort through them to discard rubbish or reorganize items.
- Ventilate spaces: Open lockers, lift mattresses, and air upholstery to release trapped dust and moisture.
- Prepare surfaces: Make sure countertops and seats are free of objects so you can wipe them thoroughly with a microfibre cloth.
Dusting and Vacuuming
Dusting and vacuuming form the backbone of interior motorhome cleaning. Since dirt settles from top to bottom, always start high and finish low. Begin with lockers, rooflight frames, and shelves, then move to surfaces and soft furnishings.
- Work high to low: Use a small brush to loosen dust in vents, rooflight frames, and corners. Wipe surfaces with a microfiber cloth dampened slightly with lukewarm water.
- Vacuum furnishings: Use the upholstery attachment to remove crumbs and dust from cushions, beds, and carpets.
- Detail work: Clean fly-screen tracks, wheel-well steps, and other often-missed areas.
- Sequence: Vacuum after wiping surfaces so you collect any dust or crumbs that were dislodged during cleaning.
Wiping Down Surfaces
Once clutter and dust are cleared, the next action is wiping down the interior surfaces. Countertops, cabinetry, and walls need careful attention since they are frequently touched and can harbor residue from food or cleaning agents. Always choose mild cleaning products, since harsh chemicals can strip finishes or damage the surface. Use a slightly damp microfiber cloth with lukewarm water, then dry immediately to prevent swelling in wood or foiled areas.
- Countertops and tables: Apply a gentle cleaning solution with a microfibre cloth, wiping in smooth motions to remove dirt and food residue.
- Walls and cabinetry: Use a non-abrasive cleaner; avoid washing up liquid if it contains corrosive additives.
- High-touch points: Disinfect handles, switches, and doors with a lightly damp cloth last, ensuring these areas stay hygienic.
Kitchen Cleaning
The kitchen area in your motorhome requires detailed care because it combines food preparation with frequent exposure to grease and water. Cleaning each appliance properly reduces odors, prevents buildup, and extends equipment life. Always empty appliances before cleaning so you can reach hidden areas where grime accumulates.
- Refrigerator: Remove all food, wash shelves and drawers in a mild cleaning solution, and wipe ventilation grilles where dust gathers.
- Stove and hob: Use a gentle cleaner on burners and surfaces, rinse thoroughly, and dry to avoid rust or staining.
- Microwave: Wipe inside with warm water and baking soda solution to lift residue without aggressive chemicals.
- Sink and taps: Clean with mild shampoo or washing up liquid, rinse with water, and dry with a microfiber cloth to avoid streaks.
Bathroom And Toilet
The bathroom in your camper van or caravan is one of the most used spaces, and cleanliness here is vital for hygiene. The shower, sink, and toilet cassette need regular cleaning to prevent limescale, odors, and bacteria growth. Always select cleaning products safe for plastics and seals, since aggressive chemicals can cause long-term damage.
- Shower walls and sink: Use an antibacterial cleaning solution with a sponge or cloth, rinsing with water to remove residue.
- Toilet bowl and cassette: Avoid bleach, which can damage rubber seals. Instead, use mild cleaners and cassette-safe additives.
- Deodorizing: A vinegar-and-water mix can help dissolve limescale and reduce odors in the cassette system, but rinse thoroughly after use.
- Finishing touches: Dry surfaces with a microfiber cloth to prevent streaks and keep fittings in top condition.
How Do You Clean Upholstery and Fabrics in a Motorhome?
Upholstery and fabrics inside your motorhome face constant wear from daily use, food spills, and outdoor dust carried in during trips. Regular cleaning not only keeps these areas fresh but also extends their life and prevents odors from building up. Start with routine vacuuming, using an upholstery attachment to remove dust and crumbs from cushions, curtains, and seating.
- Vacuum monthly: Remove loose dirt from seats, mattresses, and soft furnishings with a vacuum cleaner.
- Spot-clean stains: Treat spills promptly with a mild cleaning solution and a microfiber cloth to avoid permanent marks.
- Deep cleaning: If steam-cleaning, remove cushions to prevent excess humidity inside the vehicle and allow full air-drying.
- Removable covers: Polyester covers can usually be machine-washed at ≤30 °C with mild detergent and air-dried; curtains are often best taken for professional cleaning.
Floor Cleaning
Floors in a camper van or caravan collect the most grime, from tracked-in mud to spilled drinks. To maintain cleanliness, address flooring materials based on type and level of use.
- Carpets: Vacuum thoroughly to remove dirt and grit. For deeper freshness, apply carpet foam and allow it to dry before brushing.
- Vinyl or laminate: Mop with a gentle cleaning solution, avoiding excessive water that can seep into joints.
- Entry steps and tracks: Clean regularly since these areas collect dust, debris, and grease from the road.
Windows and Mirrors (Interior)
Interior windows and mirrors can easily develop streaks and residue from condensation, cooking, or fingerprints. Cleaning them properly improves visibility, light quality, and overall interior shine.
- Acrylic windows: Use an acrylic-safe window cleaner and a soft microfiber cloth; avoid chemicals like acetone or spirits that scratch or cloud surfaces.
- Glass windows and mirrors: Standard glass cleaners such as Autoglym Fast Glass work well when applied with a separate cloth.
- Polishing: Dry immediately with a clean microfiber cloth for a streak-free finish.
- Cloth separation: Always keep cloths used for acrylic separate from those used on glass to prevent cross-contamination with abrasive particles.
How Do You Clean a Motorhome’s Water and Plumbing Systems?
Keeping the water tank and plumbing system clean is a crucial part of motorhome maintenance. Stagnant water and residue in pipes can lead to odors, bacteria growth, or even damage to rubber seals. A regular sanitation cycle helps ensure safe drinking water and keeps the system functioning properly.
- Drain fully: Empty the fresh water tank and pipes before starting.
- Add sanitizing solution: Refill with the recommended cleaning solution and circulate through taps for around five minutes.
- Let it dwell: Leave the solution in the system for the product’s advised waiting time to disinfect tanks and pipes.
- Flush thoroughly: Drain and refill with clean water, running it through the system until no residue or chemicals remain.
- Alternative methods: Some owners use denture tablets or baking soda solutions, but always follow manufacturer instructions.
Air Freshening and Ventilation
After deep cleaning, fresh air flow helps maintain interior cleanliness and prevents odors. Ventilation grilles, doors, and windows play an important role in keeping your motorhome interior dry and fresh.
- Cross-ventilate: Open opposite windows and doors after cleaning to circulate air.
- Control humidity: Use a dehumidifier in damp weather to prevent mould and mildew.
- Rotate furnishings: Air out cushions and bedding regularly to release trapped moisture.
How to Polish and Restore Dull Motorhome Surfaces?
Over time, motorhome exterior panels and gelcoat can lose their shine, showing chalky oxidation. Polishing restores condition and protects against repeat damage. By applying the right cleaning products, you can make the paint and surfaces look fresh again.
- Assess condition: If the surface looks chalky, start with a gentle polish.
- Escalate carefully: For more severe oxidation, use a mild cutting compound to remove dullness.
- Protect afterward: Wipe away residue, then apply multiple coats of wax or protective sealant with a microfiber cloth.
- Maintain regularly: Repeat polishing as part of seasonal motorhome cleaning to prevent future buildup.
What Motorhome Areas Require Special Cleaning Attention?
When you clean your motorhome, it is easy to focus on large, visible surfaces while overlooking delicate or hidden areas that are just as important. Ignoring these areas can lead to wear, odors, or even long-term damage. Paying close attention to rubber seals, hinges, ventilation grilles, and panels under the awning ensures your vehicle stays in top condition. Electrical outlets and control panels also require careful handling to maintain security and prevent accidents.
- Seals and trims: Around doors, windows, and hatches, clean, dry, and lubricate.
- Mechanical parts: Hinges, locks, and latches, remove grime and apply protective lubricant.
- Ventilation and roof gutters: Around air conditioning units or solar panels where debris collects.
- Awning cassettes and wheel arches: Dirt and algae often build up in these areas.
- Electrical panels: Always dust with a dry microfibre cloth, keeping water away.
Cleaning Seals and Rubber Trims
Seals around windows, doors, and hatches are vital for weatherproofing, but they deteriorate quickly without care. Dirt, UV exposure, and neglect can lead to cracks or leaks. Cleaning and conditioning them keeps your motorhome exterior protected and extends the life of rubber parts.
- Wash thoroughly: Use warm soapy water with a soft cloth to remove dirt and residue.
- Dry completely: Ensure no water is left behind to prevent mold or mildew.
- Lubricate: Apply a silicone-based conditioner designed for rubber seals. This prevents drying, reduces creaking, and helps maintain flexibility.
Electrical Outlets and Control Panels
Electrical outlets, switches, and control panels require extra caution when cleaning. These sensitive parts are essential for security and function, but introducing water or aggressive cleaning agents can be risky. Always approach them with care and precision.
- Power down first: Switch off all electrical connections before cleaning.
- Use dry methods: A microfibre cloth or small brush works best for removing dust.
- Avoid liquids: Never spray cleaning products directly; keep moisture away from outlets and ventilation grilles.
- Check condition: If you notice loose grommets or fittings, reseal them to maintain protection.
How to Clean Motorhome Accessories and Outdoor Gear?
Outdoor accessories make life easier when traveling in your motorhome, but they often collect grease, dust, and grime. Folding chairs, portable tables, grills, and bike racks need regular attention to stay safe, hygienic, and ready for your next holiday. A quick step by step guide ensures you don’t carry unwanted residue back into the motorhome interior.
Tips for accessory care:
- Chairs and tables: Wipe down with a damp microfiber cloth and mild cleaning solution, then dry completely to prevent mold or staining.
- Grills and cooking gear: Remove crumbs and grease with non-abrasive cleaning agents; rinse thoroughly to avoid chemical residue.
- Bike racks and fixtures: Clean with water and washing up liquid, checking fasteners and joints for corrosion, grit, or damage before storing.
How to Clean and Protect Motorhome Storage Compartments?
Storage bays are often overlooked, yet they hold vital equipment and outdoor gear. Dirt, moisture, and poor ventilation can quickly compromise condition and security. By cleaning them regularly, you reduce damage risk and keep everything organized for smooth travel.
- Empty and vacuum: Remove all items, then use a vacuum cleaner to clear dust, debris, and grime from corners.
- Wipe and dry: Use a cloth with a gentle cleaning solution to wipe walls and doors, drying thoroughly to prevent mold.
- Protect and organize: Place items back in an orderly way that avoids abrasion, and add moisture absorbers or ventilation grilles to control humidity.
What is the Best Thing to Clean a Motorhome With?
There isn’t one single “best” solution for motorhome cleaning because every material requires a different approach. Matching the right cleaning products to each surface protects your vehicle and ensures long-term condition. The best practices involve choosing gentle yet effective cleaning agents designed specifically for motorhome use.
- Bodywork and panels: Use a pH-neutral motorhome shampoo with a microfiber cloth or sponge; avoid washing up liquid, which can damage paint and finishes.
- Windows: Acrylic-safe window cleaner or Autoglym Fast Glass for streak-free results.
- Rubber seals: Wash with mild soapy water, dry, then apply silicone-based protectant to keep supple.
- Wheels and tires: Wheel-safe cleaners and gentle brushes to remove brake dust and grime.
- Protection: Finish by applying wax, ceramic spray, or overwintering solution to guard against UV, bird droppings, and road debris.
What are the Best Products for Different Motorhome Materials?
Motorhomes combine fiberglass, acrylic, vinyl, and stainless steel surfaces, and each requires specific cleaning agents to avoid damage. By choosing the right products, you avoid streaks, scratches, or premature wear.
- Fiberglass/gelcoat panels: Wash with a pH-neutral shampoo, then polish; if chalky, use a mild cutting compound. Apply wax or ceramic for UV protection.
- Aluminum or painted body panels: Gentle wash with bug or tar removers as needed; reapply protective wax where cleaners strip it.
- Acrylic windows: Only use acrylic-specific cleaning products and a soft microfiber cloth; avoid harsh solvents or chemicals.
- Vinyl or fabric awnings: Use fabric-appropriate cleaners, rinse thoroughly, and dry fully before stowing.
- Rubber seals: Wash, dry, and apply silicone lubricant to maintain flexibility and prevent leaks.
- Stainless steel appliances: Clean with mild non-abrasive agents, then dry to avoid spotting.
What Common Mistakes Should You Avoid When Cleaning a Motorhome?
Cleaning your motorhome is straightforward when you follow best practices, but many owners make errors that harm the vehicle’s condition. These mistakes not only create extra work but can shorten the life of materials like seals, windows, and exterior panels.
- Using a pressure washer too close: High-pressure action can damage rubber seals, force water into ventilation grilles, or crack acrylic windows. If you must use one, keep distance and never spray vents directly.
- Applying dishwashing liquid: Washing up liquid strips protective coatings and corrodes metal finishes. Choose pH-neutral cleaning products designed for motorhome cleaning instead.
- Using boiling water: Hot water can warp plastics, damage acrylic windows, and weaken adhesives around trims. Stick with warm water.
- Skipping grit removal: Always rinse before wiping; otherwise, dirt particles scratch paint and glass. The two-bucket method is a safe way.
- Unsafe ladder use and vacuuming too early: Secure ladders properly, and finish wiping surfaces before vacuuming to avoid repeating jobs.
How Often Should You Clean Your Motorhome?
A consistent cleaning schedule is essential for preserving both interior and exterior areas. How often you clean depends on use, location, and season, but following a structured step by step guide ensures nothing is missed.
- Exterior: Wash after long trips with heavy grime, monthly when touring, and at minimum twice yearly, once before and once after the season.
- Interior: Wipe down and disinfect surfaces after each holiday; if you live in the van or use it regularly, plan monthly deep cleans.
- Roof and solar panels: At least once annually, though more often if parked under trees, in dusty areas, or in regions with frequent rain.
How Can You Keep Your Motorhome Clean While Traveling?
On the road, you won’t always have the time or equipment for a full clean, but small actions prevent buildup of grime and keep the motorhome interior fresh.
- Daily sweeps: Use a compact vacuum cleaner or broom to remove sand, grit, and crumbs.
- Counters and sinks: Wipe with a microfiber cloth and mild solution to prevent stains and residue.
- Shoes off inside: Keep a set of indoor slippers to reduce dirt tracked onto carpets or vinyl.
- Organized storage: Stow gear securely to avoid clutter and damage during travel.
- Fresh air and glass: Use cross-ventilation and clean windows or mirrors with a portable window cleaner or squeegee on long road days.
When Should You Consider Professional Motorhome Cleaning?
Sometimes the scale of motorhome cleaning makes it worth calling in professionals. If the motorhome roof is heavily oxidized, decals have faded, or the motorhome exterior feels chalky, a specialist can restore the finish using products you may not have at home. Professional packages often include full interior shampooing of carpets, upholstery, and curtains, as well as detailing around rubber seals, solar panels, and roof surfaces that require expert care.
Ideally, typical costs range from about £30–£150 depending on vehicle size, scope, and condition.
When to consider professional services:
- When oxidation or faded decals need polishing and protective coating.
- For complete interior shampooing of fabrics and deep sanitation.
- If reaching high areas such as the roof safely is difficult without proper equipment.
- When time is limited, and outsourcing the job is more practical.
What Safety Precautions Should You Follow When Cleaning a Motorhome?
Cleaning a motorhome involves both water and equipment, which means safety should always come first. Taking the right precautions keeps both you and the vehicle secure.
- Ladder use: Always use stable ladders with flared legs or platforms. Wear anti-slip shoes, avoid overstretching, and ask someone to steady the ladder when working on the motorhome roof.
- Electrical security: Keep water away from live circuits, switches, and outlets. Power down the vehicle when cleaning near control panels. Never use a wet microfibre cloth on electrics.
- Avoid unsuitable equipment: Truck-wash brushes and gantry systems can damage paint, panels, or rubber seals. Choose specialist motorhome cleaning services or hand washing with safe cleaning agents.
- Uneven terrain: Always park on stable, level ground before climbing ladders or cleaning the roof surface to prevent accidents.
What are the Best Eco-Friendly Motorhome Cleaning Practices?
Motorhome cleaning doesn’t have to harm the environment. By choosing the right cleaning products and methods, you can keep your vehicle spotless while reducing your ecological footprint.
- Biodegradable cleaners: Use pH-neutral, biodegradable cleaning solutions that protect both the motorhome exterior and local ecosystems.
- Water efficiency: Adopt the two-bucket step by step guide and use a low-pressure hose instead of a pressure washer to minimize water waste.
- Safe locations: Always clean your motorhome in areas with proper drainage so runoff doesn’t pollute soil or streams.
- Avoid aggressive methods: Skip automatic truck washes, as their harsh chemicals and abrasive brushes can strip protective wax and harm finishes.
- Routine maintenance: Regular light cleans reduce the need for heavy chemicals later, cutting down on residue and saving water.
How to Prepare Your Motorhome for Long-Term Storage After Cleaning?
Once you finish motorhome cleaning, the next step is preparing it for storage. Proper post-cleaning action ensures your vehicle stays in good condition and avoids mildew, odors, or damage while sitting idle. Moisture control, attention to seals, and protective covers are all part of best practices for long-term storage.
- Perform a thorough end-of-season clean and apply a protective wax or ceramic coat on the motorhome exterior.
- Dry the awning fully before stowing it away, and air out interior soft furnishings.
- Drain and sanitize the water tank and plumbing system to prevent residue or algae.
- Lubricate rubber seals on doors, hatches, and windows to maintain flexibility.
- Consider a breathable cover to reduce dirt buildup and black streaks on panels and the roof surface.
What are Other Important Motorhome Maintenance Tasks Besides Cleaning?
Other essentials include regular motorhome maintenance checks alongside cleaning. A well-cared-for vehicle not only looks better but also performs reliably on the road. By combining cleaning with preventative maintenance, you extend the life of your motorhome and reduce costly repairs.
Exterior maintenance tasks:
- Inspect and condition rubber seals, windows, and roof fittings.
- Check tire tread and pressures before long trips.
- Examine wheel arches for rust, dirt, or debris buildup.
- Clean gutters around the motorhome roof and solar panels.
- Reapply wax or protective coatings seasonally.
Interior maintenance tasks:
- Test smoke and carbon monoxide detectors.
- Inspect refrigerator vents and burner, cleaning as specified by the manufacturer.
- Sanitize tanks and plumbing, checking for leaks.
- Review emergency kit expiry dates and replace outdated items.
Conclusion
Cleaning your motorhome is more than just a chore, it’s what keeps its appearance sharp, its parts protected, and its value strong over the years. When you stick to a rhythm of deep cleans at the start and end of each season, with quick washes in between, you’ll notice how much easier the job becomes. Starting from the roof down helps prevent streaks, while giving extra care to acrylic windows, seals, and protective finishes makes future washes faster and reduces those frustrating black streaks.
The little choices matter too: working in a safe spot, using the right tools like a microfiber cloth and eco-friendly cleaners, and thinking about the environment while you clean. And if oxidation or heavy buildup ever feels overwhelming, there’s no harm in calling in professional help.
Lastly, these habits make sure your motorhome not only looks great but stays ready for every adventure you have planned.