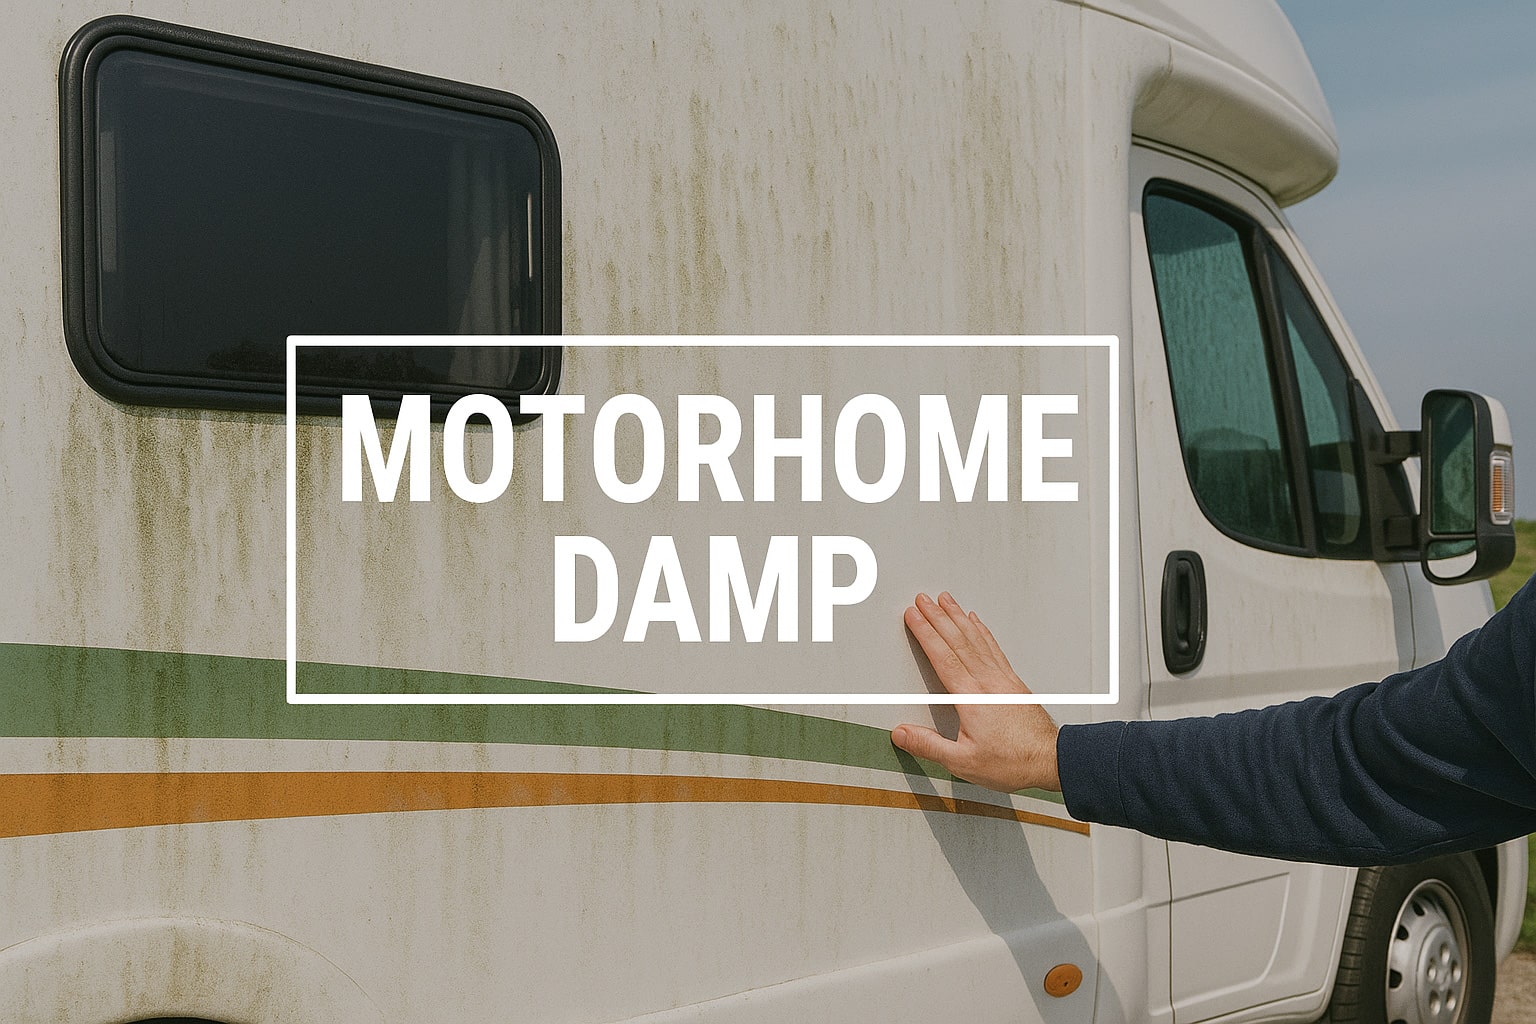

Motorhome damp is what happens when excess moisture builds up, often from condensation inside or water getting in through leaks. Left alone, it can lead to mold, mildew, rot, and costly motorhome repairs.
The truth is, if we keep our vehicles dry and protected, they not only last longer but also hold their value when it’s time to sell.
Damp comes from two main pathways: the air we breathe and cook with, and water ingress from outside. The good news is, routine checks stop both.
A quick look each month, a full sweep every 3–6 months, and extra inspections before and after winter storage or big trips give you peace of mind.
Do this and you’ll detect problems earlier, cut repair bills, protect your health, and keep resale strong.
In this article, we’ll walk through practical steps you can use to spot damp early, keep it under control, and make sure your motorhome stays in its best shape.
What is Motorhome Damp?
Motorhome damp is persistent moisture within walls, floors, ceilings, or furnishings of an RV that degrades materials, harms air quality, and creates costly problems if ignored.
Older timber-framed constructions are more susceptible to damage, but newer builds aren’t immune because flexible sealants harden and crack with age.
Road flex and minor bumps open micro-gaps that let water track into panels and joints, far from the entry point.
Think of it as a condition that affects systems the way poor engine maintenance harms an RV engine: left unchecked, it reduces reliability, increases repairs, and lowers value.
Incorporate damp checks into your maintenance tasks alongside fluid levels (coolant, transmission fluid, power steering fluid), battery terminals inspection, and fuel filter reviews so the motorhome’s engine and the living space both remain in good condition and functioning properly.
Why Do Motorhomes Get Damp and Moisture?
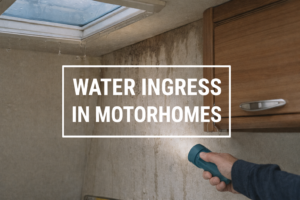
Motorhomes get damp because of two main sources: internal condensation and external water ingress.
Condensation occurs when warm, moist air meets cold surfaces, reaching the dew point and leaving water behind. Water ingress happens when failed seals, cracked joints, or penetrations allow rain to enter and track through panels.
Both pathways are shaped by air temperature gradients, relative humidity, and capillary action along cracks or fittings. Condensation is amplified by everyday living, cooking, showering, breathing, and drying wet gear inside a confined RV.
Ingress typically exploits cut-outs such as windows, rooflights, vents, and awning rails, along with poorly sealed accessories.
Water rarely appears exactly where it enters. Instead, it often runs along pipes or wires and shows up “downstream.”
What Causes Condensation in a Motorhome?
Condensation forms when warm, moist air hits a cold surface and crosses the dew point. In an RV, this is driven by daily activities in a confined space.
The eight main factors that contribute to condensation include:
- Night-Time Breathing: Moisture builds up in sleeping areas overnight.
- Hot Showers: Steam collects quickly without proper venting
- Simmering Pans Without Lids: Cooking adds constant vapor into the air.
- Drying Towels or Clothes Inside: Raises humidity and leaves damp fabrics.
- Blocked or Insufficient Vents: Restricts airflow needed to clear moisture.
- Cold Bridges: Window frames, corners, and areas behind furniture.
- Single Glazing: Surfaces cool fast and reach dew point easily.
- Wet Pets or Gear Inside: Brings outdoor water straight into the living space.
How Do Summer and Winter Conditions Change Condensation?
Condensation looks different in summer compared to winter, so you need to adjust habits.
Seasonal comparison of condensation in motorhomes:
| Season | Typical Triggers | Where It Forms | Priority Actions |
| Summer | Overnight humidity, shower steam | Windows, corners | Cross-vent, run fans, dry clothes outside |
| Winter | Cold glazing and panels | Glazing, metal trims | Background heat, insulated covers, longer fan run-on |
Do Body Heat, Showering, Cooking, and Damp Clothes Contribute?
Yes, these are the main internal sources of moisture inside a motorhome or RV. A small living space magnifies their effect, and within hours the condition of the interior can shift from dry to damp. People breathing overnight, hot showers, simmering pans, and wet clothes can release several liters of water vapor into the air each day.
The four key contributors you should focus on are:
- People: Breathing during sleep adds steady humidity in confined areas.
- Showers: Steam without fans quickly drives up relative humidity.
- Cooking: Pans without lids release constant vapor into the air.
- Indoor Drying: Towels, clothes, or gear inside keep surfaces wet.
To manage this, prioritize outside drying under an awning, lids on pans, and extractor fans running 10–20 minutes. Track RH with a hygrometer and link spikes to activities so you can build lasting habits.
What Is the Difference Between Water Ingress and Condensation?
Condensation comes from inside: warm, moist air meeting cold surfaces. It shows up as window fog, beads of water, or quick drips, and it clears when you add ventilation or background heat.
Water ingress comes from outside: failed seals, cracked joints, or roof and wall penetrations.
The two main cues are easy to remember:
- Ingress: Leaves yellow, brown, blue, or pink stains; creates soft or spongy spots; rusts screws; often worsens after rain or washing.
- Condensation: Appears as temporary fog or droplets that respond to airflow and heat.
A simple rule helps: if relative humidity is steady but a moisture meter shows high readings at windows or roof joints, suspect ingress. When fog clears yet stains or softness remain, you are likely dealing with water entry rather than indoor humidity.
What Causes Water Ingress in a Motorhome?
Water ingress in motorhomes happens when outside moisture makes its way through weak points in the RV shell.
Over time, seals harden, joints fatigue, and small cracks appear, letting water track into walls, floors, or roof panels.
Unlike condensation, ingress often remains hidden until you see stains or spongy surfaces.
The ten most common failure modes that allow water ingress include:
- Perished Seals: Rubber surrounds dry out and lose flexibility.
- Cracked Mastic: Sealant lines split and expose gaps.
- Rooflight or Antenna Penetrations: Aging gaskets allow leaks.
- Window and Door Frames: Shrinkage or poor sealing invites water.
- Accident Damage: Impact cracks open hidden paths.
- Seam and Joint Fatigue: Movement along panels weakens edges.
- Accessory Drill-Holes: Poorly sealed racks or awnings create entry points.
- Degraded Awning Rails: Water tracks along rails into seams.
- Blocked Gutters or Roof Drains: Overflow forces water into joints.
- Hairline Cracks from Panel Flex: Road vibration causes invisible openings.
Do Age, Accident Damage, and Poor Seals Increase Risk?
Yes, and the signs often show before the problem becomes critical. With age, sealants lose elasticity, rubber shrinks, and mastic starts to crumble.
Accident damage, even minor, can create cracks that channel water inside.
These weak points are no different from worn brake pads or a clogged fuel filter, they compromise reliability and safety.
A practical checklist to inspect for age- and impact-related risks includes:
- Crazing Around Joints: Fine cracks in surface coatings.
- Gaps in Mastic: Missing or brittle sealant lines.
- Brittle Rubber Surrounds: Seals that no longer flex properly.
- Mismatched or New Interior Panels: May hide past damp repairs.
- Impact Scuffs: External scrapes that suggest past bumps.
- Creaky or Spongy Floors: Indicate delamination or hidden water.
Which External Joints, Vents, and Roof Fixtures are Vulnerable?
Certain exterior points on a motorhome demand more attention because they are naturally exposed to water and road debris.
These areas age faster, just like belts or hoses in an engine system, and should be inspected as part of your routine maintenance schedule.
The ten main hotspots where leaks commonly occur are:
- Roof Seams: Expansion and contraction strain the joints.
- Awning Rails: Sealant fails and lets water creep along rails.
- Marker Lights: Gaskets perish and create water paths.
- Service Hatches: Frames and seals weaken under UV and vibration.
- External Vents and Grilles: Openings for fridge or shower areas let in rain.
- Skylight Frames: Cracked plastic or hardened gaskets leak over time.
- Aerial or Satellite Mounts: Drill points are vulnerable if sealant shrinks.
- Ladder and Bike-Rack Mounts: Bolts can loosen and open gaps.
- Window Weep Holes: Blockages force water back into frames.
- Gutter Outlets: Clogs cause pooling and overflow into seams.
Can Poor Ventilation and High Humidity Trigger Damp?
Yes, poor ventilation is one of the quickest ways to create damp problems in a motorhome.
Stagnant air traps moisture against cold panels, leading to condensation, mold, and eventually hidden motorhome repairs.
Good ventilation helps the interior stay in a healthy condition, improves comfort on a road trip, and extends the lifespan of the vehicle.
Key targets to keep in mind include:
- Relative Humidity Range: Aim for 40–60% for comfort and safety.
- High Readings: Treat persistent levels above 50% as a sign to ventilate and inspect for wet sources.
- Storage Routine: If stored, crack both high and low vents and air monthly.
What Problems Can Damp and Mold Cause in a Motorhome?
Damp in a motorhome is more than an inconvenience, it undermines the structure, reduces insulation performance, creates electrical risks, and lowers resale value. Left untreated, water ingress can lead to spongy floors, delamination, or corrosion of circuits and battery terminals.
Moisture creeping through internal wiring may cause shorts in the braking system, lights, or even the RV engine’s electrical components.
A prolonged musty odor makes the vehicle less inviting for any traveler and discourages buyers, cutting into the motorhome’s value. Just as you wouldn’t skip oil changes or ignore fluid levels in the cooling system, you can’t overlook moisture.
What Structural and Electrical Damage Can Occur?
Moisture accelerates deterioration in small, enclosed spaces where airflow is limited.
Prolonged exposure leads to major motorhome repairs, just like neglecting engine maintenance causes breakdowns.
Typical structural and electrical failures include:
- Wallboard Pimpling or Dimpling: Visible swelling or bubbling on surfaces.
- Corrosion on Screws and Fixtures: Rust develops quickly in damp conditions.
- Warped Panels: Waterlogged boards twist and lose shape.
- Degraded Insulation: Wet insulation loses efficiency and traps moisture.
- Shorted Appliances: Electrical systems fail when water bridges circuits.
What are the Health Risks Associated With Damp, Mould and Mildew?
Mold spores and damp conditions create direct health concerns. You should always wear protective gloves and a mask when cleaning, and seek professional remediation if growth is widespread or if you have existing respiratory issues.
The six main health risks linked to damp and mold are:
- Allergy Symptoms: Sneezing, watery eyes, and irritation.
- Asthma Attacks: Triggered by mold spores in sensitive individuals.
- Chest and Respiratory Infections: Especially in children or older adults.
- Headaches and Migraines: Linked to poor air quality.
- Fatigue and Cognitive Effects: Reduced concentration and energy.
- Skin Reactions: Hives, eczema, or fungal infections.
Can Damp Cause Serious Damage or Total Loss?
Yes, damp can lead to situations where a motorhome is written off entirely. When water penetrates deeply into walls, floors, or roof structures, it causes timber rot, delamination, and hidden frame compromise.
Repairing this level of damage often means stripping out units, furniture, and entire wall or floor sections. That kind of rebuild requires hundreds of labor hours, specialized services, and costly motorhome repairs, often exceeding the vehicle’s resale value.
In some cases, you might face spongy floors that spread beyond a small area, warped panels that no longer fit properly, or insulation that has collapsed.
Electrical systems can also fail when moisture reaches battery terminals or corrodes circuits.
How Can You Spot Damp in Your Motorhome?
You can often detect dampness in a motorhome without instruments if you follow a simple step-by-step routine:
- Start right after heavy rain or washing the RV, when leaks are most obvious. First, follow your nose: a musty odor is one of the clearest early signs.
- Next, use your hands and eyes.
- Run your palm along walls, ceilings, and floor areas to feel for cool, soft, or spongy spots.
- Look carefully for discoloration, peeling wallpaper, or unusual staining around seals and joints. Only after these visual and tactile checks should you turn to damp meters.
This process is like following a maintenance schedule for your motorhome’s engine, you begin with basic checks before digging deeper.
What are the Common Signs of Damp and Condensation?
A thorough inspection helps you identify damp early before it becomes a major risk.
The most common signs you should look for include:
- Musty Odors: Lingering smells that don’t clear with ventilation.
- Discolored Walls or Ceilings: Yellow, brown, blue, or pink stains.
- Soft or Spongy Surfaces: Floors or walls that flex under pressure.
- Visible Mold or Mildew: Growth on surfaces, especially in corners.
- Window or Trim Condensation: Moisture that doesn’t clear quickly.
- Peeling Wallpaper or Blistered Paint: Surface finishes lifting away.
- Cracks or Gaps in Seals: Around windows, rooflights, or doors.
- Water Streaks or Drips: Trails that appear after rain or washing.
- Creaky Floors: Indicate early delamination of panels.
- Rusted Screws or Fixtures: Metal parts showing corrosion.
- High RH Readings: Persistent humidity above comfort range.
How Do You Use a Damp (Moisture) Meter?
Using a damp meter is straightforward once you know the basics. Two main types are available: pin meters that pierce the surface to measure resistance, and pinless meters that scan without puncturing.
Begin by calibrating the device according to the manual, then apply consistent pressure at each point. Always take repeat readings to confirm accuracy.
Important notes when using meters:
- Budget Meters (~£40): Affordable but prone to false positives, log weather conditions and re-test on dry days.
- Professional-Grade Units (£170–£400+): More reliable, suitable for deeper checks.
- Trend Tracking: Draw a plan of your motorhome and log % readings with dates and locations.
What Do Damp Meter Readings Mean (0–15%, 15–20%, 20–25%, 25–30%, 30%+)?
Interpreting readings helps you decide the right level of action.
Moisture bands and recommended actions include:
- 0–15%: Normal—monitor during routine checks.
- 15–20%: Early warning—investigate, re-test in dry weather, consider professional inspection.
- 20–25%: Likely issue—inspect seals and joints, begin remedial drying.
- 25–30%: Strong ingress signal—remedial work needed; strip-down if soft areas or pimpling appear.
- 30%+: Urgent—stop using affected area; professional assessment and probable strip-down required.
What Percentage of Damp Is Acceptable in a Motorhome?
In a motorhome, only readings below 15% are considered comfortably safe. Anything higher should be treated as a caution zone. Localized spikes around windows, roof joints, or service hatches that exceed 15% deserve targeted investigation, even if the rest of the area measures lower.
This is because penetrations are natural weak points.
As a rule of thumb, 0–15% suggests normal conditions, while 15–20% requires you to re-test and watch closely. Above 20% you should plan repairs, and once levels exceed 25% the risk of structural or electrical damage rises quickly. After figuring this out, the next step is to know exactly where to place the meter for reliable results.
What Areas Should You Test for Damp With a Moisture Meter?
When using a moisture meter, you should focus on the areas most vulnerable to leaks and hidden condensation.
Damp often starts at weak points, so your inspection must cover both obvious surfaces and less accessible corners. Always apply consistent pressure, record readings, and compare them with previous notes in your maintenance schedule.
Key test points include:
- Roof/wall junctions: Check along seams where panels meet, as flex and wear can open micro-gaps.
- Around windows and doors: Peel back rubbers and probe behind to detect trapped moisture.
- Rooflights and skylight frames: Inspect seals and edges for cracks or leaks.
- Corners inside cupboards or bed lockers: Hidden spaces trap air and moisture.
- Under flooring and carpets: Feel for sponginess, a classic sign of damage.
- External vents and seam lines: Look around accessory mounts and service hatches.
Should You Rely on Budget Moisture Meters?
Budget meters can be useful for routine checks, but you should not rely on them as your only diagnostic tool. Readings may fluctuate with weather or give false positives, particularly if surfaces are cold after rain or washing your motorhome.
This makes careful cross-checking essential.
Good practices when using budget meters:
- Cross-check with RH trends: Compare readings with a hygrometer to see if high humidity matches meter data.
- Use visible and tactile cues: Rusted screws, peeling wallpaper, or musty odours confirm suspicious readings.
- Re-test after 48–72 hours of dry conditions: Persistent high levels indicate real problems rather than surface moisture.
- Confirm with professional inspection: Especially when values exceed 20% or spread across multiple areas.
Should You Use a Humidity (Hygrometer) Meter?
A hygrometer is one of the simplest tools you can use to track damp conditions inside your motorhome. By placing it in living areas, sleeping zones, or storage lockers, you gain a picture of how air behaves during daily activities.
You should aim for relative humidity between 40% and 60% for comfort and to protect the vehicle’s interior condition.
Persistent readings above 50% signal a need to check ventilation and regularly inspect for leaks.
Keep a log of humidity trends to compare peaks during cooking, showering, or drying clothes with night readings when the rv is closed up.
Recording values in a simple manual or digital chart gives you early signs of problems before damage occurs.
Of course, knowing what tools to use is only half the story, you also need to know how often to check.
How Often Should You Check for Damp?
Damp checks should be treated like regular engine maintenance: consistent attention helps extend the lifespan of your motorhome.
As a rule of thumb, you should inspect quarterly, and always after winter storage, since condensation builds when a vehicle is unused.
Checking after heavy storms or long trips also helps catch issues before they develop into repairs.
During wet seasons, monthly spot-checks add another layer of safety, especially if you’ve noticed musty odors or minor leaks.
You should also expect annual service or habitation checks to include professional damp testing, just as a mechanic would test brake fluid or transmission fluid during a car inspection.
By combining scheduled inspections with awareness of daily signs, you avoid costly motorhome repairs and protect value over time.
Which Areas are Most Prone to Damp in a Motorhome?
In any motorhome, damp can appear in places you least expect, and water often travels away from the actual entry point.
That means you should always check both the obvious areas and the “downstream” surfaces nearby. The main hotspots are easy to remember, and each needs regular inspection.
Key areas to inspect include, roof and ceiling, and windows and doors, as they are the prime entry points for water. And in the next sections, we’ll discuss other entry points as well and how to reduce their occurrence.
Roof and Ceiling — Where Should You Look?
Moisture often enters through the roof, making it one of the first places you should inspect.
Pay close attention to seams, rooflights, antennas, and skylight frames, as these points can shift with age and vibration on the road. Staining or pimpling on the ceiling is an early warning that water may be traveling inside.
You should also inspect gutter and drain outlets, making sure they are clear of debris so water doesn’t overflow into seams.
If your roof pools water, it’s worth parking on gentle ramps until the issue is corrected. Treat this inspection as a regular maintenance task, much like checking engine oil or brake fluid.
Windows and Doors — What Should You Inspect?
Windows and doors are constant exposure points for water. Start with the frame corners and look for cracks or gaps where seals meet the bodywork.
Condensation pooling on sills or water streaks running down walls are key signs.
Inspect rubber surrounds carefully, brittleness or shrinkage often shows that a seal is past its lifespan.
Keep weep holes clear, since blockages can back water into the frames and cause hidden damage. This is similar to how clogged air filters or fuel filters restrict a vehicle’s performance: neglect leads to bigger problems.
External Joints, Seals, Vents, and Grilles — What Tends to Fail?
External joints, awning rails, and service hatches can weaken over time. You should look for peeling mastic along seams, as even hairline cracks let in wind-driven rain.
Vent grilles for the fridge or shower are another weak point, especially if they’ve become brittle or cracked.
Inspect these areas regularly, just as you would regularly check fluid levels or engine oil in your rv engine. By treating seals and vents as part of your motorhome maintenance schedule, you reduce the risk of leaks that compromise both condition and value.
Bathroom (Shower and Toilet) — What’s Vulnerable?
You should pay close attention to shower trays and sealant lines, as cracks often develop from wear.
Steam can accumulate quickly, so run the extractor fan or open a window with the door closed. After each use, wiping walls helps stop residual moisture from penetrating.
Skylight frames in the bathroom also deserve inspection. Check for staining or soft spots that suggest leaks.
Kitchen (Sink and Cooker) — What’s Vulnerable?
Sink fittings and splashbacks are exposed to daily water use, so you should inspect joints for leaks. Steam zones around cookers and extractor ducting also create risks. Running fans during and after cooking helps reduce condensation.
Cooking with lids on and simmering rather than boiling prevents unnecessary moisture buildup.
Don’t forget to look under the sink. Hose clips and joints often loosen, allowing drips that can damage cupboards or flooring.
Underneath Carpets and Flooring — How Do You Check?
Flooring hides one of the most overlooked areas of damp in a motorhome. You should lift corners of carpets and feel for sponginess, especially at subfloor edges.
A creaky or soft surface often signals delamination, which needs prompt attention before it spreads. Inspecting flooring after heavy rain or washing is wise because water can travel into hidden layers.
Use your hands to press along seams and corners, noting any give or unusual condition.
Storage Compartments and Under-Seat Spaces — What Should You Check?
Storage areas and under-seat cavities are cold corners where damp often builds unnoticed. You should inspect locker seals, wall edges, and flooring inside these spaces for signs of moisture.
Ventilating lockers, avoiding wet items, and placing moisture absorbers in dead-air spaces are simple steps that prevent hidden problems.
Much like monitoring fuel filter or battery terminals during routine motorhome maintenance, keeping storage areas dry protects the vehicle’s lifespan.
How Do You Stop Water From Entering Your Motorhome (Water Ingress Control)?
You should routinely check seals, act quickly after any scratches, and avoid aggressive jet washing, which can force water into seams. When any new holes are drilled for accessories, they must be sealed immediately with the right products.
Main steps for prevention include:
- Inspect regularly: Walk around the vehicle to spot cracks or peeling mastic early.
- Reseal as needed: Use correct motorhome-rated sealants.
- Repair after damage: Even minor bumps can compromise joints.
- Protect penetrations: Seal rooflights, racks, or service hatches promptly.
How Do You Find and Fix Leaks?
Visual inspections are the first step, followed by careful hose tests. Talc can be dusted along seams to track the path of water.
Steps to follow when finding and fixing leaks:
- Check after heavy rain: Look for drips, staining, or damp patches.
- Use hose tests carefully: Spray sections one at a time to avoid confusion.
- Apply talc tracking: Dust joints and trace moisture marks.
- Photograph findings: Document problem areas for repair reference.
- Remember wiring paths: Water can travel along cables, showing up far from the entry point.
- Re-test after repairs: Confirm work by repeating checks once sealant cures.
How Do You Maintain and Reseal Windows, Doors, Rooflights, and External Joints?
Windows, doors, and rooflights are among the most common points of water ingress. Proactive resealing keeps them functioning properly, much like regular engine maintenance keeps your rv engine reliable. Always select flexible, caravan- or motorhome-rated sealants to handle vibration and expansion.
Steps for resealing and maintenance include:
- Prepare surfaces: Clean away dirt, corrosion, and old sealant before applying new.
- Apply correct products: Use manufacturer-recommended mastics with proven reliability.
- Follow curing times: Let sealants dry fully before exposing them to rain.
- Plan resealing intervals: Roof joints should be resealed at least every three years.
- Annual seal checks: Build into your routine service for peace of mind.
- Work safely: Use ladders or platforms correctly and wear protective gear.
How Can Cleaning Gutters, Awnings, and Roof Drains Help?
Water ingress in a motorhome often begins with small oversights. When gutters, awnings, and roof drains clog with debris, rainwater cannot exit properly.
It pools, creeps into seams by capillary action, and eventually causes damage that requires costly motorhome repairs. Cleaning these areas seasonally keeps your rv functioning properly and protects the motorhome’s engine bay and electrics from hidden leaks.
Seasonal cleaning checklist includes:
- Clear roof drains: Remove leaves, dirt, and debris to prevent overflow into joints.
- Clean awning fabric: Dry thoroughly before stowing to avoid trapping damp.
- Inspect gutters: Look for cracks, corrosion, or blockages that can force water under seals.
- Flush channels: Ensure free flow away from vulnerable roof seams.
When Should Seals, Mastic, and Sealants Be Replaced?
Over time, exposure to sunlight, vibration, and wear causes cracking, shrinkage, and chalking.
These changes compromise your rv’s defenses and can invite water damage that shortens lifespan.
You should regularly check seals during your maintenance schedule and plan replacements before failures occur.
Replacement guidelines include:
- Look for pulled-back edges: Gaps allow water into joints.
- Check for chalking: Powdery residue indicates UV degradation.
- Spot reseal if localized: Small cracks can be repaired with quality sealant.
- Plan full reseal: If brittleness or widespread gaps appear, prioritize a complete job.
- Interval reminder: Roof seams should be fully resealed about every three years.
Does Accident Damage or Age Require Special Checks?
Yes, accident damage and age both increase the risk of leaks. Even if repairs seem cosmetic, hidden cracks can let water migrate into floors or wall cavities.
You should meter-check surrounding panels and floor rails after any repair.
Older rvs deserve closer inspections, as age can make seals brittle and increase leaks. By catching issues early, you avoid breakdowns, protect the motorhome’s engine from indirect damage, and maintain resale value.
How Do You Reduce Condensation and Improve Ventilation?
Always ensure high and low vents remain unblocked, and run extractor fans for 10–20 minutes beyond the activity that produced moisture. Aim to keep relative humidity between 40–60% for comfort and safety.
Quick wins include opening windows in opposite corners for cross-flow, wiping down wet surfaces, and keeping cooking lids on.
Longer-term improvements may involve adding extra roof vents, installing higher-capacity extractor fans in kitchens or bathrooms, and using moisture absorbers in lockers.
What Ventilation Practices Actually Work (Windows, Vents, Extractor Fans)?
Practical airflow habits reduce the risk of condensation.
Small actions, repeated consistently, add value to your motorhome maintenance routine.
Helpful steps and tips include:
- Crack opposite windows: Create cross-flow to move moist air out quickly.
- Use roof vents effectively: Keep them open slightly, even in cooler weather.
- Run extractor fans: Operate during and for 10–20 minutes after cooking or showering.
- Add extra vents: Place in high-moisture zones like kitchens and bathrooms.
- Keep vents unblocked: Check grilles and covers regularly for debris or dirt.
How Do You Manage Moisture From Showering and Cooking?
Showering and cooking release large amounts of moisture into confined spaces.
Without proper control, this moisture accelerates wear on seals, creates odours, and can lower your rv’s resale value.
Helpful steps and tips include:
- Keep doors closed: Contain steam in one area to limit spread.
- Run extractor fans: Keep them on during and at least 10–20 minutes after activity.
- Squeegee bathroom walls: Remove water film after showers.
- Wipe mirrors and walls: Clear residual moisture to reduce condensation.
- Use lids on pots: Trap steam while simmering food.
- Cook on lower heat: Minimize excess vapor release.
How Do You Create Airflow Around Furniture, Cushions, and Storage?
When furniture or cushions sit flush against walls, trapped moisture can damage surfaces and shorten the vehicle’s lifespan. To prevent this, leave small gaps between cushions and walls, and use slatted bed bases that let air circulate beneath mattresses. Lift cushions regularly and rotate mats to expose hidden areas that may collect damp.
Open cupboard doors during storage to keep fresh air moving through, reducing the risk of corrosion or mold. This is similar to following a maintenance schedule for air filters or oil changes, you’re creating habits that keep the system functioning properly.
Then, there’s drying clothes and gear, the less you do inside, the better. We’ll shed more light on that.
Should You Dry Clothes and Gear Outside?
Drying wet gear inside your rv may feel convenient, but it adds unnecessary moisture to the vehicle. Whenever possible, dry clothes outdoors or use contained drying systems. This keeps fluid levels of humidity under control.
Where available, use site dryers for speed and reliability. If that’s not an option, hang items under your awning with good airflow. But insulation also plays a role, so let’s see where it helps and where it doesn’t.
Does Adding Insulation Help With Condensation?
Insulation can reduce condensation in your motorhome, but only if applied correctly. Thermal bridging occurs where cold air meets warm interior surfaces, creating moisture.
Adding insulation reduces these cold spots, but it must be paired with ventilation so moisture has a way out. Quick upgrades like window insulation film, thermal curtains, and skylight covers improve comfort and help manage indoor humidity.
Think of it like your rv engine: even with a regular engine maintenance schedule and clean oil filter, airflow is still essential for the system to function properly. The same rule applies inside the vehicle.
Insulation offers peace of mind on a cold road trip, but without proper airflow, trapped water may cause damage just as neglected fluid levels lead to motorhome repairs.
Should You Insulate the Floor of a Motorhome?
The floor is often overlooked in RV conversions, yet it’s one of the coldest areas. Insulating the floor reduces footwell drafts and creates a barrier against moisture rising from below.
This not only improves comfort but also cuts road and tire noise while traveling. However, the choice must be made carefully: poor installation may trap damp beneath coverings.
Using proper vapor barriers, moisture-resistant insulation, and regular checks ensures everything functions properly.
Insulation is not a one-time job but part of an ongoing maintenance schedule, much like oil changes or air filter replacements. Closely related to floor insulation is vapour control, which has specific do’s and don’ts.
Is a Vapour Barrier Necessary in a Motorhome Conversion?
A vapor barrier plays an important role in controlling moisture inside a motorhome. Correctly placed, it stops water vapor from reaching cold metal skins where it could condense.
Placement is critical: if the barrier is in the wrong layer, it can trap moisture, causing damage to hidden parts and surfaces.
You should view this as a long-term protection step, similar to regular maintenance tasks such as checking transmission fluid or spark plugs. When installed properly, vapor barriers protect the condition of your rv and reduce the risk of corrosion or mold.
How Can You Protect Windows (Covers, Films, Double Glazing Inserts)?
Windows are natural condensation points in a motorhome, especially overnight when interior air cools against cold glass.
You can reduce problems with external covers, internal thermal curtains, or removable insulation films.
Each has pros and cons: external covers shield from frost but need storage space, while films and inserts improve comfort but must not block essential ventilation.
A handheld window vacuum is also a quick way to clear morning condensate before it drips into frames.
Does Heating Help Control Condensation (And Which Heat Sources Work)?
Gentle, continuous background heat helps keep surfaces above dew point, reducing condensation in your rv.
Diesel, LPG, electric, and heat pump systems all provide solutions, but their efficiency and safety differ. The most reliable setups distribute warmth evenly across the vehicle, much like a cooling system regulates your motorhome’s engine.
Important note: avoid unvented liquid propane heaters, as they add water vapor into the air and worsen the issue.
Aim for steady thermostat settings around comfort range rather than sudden bursts of heat. Run systems long enough to dry air pockets, but always balance with ventilation.
Alongside heat, the materials you choose inside also affect moisture control.
Should You Use Breathable Fabrics and Materials Inside Your Motorhome?
Breathable materials help reduce trapped moisture in living areas. Mattress bases with slats, cushion covers that allow airflow, and storage bags made from breathable fabric all improve circulation.
Avoid impermeable liners pressed against walls, as they trap moisture and may cause hidden damage. Gaps behind furniture and cupboards are essential for proper airflow.
Think of this as another maintenance task, much like replacing a fuel filter or monitoring brake fluid.
It may not seem urgent, but these steps protect the condition of your motorhome over the long term.
By combining breathable fabrics with routine checks, you lower the risk of damp-related repairs and preserve value. And sometimes the simplest option is shifting moisture-heavy tasks outdoors or to campsite facilities.
Should You Use Campsite Facilities to Reduce Indoor Moisture?
During damp spells, campsite facilities are your best ally for keeping condensation under control in your motorhome.
By showering and cooking in dedicated blocks instead of inside the vehicle, you cut down the internal humidity load.
A traveler who logs relative humidity before and after adopting this habit often sees clear reductions, for example, dropping from 70% to around 55% overnight.
What are the Dos and Don’ts for Condensation Control?
You can protect your rv interior from damage by following simple behaviors. Think of these as maintenance tips for air quality, much like checking engine oil or brake fluid keeps your motorhome’s engine safe.
DOs:
- Run extractor fans after cooking or showering for 10–20 minutes to clear excess vapor.
- Crack windows opposite each other to create airflow and reduce condensation.
- Wipe down windows and mirrors daily to remove visible moisture.
DON’Ts:
- Dry wet clothes or gear inside your motorhome during damp spells.
- Block roof or wall vents, as they are essential for airflow and safety.
- Ignore daily water buildup on glazing, it is a sign of high humidity needing action.
Should You Use a Dehumidifier in a Motorhome?
Yes. A dehumidifier can be a useful tool for managing indoor air quality in your motorhome. These devices reduce condensation by drawing moisture from the air, helping to prevent mold, corrosion, and hidden motorhome repairs.
Technologies vary: compressor-based units work quickly but use more power, while desiccant types function better in cooler conditions and often suit rvs stored in winter climates.
You should also think about where condensate collects, tanks require regular emptying, while hose-drain setups need careful routing.
Small disposable traps can help in dead-air spaces such as cupboards or under seats, but they have limited capacity compared to plug-in electric units.
Are Electric Dehumidifiers Suitable for Motorhomes (Pros and Cons)?
Electric dehumidifiers offer many benefits in a motorhome, but they come with trade-offs. You should weigh performance against energy use and space limitations.
Pros:
- Remove moisture quickly, keeping your rv interior dry and safe.
- Improve air quality, reducing condensation that damages fittings and surfaces.
- Some models allow continuous drainage, lowering the need for manual emptying.
Cons:
- Use considerable power, impacting battery terminals and inverter loads.
- Can produce noise during operation, affecting comfort during travels.
- Require careful placement and securing for safety while on the road.
Can You Use Household Dehumidifiers in a Vehicle?
Household dehumidifiers are generally too large and power-hungry for most rvs. While they may work when plugged into mains on a campsite, their high draw often strains a vehicle’s electrical system.
Inverters sized for standard appliances might not cope with the continuous load, and oversized units are difficult to secure during travel.
A better choice is a vehicle-specific unit designed for compact areas and variable temperatures. These options are built with safety shut-off features, preventing overflows and electrical issues during trips.
Like choosing the correct oil filter or following a maintenance schedule, picking equipment that suits your motorhome’s condition pays off in reliability and longevity.
And if power is limited, non-electric desiccant options come into play.
Are Non-Electric (Desiccant) Dehumidifiers Effective?
Non-electric dehumidifiers can be useful in a motorhome when you need a simple, low-power option. They work by absorbing airborne moisture into a salt-based medium or gel.
Their main advantage is silent operation with no need for electricity, making them practical for lockers, cupboards, or storage during long trips.
A typical tray unit has the capacity to absorb up to about 1 liter of water and usually lasts 6–8 weeks in small enclosed spaces, though replacement is needed sooner if saturated.
These devices are limited in scope, they won’t keep the entire rv dry but can reduce damp in dead-air zones.
Still, for mobile use, 12V units designed for motorhomes may be your best fit.
What Should You Look For in a 12V Dehumidifier for a Motorhome?
When choosing a 12V dehumidifier, you want features that match the unique demands of your motorhome. Look for rated extraction capacity that suits the volume of your rv interior.
Compact footprint and lightweight design matter for storage and placement, while noise levels affect comfort during travels.
Power draw should align with your battery terminals and inverter load limits, preventing system strain.
Safety is also essential, units with auto-shutoff and overflow protection reduce risk while driving. Secure the unit properly before every road trip to avoid damage.
Selecting a model is much like following your maintenance schedule: you regularly check air filters, engine oil, and brake pads to keep your motorhome’s engine reliable.
How Do You Treat Damp and Mould Safely?
When you discover damp and mould in your motorhome, the first step is always safety. You should wear gloves and a mask to protect yourself from spores while working.
Containment comes next, limit air movement to stop mould spreading into other areas of the rv. Before any cosmetic repairs, you need to focus on drying and sanitizing the space.
Avoid bleach as it can damage surfaces and simply mask the issue. Instead, clean with warm water mixed with mild detergent or a 1:1 vinegar and water solution. Always dry the surface fully afterward, using airflow and heat if needed.
What Should You Do Immediately After Finding Damp?
Once damp is detected, you should act quickly to prevent worsening damage. The first priority is to identify and isolate the source of water. Ventilate the area well and begin controlled drying with fans or natural airflow.
Temporary stop-gap measures like absorbent cloths or containers can help while awaiting a permanent fix.
If water pools on the roof, you can park your motorhome on gentle ramps to shed it until repairs are carried out.
Taking early steps mirrors your maintenance schedule for the rv engine: you regularly check fluid levels, perform oil changes, and replace air filters before problems escalate.
Now, let’s discuss practical steps on how to dry your motorhome.
How Do You Dry Out a Motorhome After Finding Damp?
Drying your motorhome requires careful, stepwise work. First, isolate and repair the source of the leak. Next, remove soaked cushions, carpets, and other soft furnishings so they can dry separately.
Create steady warm airflow using fans or heating, combined with ventilation to move moisture out.
Using a dehumidifier adds efficiency, but remember to monitor readings with a moisture meter until levels fall back into the safe range.
Pay attention to hidden cavities and laminated floors, which can trap water and require more time. Like engine maintenance, where you regularly check spark plugs, timing belts, and fuel filters, consistent checks are the only way to ensure your rv is functioning properly.
How Do You Remove Mould and Mildew Safely?
When you notice mould in your motorhome, you should focus on safe removal before cosmetic fixes.
Wear gloves and a mask to protect yourself from spores, and keep the area well ventilated. Always choose approved cleaners or mild household solutions instead of harsh chemicals that could damage surfaces or soft furnishings.
A proven method is to scrub the affected surface with detergent or a 1:1 vinegar-to-water solution.
An optional clove-oil rinse can be used, mix one tablespoon per liter of water, leave it for around 20 minutes, then wipe dry. Dispose of used cloths immediately to prevent spores from spreading.
Finally, vacuum the area with a HEPA filter to remove residue. The next question is whether household products are safe and effective.
Can You Use Household Products (e.g., Bleach or Vinegar) to Treat Mould?
Household products may help with small areas of mould, but you need to be selective. Bleach is not recommended in a motorhome, it can corrode surfaces, give off harmful fumes, and may not penetrate porous materials where mould roots grow.
Vinegar diluted with water, on the other hand, can work well on many hard surfaces. Always test an inconspicuous spot first to avoid surface damage.
Never mix chemicals, as combining products such as bleach and ammonia produces dangerous gases.
Stick with simple, single-solution approaches and rinse surfaces thoroughly after treatment. Think of it as you would engine maintenance: you wouldn’t mix transmission fluid with brake fluid, and you wouldn’t skip regular oil changes.
What’s the Best Practice for Cleaning Mould and Mildew?
The safest approach to mould removal is to follow a clear, stepwise process. Start with personal protection, then isolate the area and select the right cleaning product.
Apply diluted solutions with correct dwell time, long enough to neutralize spores without harming the material. Always rinse thoroughly and dry the space fully with airflow or a dehumidifier.
Tip Box: Do not mix chemicals, this creates serious health risks.
For delicate surfaces, switch to purpose-made biocidal cleaners instead of household products.
They’re designed for specific materials, offering reliability and protection. Setting realistic expectations is also important: mould removal is often about control, not permanent elimination.
Which Moisture Absorbers Work (Hanging Absorbers, Moisture Traps with Refills)?
Hanging absorbers work well in wardrobes and lockers, drawing moisture out of still air and protecting fabrics from mould. Tray-style moisture traps are best for under-seat storage or compact areas that lack natural airflow.
Most narrow moisture traps can absorb up to about 1 liter of water over 6–8 weeks in a small enclosed space.
Replace them as soon as the refill is saturated.
Position absorbers in multiple zones for full coverage, wardrobes, lockers, and footwells all benefit. But consumables only go so far, you’ll also need reliable sealants and tapes.
Which Sealants and Tapes Should You Keep on Hand?
Butyl tape is excellent for sealing joints and trims because it stays flexible, even after years on the road. MS polymer sealants are strong, durable, and safe for many exterior applications without cracking.
Silicone should only be used in specific areas like bathroom fittings, never on structural seams.
Always choose products rated for motorhome exteriors, as these maintain flexibility through temperature changes. Finally, there are simple gadgets that make daily moisture control quick and easy, let’s go into that.
Which Small Gadgets Help Day-to-Day (Squeegee, Window Vac, Extractor Fan, Window Protectors)?
While sealants handle bigger leaks, simple gadgets help with everyday condensation. These tools keep your rv interior functioning properly.
- Squeegee: Clears water from windows and mirrors each morning, preventing drips from seeping into seals.
- Window vacuum: Speeds up clear-down after a night of cooking or showering, capturing water neatly into a tank.
- Extractor fan: Improves airflow during cooking or washing, reducing internal humidity that could shorten the lifespan of soft furnishings.
- Window protectors: Add insulation to glazing, keeping surfaces warmer and cutting down condensation build-up.
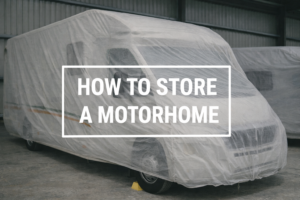
How Should You Store Your Motorhome to Avoid Damp (Especially in Winter)?
Before storage, complete a checklist similar to a maintenance schedule you’d follow for your motorhome’s engine, drain fluids where needed, inspect seals, and make sure vents remain clear.
Use a breathable, waterproof cover that protects the vehicle without trapping condensation.
Position cushions and mattresses upright or slightly lifted so air can circulate, and leave cupboard doors open to reduce stagnant pockets. A traveler who invests in these simple tasks reduces risk, much like regularly checking oil or brake fluid prevents engine failure.
During storage, air the van monthly for an hour. Afterward, recommissioning should include a full inspection of fluid levels, air filters, and cooling system checks to ensure everything is functioning properly before your next road trip.
How Do You Prepare Your Motorhome for Winter Storage?
Preparing for winter storage is a task best approached like engine maintenance, systematic and thorough.
First, perform a full dry-down routine. Open windows to release moisture, then deep-clean every surface. Ensure all areas are completely dry before closing up, as even small damp spots can lead to mould.
Crack roof vents to maintain a gentle airflow. Drain water systems and tanks to avoid damage from freezing, and add desiccants or moisture traps in lockers and storage spaces.
Cover electrics with breathable protectors to prevent corrosion.
These steps, like changing engine oil or replacing a fuel filter, are small but essential. Once your motorhome is prepped, the cover you choose becomes critical.
Should You Cover Your Motorhome in Winter?
Yes. Covering your motorhome during winter can be beneficial, but only if you choose the right materials. Breathable covers allow moisture to escape while keeping out rain, snow, and debris.
Non-breathable covers may seem protective, but they can trap condensation against surfaces, leading to corrosion and cracks in seals.
Fit is just as important as material. A loose cover may rub against paintwork or windows, causing abrasion. Too tight, and it can strain joints or restrict airflow. Always select products designed for rv use, with flexibility to handle temperature changes. But a cover alone isn’t enough; you’ll still need to ventilate and check regularly.
How Do You Ventilate and Check a Stored Motorhome?
Aim to air out the vehicle monthly for about an hour by opening doors, windows, and roof vents. This circulation keeps surfaces dry and prevents musty odors.
Spot-check relative humidity (RH) with a handheld hygrometer. Readings above 65% suggest conditions where mould and corrosion may start. Create a simple inspection map so you cover high-risk areas like window seals, under-bed lockers, and roof joints each visit.
How Do You Re-Commission After Storage to Prevent Damp?
Start with a visual sweep, looking for water stains, surface cracks, or signs of corrosion. Then use a damp meter to check walls, floors, and lockers.
Inspect all seals around windows, skylights, and doors for wear or damage. Replace or reseal as needed to avoid future leaks. Test the shower, taps, and drains, watching carefully for drips or pooling water. Inside, reinstall cushions and mattresses, confirming airflow gaps remain clear.
What Maintenance Routines Prevent Damp Long-Term?
A recurring schedule reduces the risk of hidden water damage, corrosion, or expensive motorhome repairs.
Create a structured plan: monthly ventilation checks, quarterly damp meter sweeps, and seasonal deep-clean routines.
Always include inspection of seals, roof joints, and underfloor areas where leaks may form.
Schedule a roof-joint reseal at least every three years and request seal checks at every annual service.
How Often Should You Inspect and What Checklist Should You Follow?
You should think of damp prevention like following a manual for rv engine care, consistency is everything.
Inspections are most effective when broken into clear intervals you can follow without guesswork.
Here’s a simple at-a-glance guide for your maintenance tasks:
- Monthly: Visual sweep of windows, roof, and locker seals.
- Quarterly: Damp meter sweep; inspect soft furnishings for wear or mould.
- Pre/Post-Storage: Deep airing, fluid levels checked, cushions lifted for airflow.
- Post-Storm: Inspect roof joints, wheel arches, and underfloor areas for leaks.
- Annual Service: Request full damp test along with oil changes, brake system inspection, and general motorhome maintenance..
How Do You Keep Surfaces Dry and Clean Daily?
Daily upkeep in your motorhome doesn’t have to be a chore, it’s about forming small habits. Spending five minutes after cooking, showering, or simply waking up can prevent moisture from taking hold.
- Five-minute habits to follow: Wipe down windows with a cloth or squeegee, vacuum condensation with a handheld window vac, rotate mats to dry hidden areas, and crack vents to maintain airflow.
And when checks find leaks, prompt action makes all the difference.
How Do You Address Leaks Promptly?
The first step is to identify the source. Water can track along belts, hoses, or seals before appearing on a surface, so follow the trail carefully.
Temporary measures such as applying waterproof tape or sealant patches can hold until a mechanic completes permanent motorhome repairs.
Always document with photos and retest after repair. This record helps track changes and ensures the fix is working. Ventilate the area immediately to reduce humidity, and remove any damp items like mats or cushions.
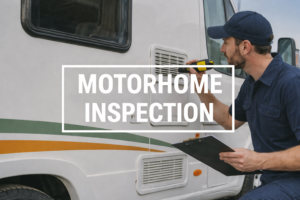
When Should You Seek Professional Help for Damp?
You should bring in a professional when damp meter readings move into higher bands, when you feel softness in walls or floors, or if you notice visible rot.
These are warning signs that exceed routine motorhome maintenance.
Some dealers offer paid damp checks, and a thorough inspection typically costs around £150. During an assessment, the team will examine seals, corners, and hidden areas where leaks may compromise the vehicle’s structure. They may also review your maintenance schedule and ask about recent services such as oil changes or brake fluid inspections, since overall condition affects repairs.
What Services Can Specialists Provide (Leak Testing, Resealing, Structural Repairs)?
Specialist services go beyond what a traveler can handle alone. Professionals may perform pressure testing, introducing controlled air to detect leaks in your motorhome or rv.
Smoke testing helps locate tiny entry points that would otherwise remain hidden. If problems appear, they can reseal joints using manufacturer-approved products, ensuring flexibility and long-term reliability.
For more severe damage, experts handle panel or floor repairs, replacing compromised components before structural integrity fails.
This can be as critical as replacing brake pads or a timing belt in your motorhome’s engine, both protect lifespan and safety. Many services include a detailed report with photos, showing changes and confirming repairs. If you decide to hire a specialist, the next step is knowing how to choose one.
How Do You Choose a Qualified Damp Inspection and Repair Service?
Before committing to any damp and repair service, check their credentials,, look for training, manufacturer approvals, and warranties on work. Reviews from other travelers and rvs owners reveal how a company handles repairs, fluid checks, and long-term value.
A good service should provide clear information, including estimated costs, lead times, and what tasks their team will perform.
Some even offer email address contact for updates during repairs.
Ask whether they back their damp inspection with a warranty, similar to how a manual guarantees parts or maintenance tips.
How Does Proper Damp Management and Mould and Mildew Prevention Influence Motorhome Value?
Protecting your vehicle from damp has a direct effect on long-term motorhome value.
A traveler looking to buy wants peace of mind, just like when checking the condition of a motorhome’s engine or reviewing a maintenance schedule with oil changes and air filters. Logs showing damp readings consistently under 15% at key points, along with receipts for resealing, help demonstrate reliability.
These records are like a manual for care, showing regular maintenance tasks have been followed.
On the other hand, spongy floors, musty odor, or panel replacements signal risk. Buyers immediately imagine future motorhome repairs, similar to seeing worn brake pads or spark plugs in a car.
How Much Might Motorhome Damp Repairs Cost?
The cost of motorhome repairs depends on extent, access, and labor rates. A paid damp inspection usually runs around £150. Resealing joints can be a few hundred dollars, while panel replacements or floor rebuilds may escalate into thousands. In severe cases where walls or floors require full strip-down, labor hours can run into the hundreds, becoming the main cost driver.
Smaller jobs such as mould remediation, drying, or dehumidification are less expensive, though moisture-trap refills every 6–8 weeks add ongoing costs.
Cost vs. DIY Risk: Attempting structural reseals or floor repairs without expertise can cause further damage, much like mishandling transmission fluid or brake fluid in your rv engine. Professional services provide reliability, longevity, and better value.
Is It Possible to Eliminate Damp Entirely in a Motorhome?
No. You cannot remove all moisture from a motorhome because daily cooking, showering, and even breathing add water vapor. The real goal is to keep relative humidity in the healthy 40–60% range and prevent leaks. Proper damp control works like regular engine maintenance, small checks prevent big problems.
The pillars are clear: ventilate well, add heat where needed, insulate surfaces, repair leaks quickly, and monitor fluid levels of the environment with hygrometers. Following these steps ensures your rv remains safe and comfortable.
What Common Myths About Motorhome Damp Should You Ignore?
Damp in a motorhome is often misunderstood, and ignoring the facts can put your vehicle at risk. Here are key myths worth busting:
- “Leaving a window open fixes everything”: Ventilation helps, but without sealing leaks and checking fluid levels, moisture still builds.
- “Only old vans get damp”: Even a new RV can suffer if the motorhome’s engine and body seals are not maintained.
- “Any dehumidifier will do”: Some models pull little water, and others risk over-drying air filters or soft furnishings.
- “You’ll always smell damp”: Many early leaks are odorless; a meter will reveal hidden problems.
- “Wood-free vans can’t get damp”: Floors and supports can still rot if seals fail.
- “You can always see damp”: Visual signs often appear late, so regularly check with the right tools.
Conclusion
When it comes to damp, the best approach is steady, simple routines that keep your motorhome healthy year after year. Think of it like checking engine oil or swapping an oil filter, you wouldn’t skip it if you wanted your rv engine running smoothly.
The same goes for moisture: a quick look every month, a proper meter sweep each quarter, seasonal checks when storing, and a full annual service with a damp test.
Keep your relative humidity between 40–60% and pay attention to the numbers: 15–20% means take a closer look, 20% or more needs action, and 30% or higher is urgent.
If we stay on top of these small tasks, then we’ll have way fewer surprises, and motorhomes that hold their value while staying ready for the next road trip.