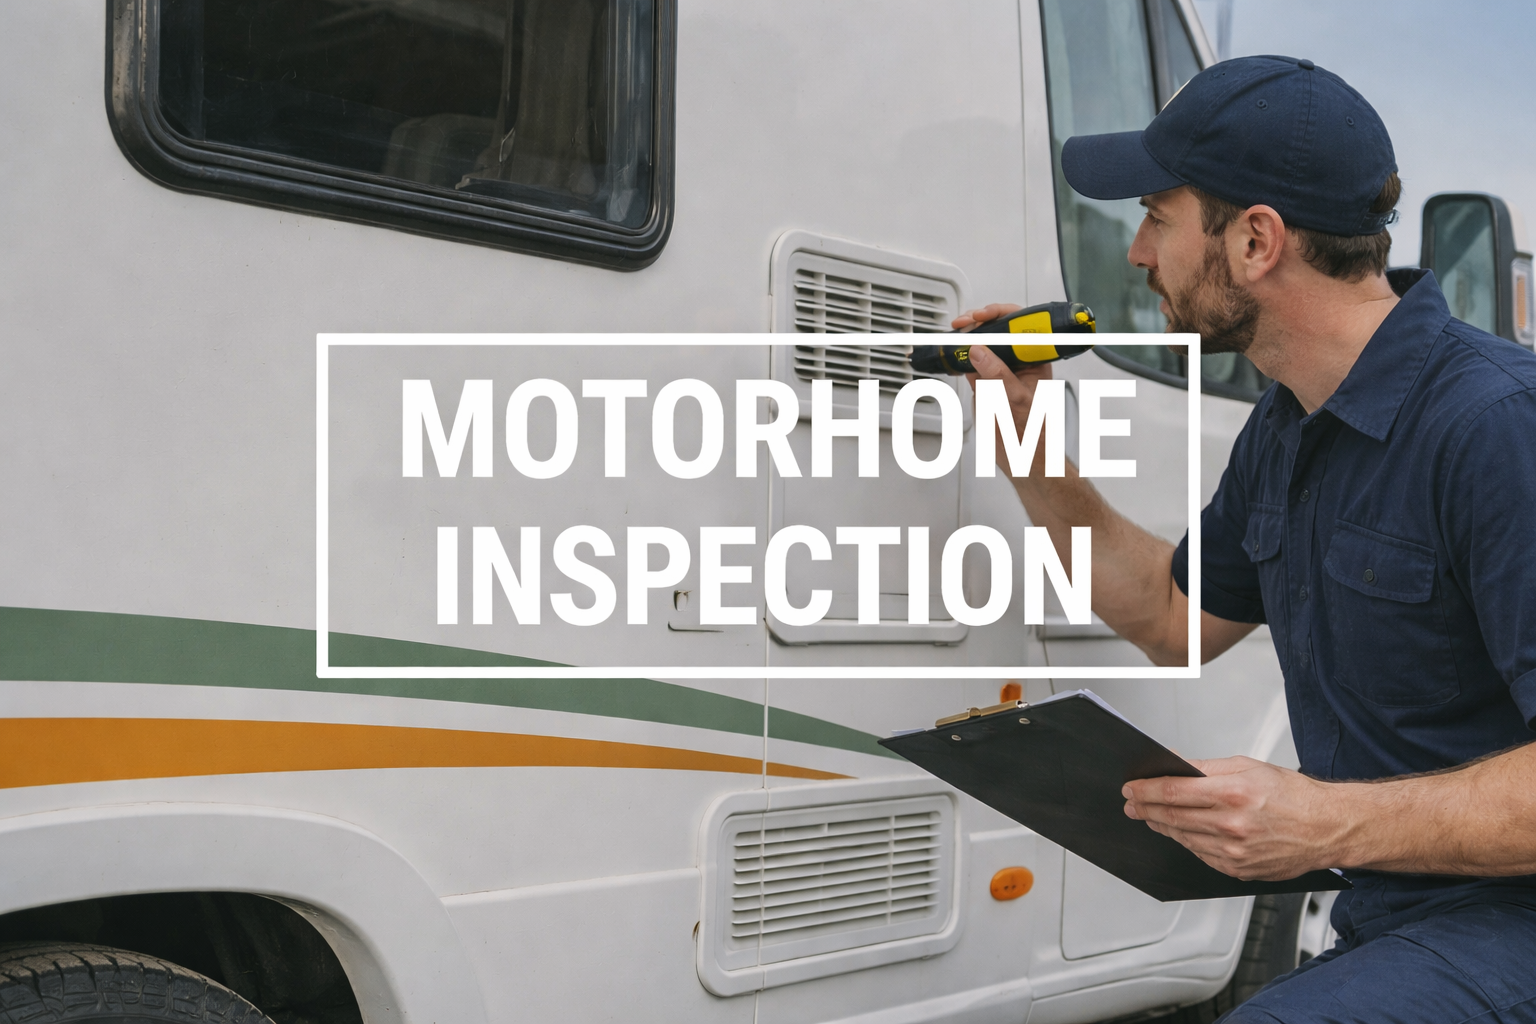

A motorhome inspection is a structured assessment of a vehicle’s road and living systems to document condition, safety, and value when selling the vehicle.
A thorough motorhome inspection includes legal MOT (UK), habitation checks, pre purchase inspection reports, courtesy checks, and routine annual maintenance inspections, with Level 1 visual/safety reviews (~3 hours) and Level 2 detailed evaluations that may take a full day and include lab fluid analysis.
You use inspections before a purchase, after storage, and ahead of long trips to catch faults in brakes, tyres, electrics, gas/propane, plumbing, and roof seals.
Documented inspections—photo report, moisture maps, and certificates—reduce surprises and help with insurance, warranty, and resale.
As a buyer or seller, this process gives you information, leverage on price, and peace of mind.
Skipping it is like buying a house without a survey, you may save money now but face costly issues later. A skilled inspector, mobile or workshop-based, checks components methodically and explains risks, actions, and costs.
Why is motorhome safety and inspection important?
Motorhome safety and inspection matter because they prevent accidents, reduce breakdown risk, and preserve value you can prove to potential buyers and motorhome traders and brokers.
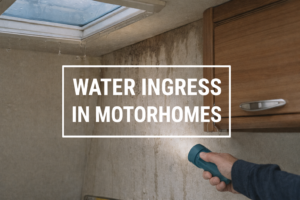
Routine checks detect water damage around roof seams and windows, perished tyres older than 5–6 years, corroded brake lines, failing detectors, and gas leaks that a quick wash can’t hide.
By addressing defects early, you avoid roadside tow bills, ruined trips, and negotiation hits during sales.
For warranties, many builders require annual habitation damp tests in the first years; some policies expect evidence of electrical and gas safety for compliance.
Buyers scan history fast—recent reports, photos, and invoices shorten time-to-sale and justify the valuation you want.
If you’re preparing for a long road trip, the same inspection minimizes mechanical issues on steep roads and in hot conditions. The result: fewer hazards for you and your passengers, a stronger paper trail for your investment, and a smoother test drive experience.
How does inspection influence motorhome value?
Inspections influence motorhome value immediately and over time because they convert condition into evidence.
Short term, a pre purchase inspection highlights fixable problems—reseal a rooflight, replace perished tyres, adjust brakes—so you show a well-maintained vehicle and limit buyer discounts.
Long term, a file with annual habitation certificates, MOT passes, dated moisture maps, and fluid analysis trends signals lower risk to the next buyer.
What maximizes value is documentation: readings for damp, photos of roof seams and underbody, invoices for remedy work, tyre DOT dates, and any lab reports for engine/gearbox fluids (Level 2).
The Motorhome Trader suggests always keeping a log with service stamps, gas/electric certificates, recall paperwork, and resolved advisories.
As a buyer, request the same information to quantify conditions and shape your decision, not your hopes.
What MOT does a motorhome need in the UK?
A motorhome requires the MOT class that matches its registered body type and Maximum Authorised Mass (MAM), with Class 4 or Class 7 being the most common and heavy vehicles over 3,500 kg using the annual HGV test.
Legally, driving without a valid MOT can bring fines up to £1,000 (only travel to a pre-booked test is permitted).
If your V5C shows “Motor Caravan” and MAM ≤ 3,000 kg, it’s generally Class 4
If it’s registered as “goods” or sits between 3,000–3,500 kg, many are directed to Class 7.
Over 3,500 kg? Expect the DVSA heavy-vehicle route. Class 4/7 tests fall due annually after the third anniversary of first registration.
>3,500 kg vehicles test annually from 12 months after first registration.
Large A-class rigs may exceed some bays/rollers, so confirm station headroom, ramp capacity, and axle limits before booking. The outcome is pass/fail plus advisories; repairs sit outside the test but are often needed to pass.
Edge cases exist: heavy coach-built or A-class models close to limits may need facilities with higher axle-weight rollers—call ahead with VIN-plate axle ratings to avoid a wasted trip.
Always validate the V5C against the physical plate; self-builds and conversions not clearly meeting “motor caravan” criteria may need reclassification to align with the vehicle’s true use.
Since MOT rules depend on your vehicle’s weight and registration details, the next step is knowing exactly which MOT class your motorhome falls under and how to confirm it.
When uncertain, confirm with a test station that regularly handles motorhomes.
What items are inspected during a motorhome MOT?
An MOT checks brakes, steering, suspension, tyres, lights, seatbelts, emissions where applicable, structure/corrosion, mirrors, wipers/washers, registration plates, and visibility; it confirms roadworthiness but not living-area safety.
Common fail/advisory points include aged or cracked tyres, brake imbalance, corroded brake pipes, poor headlamp aim, fog/marker light faults, windscreen chips in the swept area, and exhaust/emissions issues.
The MOT excludes:
- 12V/230V habitation electrics
- gas tightness
- damp/moisture
- appliance operation
Those belong to habitation checks or pre-purchase inspections. Preparation helps: check DOT tyre dates, replace failed bulbs, top screenwash, clear the cab, and ensure seatbelts are accessible. If you’re selling soon, fixing advisories now can protect price later.
Why are habitation checks essential for motorhome safety?
Habitation checks are vital for verifying the safety and operation of the living systems—gas, electrics, water, ventilation, and fire/CO alarms—that an MOT doesn’t touch. A typical annual check validates 12V/230V integrity (charger output, RCD/MCB function, polarity), tests gas tightness and regulator age, confirms detector operation, pressure-tests the plumbing, maps moisture in walls/ceiling/floor, and inspects roof/body seams.
These steps prevent fire risk, CO exposure, scalding, leaks, and hidden water damage that can cause rot or structural failure. Many body warranties in the first 3–5 years require documented damp checks; some insurers may expect proof of gas/electrical safety for certain covers.
If you travel often or store in wet climates, the inspection cadence becomes your risk control plan: find ingress early, fix seals properly, and re-check damp to prove the problem is trending down.
Knowing why habitation checks matter naturally leads to understanding what’s actually covered during one—and how each test keeps your living space safe and compliant
What is included in a habitation check?
A habitation check verifies living-area safety from fuel to fixtures.
The technician tests gas/propane tightness and appliance ignition/venting, runs electrical RCD/MCB and polarity checks, inspects charger performance, and measures battery health.
Water systems are filled and pressure-tested, with taps, toilet, heater, and tanks checked for leaks.
Moisture readings are recorded at key points; roof/body seal integrity is examined for cracks.
Appliances such as the fridge (12V/230V/gas), hob, oven, space heater—are tested for stable ignition and flame quality.
Ventilation paths, CO/smoke detectors, doors/windows/rooflights, and furniture anchorage are verified.
The inspector also reviews underbody for ingress points, slide-out alignment and seals where fitted, and awning condition.
Findings are documented with photos, moisture percentages, regulator age, hose date codes, any non-compliant DIY wiring, and actions prioritized by risk, giving you a clear report for quotes and repairs.
Are habitation checks mandatory and how often should they be done?
Habitation checks are not legally required in the United Kingdom, but they’re strongly recommended annually and can be often mandatory for warranty or insurance compliance.
Most owners benefit from an annual check; high-use/full-time living may justify twice yearly.
After long storage periods, re-verify damp and gas safety before travel. Hiring out a motorhome typically requires documented habitation safety.
Optimal frequency depends on usage and climate
After any water-ingress repair or new sealant work, schedule an early recheck (around 3–6 months) to confirm moisture readings trend downward and seals have bedded correctly.
How can you protect your motorhome after inspection?
You protect your motorhome by fixing flagged items in order of priority and maintaining stable system conditions.
Start with dangerous/immediate actions—gas leaks, exposed live electrics—then address major items, then advisories.
Convert the report into a plan:
- reseal minor roof/trim gaps
- replace tyres older than 5–6 years
- clean and condition seals
- exercise slide gear, steps, and jacks
- update detectors
For storage, maintain tyre pressures, cover tyres against UV, ventilate or use dehumidifier packs, float-charge batteries, and cap/secure cylinders.
Enhance security with strong locks, an alarm, and a GPS tracker. Keep digital copies of certificates and photos; this paperwork supports sales, warranty, and insurance claims and reassures the next buyer that the vehicle has been cared for.
What are the legal safety and inspection requirements in the UK?
In the UK, you must keep the motorhome roadworthy with a valid MOT where required, suitable insurance, Vehicle Excise Duty, and compliance with Construction & Use and lighting rules
Habitation checks are separate but strengthen your safety record.
Stay within plated GVW and axle limits, secure loads, and ensure seatbelts comply with regulations for travel seats. Driving without MOT can incur fines up to £1,000, and serious defects or overweight conditions risk prohibitions and further penalties; lack of MOT may jeopardize insurance claims.
Remember: MOT evaluates road systems; habitation checks address the living area (gas, electrics, damp). Keep both up to date to reduce risk, maintain value, and simplify purchase and sale transactions.
What do UK safety inspection laws require?
UK law requires a valid MOT, Vehicle Excise Duty, and insurance, along with compliance to Construction & Use standards.
Owners must maintain lights, mirrors, tyres, brakes, and visibility, and keep the motorhome within plated weights.
Good records matter: MOT certificates, advisory rectifications, gas/electrical safety certificates, and damp reports prove compliance.
Ensure seatbelts are fitted and used correctly; child restraints must meet standards for travel seats.
External accessories such as racks, awnings, or satellite gear must be secure and clear of lights or plates. If your model is heavy or long, book a test site with suitable capacity.
What are the consequences of non-compliance?
If you operate without a valid MOT or in an unroadworthy state, you risk fines, penalty points, prohibitions, or even vehicle impoundment.
After an incident, defects can increase liability exposure and insurance may reject claims.
On resale, gaps in inspection history lower valuation, invite discounts, and lengthen time-to-sale.
Ignoring advisories can turn minor faults into expensive repairs—brake corrosion, tyre failures, or electrical shorts that cause fire or trip RCDs repeatedly.
What actions ensure compliance?
Set MOT reminders, choose reputable testers, and fix advisories quickly. Weigh the motorhome at a public weighbridge after loading to confirm axle and gross weights; redistribute payload if needed.
Maintain a pre-trip checklist covering tyres, lights, fluids, mirrors, and visibility; after storage, check damp, rodents, and batteries.
File all certificates, reports, and receipts.
When modifications affect weight or electrics/gas, use professionals and keep documentation for warranty and insurance.
How often is a habitation check recommended?
Most owners should plan an annual habitation check; heavy use or full-time living can justify a six-month cadence.
After major sealant work or any water-ingress event, recheck in 3–6 months to ensure moisture readings are improving.
Time your check before the main travel season so you can schedule repairs without rush.
How should you prepare for a motorhome inspection?
The main steps involve cleaning, powering systems, enabling safe access, and assembling documents to help the inspector can work efficiently:
- Clean & declutter: Remove clutter so panels, seams, and underbeds are visible.
- Power & fluids: Charge both starter and leisure batteries; top oil, coolant, washer fluid.
- Access & logistics: Provide shore power, water, safe gas access, and clear roof access.
- Known issues: Write a list of noises, leaks, or intermittent faults to reproduce.
- Documents: V5C, MOT history, service records, manuals, tyre DOT dates, recalls, prior video reports.
- Cold start & road test: Request a true cold start and plan a varied route.
- Safety: Keep pets away, ventilate during gas tests, and be ready to check gas appliances.
Which components are checked during a motorhome inspection?
A full inspection reviews exterior body/seals, roof, windows/doors, chassis, tyres/undercarriage, interior structure, appliances, gas, electrics, plumbing, heating/cooling, safety equipment, and documentation—distinguishing MOT (road systems), habitation (living systems), and full pre purchase scope (combined, with photos and estimates).
Expect slide-out and awning checks, smoke/CO/LP detector tests, RCD trip and polarity confirmation, plumbing pressure tests, and fridge operation on 12V/230V/gas.
For motorhomes, the inspector assesses engine/transmission leaks, brake balance, steering play, suspension bushings, and underbody rust; for trailers, the focus shifts to hitch, jacks, wheel bearings, and breakaway systems.
Documentation and history are verified against VIN plates, service intervals, and payload calculations (GVWR and axle ratings vs actual). This holistic approach turns aspects of condition into clear actions.
What safety issues are most commonly found during a motorhome inspection?
The most common safety issues are water ingress/damp, old or perished tyres, gas leaks or faulty appliances, electrical polarity/RCD failures, brake or suspension wear, corroded chassis points, damaged or leaking seals, and battery/charging faults.
You’ll notice cues like musty odors, soft flooring, fogged windows, unexplained battery drain, frequent RCD trips, yellow/brittle gas hoses, uneven tyre wear, and slide misalignment.
Prioritize action by severity: isolate gas immediately if a leak is suspected, address damp early to prevent rot, and replace tyres older than 5–6 years even with good tread.
Addressing these issues lowers breakdown risk, safeguards passengers, and maintains resale value.
What should you do after an inspection identifies issues?
Address critical safety issues immediately, then schedule major repairs and plan advisories. If a report marks gas or live-electrics as dangerous, don’t operate the system until a qualified engineer repairs and signs off.
Create a corrective-action log: defect → photo → repair invoice → retest reading (e.g., moisture %).
For MOT failures, know the retest window and book promptly; for advisories, target 30–90 days depending on risk.
Check for warranty, recall, or goodwill routes to reduce cost. After water-ingress repairs, schedule a follow-up damp map in 3–6 months to confirm improvement.
Keep video or photo evidence and file everything digitally for insurance, dealer discussions, and the next buyer.
What actions correspond to each identified issue?
Assign a clear action to each issue:
- Gas leak: shut cylinder valves, ventilate, and contact a certified technician.
- Damp: locate ingress, reseal correctly, dry the area, and re-measure moisture until stable.
- Electrical polarity/RCD trips: disconnect shore power, test outlets, and engage a qualified electrician if faults persist.
- Old or cracked tyres: replace as a matched set and check alignment/suspension afterward.
- Brake pull/noise: inspect pads/discs, hydraulics, and hoses; road test and recheck balance.
- Slide/awning faults: lubricate tracks, adjust seals, correct fabric tension, and verify watertight closure.
- Battery/charging problems: clean terminals, confirm alternator/charger outputs, and test parasitic draw.
How do you maintain your motorhome between inspections?
Maintain your motorhome on a schedule separating owner and technician tasks. Each month, you check tyre pressures and tread, run detectors, verify battery state (starter and leisure), and scan for leaks or musty odors.
Seasonally, inspect roofs and seals, lubricate steps, jacks, and slides, pressure-test plumbing, run HVAC, and check awning hardware.
Annually, a technician performs gas-tightness testing, deeper electrical tests (RCD, polarity, charging), full moisture mapping, and chassis service to manufacturer schedule. This rhythm protects value, supports warranty and insurance expectations, and makes every test drive feel consistent.
To make this maintenance routine practical, it helps to know exactly what tasks you should include on your regular checklist and how to track them effectively.
What should be on your regular maintenance checklist?
Maintain a short checklist that requires no special tools:
- Weekly or monthly, confirm tyre pressures/tread, top fluids, test CO/smoke/LP detectors, and check exterior lights/reflectors.
- Check roof edges and window weep holes; wipe and clear them so water drains.
- Inspect underbody for rust and loose fixings.
- Cycle valves and pumps to prevent sticking, run the appliances briefly, and record dates and photos.
- A simple spreadsheet or page in your notes with mileage, readings, and email receipts builds the history that future customers (buyers) trust.
When should you schedule service intervals?
Follow manufacturer schedules for engine/chassis service and align habitation checks just before your main travel season. Schedule a post-storage mini-check 2–4 weeks before departure, leaving time to order parts. Gas/electrical safety is annual at minimum; high-use rigs may justify a six-month quick review of seals, detectors, and tyres.
How do you inspect a used motorhome before buying?
Your pre-purchase process covers documents, exterior, interior, mechanics, and a real test drive; this how-to includes eight steps. Start by verifying V5C, finance status, service/repair receipts, habitation/MOT certificates, and recalls.
- Research model issues and print a checklist.
- Tools: flashlight, moisture meter, multimeter, polarity tester, tyre gauge, inspection mirror, camera.
- Setup: request a cold start, ensure shore power and water, and arrange underbody access.
- Exterior: roof/seals, body panels, awning, storage bay seals/hinges, weep holes.
- Interior: damp scan, detectors, cabinet security, table stability, 12V/USB sockets.
- Systems: fridge on 12V/230V/gas, heater, water pump, RCD trip/polarity.
- Mechanical: leaks, fluids, service intervals, steering/brake feel on the road.
- Decision: compile video reports and photos, price the fixes, and walk away if evidence doesn’t match the story.
What should you do before the inspection?
Before viewing, confirm VIN/HPI/finance status, read common faults for that model, and book enough daylight time.
Collect a moisture meter, torch, multimeter, polarity tester, tyre gauge, and camera.
Request for shore power and water on arrival; request tanks are partially filled to test pumps and heater.
Arrange a true cold start and a varied test route. If possible, arrange ramps or a lift for underbody viewing.
How do you inspect the exterior?
Exterior checks follow a simple five steps process:
- Body & paint: look for delamination/bubbling, cracks, filler lines, panel mismatch.
- Windows/doors: test latches, hinges, seals, blinds, and flyscreens; confirm weep holes are clear.
- Roof & seals: inspect seams, rooflights, antennae, racks; photograph all penetrations.
- Lights & signals: test every lamp/reflector and check for water inside housings; verify aim.
- Tyres & undercarriage: read DOT dates, inspect sidewalls/tread/wear; look for rust on subframe/exhaust, leaks at engine/gearbox/axle, and jack/ stabilizer condition.
Body and paint condition
Start by confirming consistent panel finish and tight edges; widespread delamination, star cracks, or ripples indicate past impact or water.
Look for overspray, uneven orange-peel, and masking lines, which often indicate rushed repairs. Inspect frame extensions and welds for rust or distortion that suggest overload or a poor towbar fit.
Windows and doors
Confirm latches, hinges, and seals operate smoothly; sticky locks or misaligned doors may indicate flex or prior damage. Check blinds/flyscreens, condensation between panes, and staining below frames as clues of leaks.
Roof and seals
Check roof seams, rooflights, antennae, and rack mounts for hairline cracks or loose fasteners. Avoid walking a soft roof; use boards or inspect from a ladder.
Photograph all penetrations for records and potential insurance discussions.
Lights and signals
Test all exterior lights, reflectors, and number-plate illumination; moisture inside housings and cloudy lenses cause failures and dim output. Verify headlamp aim and address any dashboard warnings.
Tyres and undercarriage
Confirm DOT date codes, sidewall condition, and and tread wear; replace tyres older than 5–6 years. Inspect subframe, springs, mounts, and exhaust for corrosion. Cycle jacks/stabilizers, and check for leaks at engine/gearbox/axle.
How do you inspect the interior?
Inspect the interior using five clear steps:
- Damp & mould: sniff for mustiness; probe soft spots; take moisture readings near rooflights and corners.
- Appliances & fixtures: run fridge on all modes, ignite hob/oven, and test water heater.
- Electrical systems: verify 12V/230V circuits, RCD trip, charger output, and control panel accuracy.
- Furniture & upholstery: check anchorages, hinges, slides, wear, and odors; confirm bed frame rigidity.
- Storage spaces: inspect seals, locks, and damp; confirm spare wheel tools and jack.
Water damage and mould
Start with obvious signs: any soft floor or stained wall needs further investigation. Measure moisture at multiple points and map results; consistently high readings near rooflights and corners indicate typical ingress.
Appliances and fixtures
Every appliance should start reliably and vent correctly. Look for steady blue flames, quick furnace ignition, and fridge cooling within 30–60 minutes on mains or gas.
Electrical systems and controls
Confirm clean polarity, functional RCD trips, charger output, and accurate tank/battery gauges. Inspect inverter/charger settings and cable routes for DIY shortcuts.
Furniture and upholstery
Check seat and bed anchorages, hinge security, slide-out function, and fabric wear. Lift cushions and look at previous leaks or signs of pests.
Storage spaces
Open every locker: seals, hinges, damp signs, and latch alignment matter. Verify external locker keying and that tools are present.
What should you look for on a test drive?
Decide fast with real inputs: choose a route with town, highway, and a grade.
Listen for knocks, monitor braking alignment, watch vibrations, and check cruise RPM.
Confirm steering returns to center, downshift behavior, mirror stability, and wind noise. Validate dash warnings, ABS function, and engine temperature stability.
Which final paperwork checks should you complete?
Before money changes hands, verify V5C, HPI/finance, consistent mileage, service/repair receipts, habitation certificates, MOT history, recall status, and seller ID.
Confirm VINs on plates, dash, and etched glass. Photograph documents and store them with your inspection report.
Which systems and utilities must be function-tested during a motorhome inspection?
You must function-test shore power, inverter/charger, 12V circuits, RCD trip, polarity, pumps, water heater, HVAC, generator under load, and gas ignition/leaks—always prioritizing safety.
Sequence matters: connect shore power, confirm polarity and RCD, verify 12V distribution and charger output, then operate pumps and inspect for leaks under pressure.
Heat water, test space heating and AC, and run the generator with a real load (A/C or microwave) to assess stability and noise. Record outlet tests with an outlet/polarity tester.
For gas, check regulator age and hose date codes, confirm detector alarms, and validate ventilation paths.
This disciplined approach shows condition, reduces risk, and produces the information a serious buyer or dealer expects.
Electrical system
Start by proving safe polarity and RCD/MCB operation. Check 12V distribution, charger/inverter function, control panel readings, USB/12V sockets, and parasitic draw.
Confirm batteries hold voltage and that charging sources (alternator, mains, solar controller) behave as expected.
Plumbing and water systems
Prime the pump, build pressure, and watch for drips at joints, heaters, and fixtures. Test taps, toilet, and tank valves; run the water heater and confirm gauge readings. Look under sinks for warped wood or staining.
Heating, cooling, and HVAC
Run space heaters (gas/diesel/electric) and cab AC; confirm even airflow from all vents and stable thermostat control. Clean or replace filters when airflow is insufficient.
Generator and shore power
Start the generator, warm it under load, verify stable output, and inspect the shore cord and inlet for heat or damage. After testing, plugs should be clean and free of burnt odor.
Propane/gas system
Test for leaks, validate regulator performance and hose dates, confirm cylinder securing and compartment venting, and prove detector function. Confirm each appliance ignites reliably and vents properly.
Chassis and driving components (for motorhomes)
Assess steering, brakes, tyres, alignment, and weight distribution. Weigh the loaded vehicle to confirm payload margins and adjust stowage to balance axles.
Where should you start with specs and documentation during a PDI?
Start by matching VINs, build sheet, and conformity plates, then confirm GVWR/axle ratings, manuals, warranty cards, and the dealer’s PDI checklist remove, unnecessary word.
Validate tank capacities against your travel plans, confirm software/firmware versions on control systems, and count keys/fobs and security codes.
This admin menu reduces later confusion and supports warranty and insurance.
What is included in a pre-delivery inspection (PDI)?
A PDI ensures the motorhome is ready for immediate use. Dealer or third-party should verify system operation, fit-and-finish, fluid levels, recalls, and any required software updates, plus lights, detectors, seals, slide/awning cycles, and documentation handover.
Which documents and specs should you verify?
Verify conformity plates, emissions, service intervals, tyre specs, payload calcs, keys/fobs, and security codes. Compare CCC (Cargo Carrying Capacity) against your planned load of passengers, water, and equipment.
What details are easy to overlook during inspection?
Owners often overlook small but telling items:
- blocked window weep holes
- awning fabric and arm wear
- roof ladder mounts
- hairline sealant cracks
- spare tyre age
- jack/tools presence
- reversing camera function
- satellite/antenna status
- USB/12V sockets
- table leg stability
- blind operation
- damp behind the shower
- misreading tank sensors alarm/immobilizer function
Also check storage-bay seals and hinges, under-bed space, behind-fridge panels, and slide toppers.
What red flags mean you should walk away from a motorhome?
Refuse purchase if you find severe damp or rot, an unresolved gas leak, odometer discrepancies, undisclosed salvage, persistent electrical faults, undeclared accidents, refusal of a cold start, or a seller blocking full inspection.
Add widespread delamination, frame rust-through, multiple non-functional safety systems, and evasive or missing documents. Your money is your veto; use it.
What types of motorhome inspections are available?
A motorhome inspection is any structured review of condition tailored to context:
- pre purchase inspections
- annual maintenance/habitation checks
- courtesy checks
- legal MOT (UK), and state safety/emissions (some US states): Level 1 is visual/safety (~2–3 hours). Level 2 is comprehensive (often 5–8 hours onsite) and may add fluid analysis with lab turnaround.
- Courtesy checks are quick snapshots and don’t replace professional evaluations before major trips or purchases.
Pre-purchase inspections
A pre-purchase inspection is an independent, detailed report used to inform a decision and negotiate price. Expect photo-rich findings, defect grading, and repair estimates; ~3–5 hours for trailers and 5–8 hours for motorhomes.
Annual maintenance/habitation inspections
This scheduled review verifies gas/electrics, damp, and appliance function to spot wear early and maintain warranty expectations. Schedule it before peak travel or following storage.
Courtesy inspections
A courtesy check is a free or low-cost visual pass—roof, tyres, lights—that helps you catch basics. It’s not a substitute for a professional pre-purchase evaluation.
Mandatory state or regional inspections
Requirements differ: the UK mandates MOT, while some US states enforce safety and emissions tests. These confirm road safety and emissions, not cosmetic or habitation condition.
Should you hire a professional motorhome inspector?
Yes—particularly for high-value rigs, complex systems, distance purchases, or when your knowledge is limited.
Professionals bring moisture meters, electrical and gas testers, cameras, and structured methods. Many complete 80+ hours of specialized training, carry insurance, and deliver multi-hundred-point reports with photos and repair estimates.
Mobile teams can visit sellers (travel fees apply). DIY helps you learn the vehicle, but third-party documentation reduces risk and strengthens sales outcomes.
How do you find a reliable inspector?
Choose provider offering sample reports, clear scope, references, and turnaround times. Confirm current credentials, insurance, experience with your RV type, tools used, and whether you can attend.
Certified inspectors and credentials
Credentials show training and standards adherence; ask about continuing education and scope limits.
Mobile inspection services
Mobile services come to you or the seller, saving moves and letting you observe. Expect call-out fees based on distance.
Dealership service centers
Dealers inspect efficiently but may have scheduling pressure; ask for a written scope, technician qualifications, and a neutral checklist.
Where can you find a qualified motorhome inspector?
In the UK, consult national directories, independent experts, and owner forums. Compare inclusions (moisture mapping, gas/electric tests, photo/video), report delivery times, and travel surcharges.
What’s included in a professional motorhome inspection?
Expect hundreds of checklist points, moisture map, gas-tightness and electrical tests, a road test (for motorhomes), photos/video, defect grading, repair estimates, and timelines with “monitor” categories and recheck intervals.
How much does a motorhome inspection cost?
Typical UK ranges are:
- Level 1 about £160–£400
- Level 2 about £400–£800, with possible lab fees for fluid analysis.
- MOT maximum fees are about £54.85 (Class 4) and £58.60 (Class 7).
- Habitation checks commonly £150–£400
Price also depends on duration: ~2–3 hours for basics to 6–9 hours for full reviews plus 3–6 hours of report writing.
Large A-class rigs and complex systems cost more, and some shops decline very large vehicles—seek heavy-vehicle specialists.
What do professional inspection fees typically cover?
Fees generally include onsite time, testing equipment, photo documentation, report writing, and a follow-up call. Clarify whether moisture mapping, gas certification, road test, and photo counts are included or add-ons.
How do costs vary by RV type and location?
Diesel A-class motorhomes cost, cost more than travel trailers due to drivetrain checks; urban areas trend higher than rural.
What does a UK MOT or habitation check cost?
Expect MOT fees near the legal maximums noted above, habitation checks around £150–£400, plus any travel surcharges and re-inspection fees after repairs.
Can you inspect a motorhome yourself?
You can, and you should for routine checks, but treat gas and 230V electrics with caution and call professionals when safety is in question. DIY increases familiarity and saves cost, yet lacks third-party liability and the depth of a trained inspector. Use a structured, printable checklist and still plan a professional inspection for high-value or remote deals.
What tools do you need for a DIY inspection?
Bring a moisture meter, torque wrench, digital tyre gauge, multimeter, polarity tester, basic OBD2 scanner (where applicable), gas-leak detector spray, ladder, PPE, borescope, inspection mirror, flexible-neck flashlight, and a camera for documentation.
What should be on your DIY monthly checklist?
List pressures/tread, detector tests, brief appliance runs, battery voltage checks, exterior seal visuals, roof glance, and lights.
Record dates and photos to maintain a clear history.
What should be on your DIY seasonal checklist?
Cover winterization/de-winterization, roof reseal inspection, deep clean, battery conditioning, and tyre rotation/torque checks.
Add awning deployment, slide topper condition, and undercarriage rust touch-ups.
How should you plan seasonal and pre-trip inspections?
Plan pre-trip checks two weeks before departure and post-storage checks a month ahead. Pre-trip covers tyres/lights/fluids, brake test, gas level/leak check, detectors, visibility, and payload.
Post-storage adds damp and rodent checks, battery health, tyre flat-spot review, stale fuel mitigation, and stuck valves/taps.
What should you check before each trip?
Confirm tyres, lights, fluids, brake feel, gas level/leak test, detectors, mirrors, visibility, and payload/weight distribution. Verify spare, jack, tools, and tow electrics if applicable.
What should you inspect after storage?
Scan for damp, rodent damage, and battery condition; check tyres for flat-spots and assess stale fuel risk. Flush/sanitize water, check roof/slide seals, and test both starter and leisure batteries.
Conclusion
Motorhome safety depends on two pillars: UK MOT for road systems and habitation checks for living systems.
A structured pre-purchase process, organized reports, and sensible maintenance cadence keep your vehicle safe, predictable, and valuable. Whether you go DIY or hire a pro, test each system carefully, document fixes, and keep records tidy.
Мini-checklist: V5C/MOT/habitation certificates filed; roof/seals reviewed; damp scan recorded; gas/electrics tested; tyres age/date confirmed; full test drive completed; photos and report stored for warranty, insurance, and resale.
FAQs
What is the difference between a travel trailer inspection and a motorhome inspection?
A travel trailer inspection focuses on towability (hitch, wiring, jacks, bearings, trailer brakes), while a motorhome inspection adds engine, transmission, chassis wiring, dashboard electronics, and on-road dynamics. Trailers do not include drivetrain checks and often cost less to assess; motorhomes require road testing and fluid considerations.
Comparison Table
| Factor | Travel Trailer | Motorhome |
| Drivetrain | N/A | Engine/gearbox checks |
| Braking | Trailer brake & breakaway | Full hydraulic/ABS balance |
| Tow/Hitch | Critical | N/A |
| Electrical | 12V/shore | 12V/shore + alternator |
| Inspection Time | Shorter | Longer |
| Cost | Lower | Higher |
How long does a motorhome inspection take?
Expect about 45–60 minutes for an MOT, 2–4 hours for a habitation check, and 4–8+ hours for a full pre-purchase inspection. Level 1 reviews run ~2–3 hours; Level 2 often takes a full day onsite, with lab analysis results arriving days later.
How often should I inspect my motorhome?
Do quick checks monthly during use, pre-trip checks before every journey, an annual MOT (UK), an annual habitation check, and seasonal deep checks. Following major repairs or water ingress, schedule an interim recheck in 3–6 months.