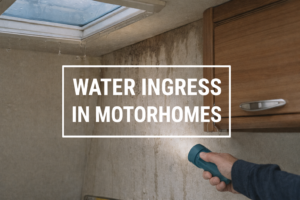


Motorhome servicing is the annual programme of professional inspections that keeps a motorhome roadworthy, gas-safe, structurally sound, and under warranty — covering both the base vehicle chassis and the self-contained habitation area that a standard vehicle service never touches.
UK motorhome registrations increased by 20.2% in 2024, according to National Caravan Council data, and the UK caravan and camping sector contributes £7.2 billion in Gross Value Added to the economy annually, supporting 226,745 full-time jobs.
Key Takeaways
- Motorhomes require two annual services: a habitation check and a base vehicle mechanical service, regardless of mileage.
- The Approved Workshop Scheme lists over 550 accredited workshops across the UK; annual habitation checks cost £200–£350 in 2025.
- Missing a single habitation service can void a water ingress warranty lasting up to 10 years on a new UK motorhome.
That growth in ownership makes understanding servicing more important than ever. This guide covers every aspect of motorhome servicing in the following order: how often a motorhome should be serviced and what an annual service includes; what routine checks owners should perform between services; which tasks must only be handled by professionals; winter preparation and winter touring; getting started as a beginner; why servicing matters; what motorhome servicing and habitation checks actually are; how engine and mechanical requirements differ from car servicing; bodywork and exterior maintenance; safety and security systems; damp surveys; the difference between an MOT and a full service; how to navigate a professional service visit; costs; how service records affect warranty and resale value; motorhome versus caravan servicing; when to book urgent repairs; how to choose a service centre; booking timelines; the regulatory framework; preventive maintenance habits; and how to tour with confidence after every service.
How often should a motorhome be serviced and what does an annual service include?
Annual is the answer — regardless of mileage. A habitation service is required every twelve months, and a base vehicle mechanical service at least once a year or every 10,000–15,000 miles, whichever comes first. These two intervals are independent of each other: a motorhome that travels only 2,000 miles in twelve months still requires both services. Low-mileage use does not delay the habitation service because condensation, seal deterioration, and gas regulator ageing occur through time, not through distance.
The habitation service addresses every system in the living area — gas, electrical, water, ventilation, damp, and fire safety — and must be carried out by an Approved Workshop Scheme (AWS) accredited engineer. The base vehicle mechanical service is performed by a qualified vehicle mechanic following the chassis manufacturer’s schedule. These are two distinct services requiring different skill sets, and some larger workshops offer combined same-day bookings so both can be completed in a single visit.
Warranty compliance depends on adherence to the schedule. Annual habitation service adherence is required to maintain both the habitation warranty and the water ingress warranty on new motorhomes. Missing a service — even by a matter of weeks, depending on the manufacturer’s window — can invalidate a warranty that would otherwise protect against the most expensive repairs a motorhome can require.
A full annual service has two components: the base vehicle mechanical service and the annual habitation service. The sections below detail what each covers.
Engine and mechanical service scope
The mechanical service scope covers every system in the base vehicle chassis — the engine, running gear, and safety-critical mechanical components. A qualified vehicle mechanic carries out this work, not an AWS habitation engineer — the two roles require different qualifications and tools.
A standard base vehicle service covers the following ten items:
- Engine oil and filter change — using the oil specification recommended by the chassis manufacturer (long-life oils are not always appropriate for low-mileage motorhome use patterns).
- Fuel filter replacement — at the manufacturer’s specified interval; blocked fuel filters restrict fuel delivery and affect engine performance.
- Air and pollen filter inspection and replacement — pollen filters accumulate debris rapidly in vehicles stored near vegetation.
- Brake inspection and brake fluid change — brake fluid is hygroscopic and absorbs moisture over time; replacement is recommended every two years regardless of mileage.
- Steering and suspension check — ball joints, steering rack gaiters, shock absorbers, and springs are assessed for wear; motorhomes operating near their maximum gross vehicle weight (GVW) accelerate wear on rear suspension components.
- Tyre condition assessment — tread depth, pressure, sidewall condition, and age (via the DOT sidewall date code).
- Lights and emissions check — all exterior lights and an OBD diagnostic scan to identify any fault codes stored in the engine management system.
- Timing belt or chain inspection and replacement — typically required every five years or per manufacturer specification, whichever comes first; incorrect timing belt installation can cause catastrophic engine failure.
- Cooling system check — coolant level, condition, and hose integrity; coolant replacement is typically required every five years.
- Drivetrain check and road test — final verification of clutch, transmission, and driveshaft condition followed by a short road test to confirm performance under normal operating conditions.
Habitation service scope
A habitation service checks all living-area systems — gas, electrical, water, ventilation, damp, and fire safety — and typically covers approximately 50 individual inspection points. This section provides an overview of the system categories; the full itemised breakdown appears in the dedicated “What does a habitation check cover?” section later in this guide.
The habitation service scope is entirely distinct from any work on the engine, transmission, or mechanical components of the base vehicle. Six system categories are covered:
- Gas system — gas-tightness test under pressure, inspection of cylinders, regulators, hoses, and pipes; appliance function testing of the hob, oven, grill, fridge, heater, and water heater; gas compartment seal and ventilation check.
- Electrical systems — 230V RCD test, polarity test, earth bonding, consumer unit inspection; 12V charging system test including leisure battery condition; fridge operation on both 12V and mains supplies; all internal and external lights.
- Water system — fresh water tank, pump, pressure switch, taps, shower, and toilet checked for leaks and correct operation; wet heating system (if fitted) inspected; sterilisation recommendation for fresh water tank.
- Ventilation — rooflights, fixed vents, and windows verified for unobstructed airflow, correct opening and closing function, and adequate gas dispersal capacity.
- Damp check — moisture ingress scan across all wall, ceiling, and floor panels using a specialist damp meter; readings above 20% trigger investigation and remediation assessment.
- Fire and CO safety devices — smoke alarm function test, CO detector function and age check, fire extinguisher pressure check, fire blanket seal inspection.
A standard habitation check covers approximately 50 individual items and takes approximately three hours. More comprehensive checks — including detailed appliance inspection or extensive damp investigations — can take up to four hours. Travelworld’s habitation service, for reference, is a defined 42-point inspection package.
Bodywork and chassis checks included in an annual service
Bodywork and chassis checks form part of the full annual service, covering everything from sealant seams and panel condition to chassis mountings and torque-checked wheel fixings. These checks are often performed alongside the habitation inspection, as many of the access points for damp meter readings require examining the same external surfaces.
Eight areas are covered in the bodywork and chassis inspection:
- Underside corrosion inspection — chassis rails, outriggers, and floor mounting points checked for corrosion, especially in older motorhomes where floor-fixing bolts can corrode through time.
- Body panel condition — GRP or painted panel surfaces inspected for cracks, bubbling, or impact damage that could allow water penetration.
- Sealant seam inspection — the primary cause of water ingress is sealant degradation around windows, doors, roof joints, and external locker surrounds; every seam is assessed for cracking, lifting, or gaps.
- External lights, mirrors, and windscreen — all exterior lights tested, mirrors and windscreen assessed for condition; these items are also MOT check points.
- Wipers and washers — blade condition and washer jet function verified.
- External accessories — awning rail and fabric condition, bike rack security and torque, any other accessory fixing points.
- Torque check on wheel fixings — wheel bolts verified at correct torque; loose wheel fixings are a safety-critical fault.
- Chassis mounting integrity — chassis-to-habitation body mounting points checked for integrity and corrosion; this check is unique to motorhome-specific servicing and is not part of a standard vehicle inspection.
Service intervals: time versus mileage guidance
Selecting the right service interval depends on annual mileage, storage patterns, and manufacturer warranty requirements — and in most cases, the time-based interval should take precedence over mileage. A motorhome that covers only 3,000 miles in twelve months should not defer its base vehicle service simply because the mileage threshold has not been reached.
The “time beats miles” principle is particularly relevant to motorhomes for three reasons. First, condensation accumulates in engine oil during short movements and infrequent use, degrading the oil’s protective properties regardless of total mileage. Second, rubber seals, coolant hoses, and brake hoses deteriorate through ageing independently of use. Third, brake disc surface corrosion develops when a motorhome sits unused for extended periods, which can produce judder on first use after storage.
Long-life engine oils have specific compatibility requirements. Not always suitable for motorhome usage patterns of short trips and long idle periods, they can leave owners worse off than a conventional oil changed on a time schedule — which is often the more appropriate choice.
For warranty purposes, manufacturer requirements vary. Some require the service to be completed within a 60-day window of the anniversary; others allow up to six months. Checking the specific window in the motorhome handbook or with the manufacturer at the point of purchase prevents inadvertent warranty invalidation. The habitation service operates on a strict annual schedule regardless of mileage — there is no mileage-based extension.
What routine checks should owners perform between services?
Between professional services, motorhome owners should carry out regular self-checks across eleven systems — most of which can be completed in under 30 minutes with no specialist tools. These checks do not replace professional servicing; they form the second layer of a maintenance system whose foundation is the annual service.
The eleven check categories, each with a recommended frequency, are:
- Safety inspections — pre-trip
- Electrical connections — pre-trip
- Engine and drivetrain fluids — monthly
- Water system — monthly
- Tyres — monthly
- Battery care — monthly
- Gas system visual checks — monthly
- Seals and bodywork — monthly
- Lights, wipers, washers, and mirrors — pre-trip
- Roof, awning, and external accessories — monthly
- Toilet and waste systems — monthly during touring season
Safety inspections
Safety devices should be tested before every trip — smoke alarms, CO detectors, and fire equipment take under two minutes to verify. A failed CO detector in a sealed motorhome with gas appliances running overnight is a life-safety risk, not an advisory item.
Before every departure, complete these five safety checks:
- Smoke alarm — press the test button; a functioning alarm will sound immediately. Replace batteries annually or as directed.
- CO detector — press the test button; verify the indicator confirms function. CO detectors have a manufacturer-stamped expiry date — check it is not overdue.
- Fire extinguisher — check the pressure indicator needle is in the green zone; if it is in the red, the extinguisher requires servicing before use.
- Fire blanket — confirm the seal on the housing is intact; a broken seal indicates the blanket may have been partially deployed and requires replacement.
- Gas cylinders — confirm cylinders are properly secured in their compartment and the gas compartment seal closes correctly.
Electrical connections
A quick electrical walkround covers hook-up cable integrity, lighting function, and leisure battery charge level — all checkable without specialist tools. Any persistent RCD (Residual Current Device) trips require immediate professional attention; do not attempt to diagnose 230V wiring faults yourself.
Owner-checkable electrical items include:
- Shore power hook-up cable — inspect the full length of the cable for fraying, cracked insulation, or bent pins; a damaged cable is a fire and electric shock hazard.
- 12V socket function — verify at least one 12V socket operates correctly, confirming the leisure battery is connected and charged.
- Internal and external lighting — test all habitation lights; a non-functional external light may be an MOT failure item.
- RCD trip test — press the test button on the consumer unit; the RCD should trip immediately. Reset it after testing to confirm it also resets correctly.
- Leisure battery charge indicator — monitor the battery state of charge display; a leisure battery that is consistently low during use may be reaching the end of its service life.
Engine and drivetrain fluids
Monthly underbonnet checks take five minutes and cover the six fluids that can cause immediate mechanical failure if they run low. Low oil or coolant should always be investigated before driving — topping up and ignoring the underlying cause risks major engine damage.
The six fluids to check monthly:
- Engine oil — check level and colour on the dipstick; dark or milky oil indicates contamination and requires investigation before the next trip.
- Coolant — check level in the expansion tank against the min/max marks; discolouration or floating debris warrants professional inspection.
- Brake fluid — check level in the reservoir; a progressively dropping level may indicate a brake system leak.
- Power steering fluid — check level if the base vehicle has hydraulic power steering (some modern base vehicles use electric power steering with no fluid reservoir).
- Windscreen washer fluid — top up regularly; running dry risks washer jet and pump damage and is an MOT advisory item.
- AdBlue — on Euro 6 diesel motorhomes, monitor the AdBlue level and top up with the correct specification fluid; a vehicle that exhausts its AdBlue supply will eventually be prevented from starting.
Water system care
The water system should be checked for leaks and drips at least monthly — undetected micro-leaks are a primary contributor to damp readings inside the habitation area. Even a slow drip under the bed or behind a kitchen unit, left undetected for several weeks, creates moisture conditions that generate high damp meter readings at the next habitation service.
Monthly water system checks should cover these four actions:
- Visual inspection for drips — check under the bed, around the shower tray, beneath the sink unit, and under any visible pipe runs for moisture or staining.
- Water pump function test — run the pump briefly with taps closed to verify pressure is building correctly; an unusually noisy pump may indicate air in the system or low tank level.
- Fresh water tank sterilisation — sterilise at least twice per year (spring and autumn) using a leisure vehicle-grade sterilisation product; bacteria and algae accumulate in tanks that are left partially full between uses.
- Full drain-down before storage — drain the fresh water tank, run all taps until flow stops, and open any accessible drain plugs before any storage period exceeding two weeks.
Tyres
Motorhome tyres require more frequent pressure checks than car tyres — load, temperature, and storage conditions all affect tyre integrity, and age matters as much as tread depth. The correct pressure for a motorhome is higher than a car and is often different front to rear when the vehicle is loaded; the correct pressures are shown on the motorhome’s tyre placard or in the handbook.
Monthly tyre checks should cover:
- Pressure check — check when cold, before driving; use the pressures specified for the loaded condition when preparing for a trip.
- Tread depth — the UK legal minimum is 1.6mm; replacing at 3mm is recommended because of the increased stopping distances at the legal minimum, particularly on a laden motorhome.
- Sidewall inspection — check for cracking, bulges, or cuts on both the inner and outer sidewall; sidewall damage that penetrates the structure of the tyre requires immediate replacement.
- Age check — locate the four-digit DOT date code on each tyre sidewall; the first two digits are the week of manufacture and the second two are the year. Motorhome tyres should ideally be replaced before seven years of age regardless of remaining tread depth, because the rubber compound degrades through UV exposure and ozone cracking even when the tyre is not in use.
Battery care (starter and leisure)
Motorhomes carry two batteries — a starter battery for the engine and a leisure battery for the habitation area — and both require separate maintenance attention. The starter battery powers the engine and base vehicle electrics; the leisure battery powers 12V habitation appliances, lighting, and the water pump when off-grid.
In-season battery maintenance covers four checks:
- Starter battery charge state — if the motorhome is stored between trips for more than two weeks, check the starter battery charge state; a consistently low starter battery may indicate a parasitic drain or a battery approaching end of life.
- Leisure battery charge cycles — monitor how quickly the leisure battery depletes during a day’s use; a battery that no longer holds its charge through a single day is likely deteriorating.
- 50% discharge rule — flooded lead-acid leisure batteries should not be discharged below 50% of their rated capacity; repeated deep discharges below this threshold significantly shorten service life.
- Terminal condition — check both batteries for white or greenish corrosion around the terminals; clean with a dedicated battery terminal cleaner and apply terminal protector spray.
Leisure batteries typically have a service life of three to five years under normal use conditions. A battery more than five years old and showing reduced performance should be replaced before the next touring season.
Gas system visual checks
Gas system visual checks are limited to what an owner can safely observe — any pressure testing or leak detection must be carried out by a qualified gas engineer. An owner should never attempt to test gas tightness or rectify a gas leak independently.
Four owner-safe visual checks apply here:
- Regulator condition — inspect the gas regulator for visible corrosion or physical damage; the manufacture date is stamped on the regulator body and a regulator over ten years old should be replaced during the next professional service.
- Hose condition — check flexible gas hoses for surface cracking, brittleness, or kinking; a degraded hose should be flagged to the service engineer immediately.
- Cylinder security — verify that gas cylinders are properly restrained in the gas compartment and cannot move during travel.
- Compartment ventilation — check that the gas compartment ventilation slot is clear and unobstructed; blocked gas compartment ventilation prevents safe dispersal of any released gas.
If a gas smell is detected at any time — inside or outside the motorhome — turn off the gas supply at the cylinder immediately, ventilate the motorhome fully, leave the vehicle, and contact a qualified gas engineer before using the motorhome again.
Seals and bodywork quick inspections
A monthly external seal check takes less than ten minutes and is one of the most cost-effective things an owner can do to prevent water ingress. Proactive resealing at the first sign of degradation costs a fraction of the structural damp repair costs that follow undetected ingress.
A monthly seal walkround covers five areas:
- Window frame sealant seams — look for cracks, gaps, lifting, or discolouration in the sealant bead around every window; pay particular attention to the bottom corners where water collects.
- Roof joint sealant — check the sealant where the roof panel meets the sidewalls; this is a high-stress joint that is vulnerable to cracking through thermal cycling.
- External access locker seams — check the perimeter sealant around every storage locker opening; a loose locker lid seal allows water ingress directly into the structural wall.
- Habitation door seal — check the rubber compression seal around the habitation door for cracking, compression loss, or sections that have pulled away from their track.
- General inspection for lifting or gaps — any sealant that is visibly separating from its substrate should be professionally resealed before the next tour; do not apply additional sealant over cracked sealant without removing the degraded material first.
Lights, wipers, washers and mirrors
Lights, wipers, washers, and mirrors are the fastest pre-trip check — a complete walk-round takes under two minutes and covers items that could fail an MOT. A defective brake light or a missing number plate light is both a police stop risk and an MOT failure point.
Five items to check before every journey:
- Headlights and sidelights — confirm both dipped and full beam function correctly on both sides.
- Indicators, brake lights, and reverse lights — check all three circuits; brake light checks require a second person or a wall reflection.
- Number plate lights — a common MOT failure; check both number plate light bulbs are functioning.
- Wiper blade condition and washer jets — check blades are clearing cleanly without streaking; verify both front and rear washer jets are operational.
- Mirror condition and adjustment — confirm mirrors are correctly positioned and that glass is intact with no chips that obscure the rearward field of view.
Roof, awning and external accessories
Roof-mounted fittings and awning rails are high-risk water ingress points and should be visually checked from ground level at least monthly. Roof-penetrating fittings are among the most common locations for the onset of structural water ingress — particularly when sealant has degraded around aerial bases or rooflight surrounds.
A monthly roof and accessories check should cover four areas:
- Roof panel and rooflight surrounds — from ground level using binoculars or from a ladder where safe, check for cracked or lifting sealant around every rooflight, satellite dish, aerial fixing, or ventilation hatch; any sealant separation should be professionally inspected and resealed as part of the annual service.
- Awning rail and fabric condition — check the awning fabric for tears, mould patches, or broken guide runners; inspect the awning rail for cracks or bowing; ensure the auto-stop function works correctly on electric awnings.
- Bike rack security and torque — verify that the bike rack fixings are secure and that any bikes mounted comply with the rack’s load rating; overloading a rear-mounted rack increases rear axle weight and affects rear tyre wear and braking.
- External accessory fixings — check all external accessories (aerial mounts, satellite dishes, solar panel frames) for security; loose fittings vibrate under motorway driving conditions and progressively enlarge their fixing holes, creating new water ingress points.
Toilet and waste systems
The toilet and waste system require monthly attention during touring season — cassette seal lubrication and regular emptying prevent both odours and seal deterioration. A failed blade seal on a cassette toilet is one of the most common service-identified advisory items and is entirely preventable through regular maintenance.
Three tasks apply monthly:
- Cassette blade seal lubrication — apply the correct lubricant (specified by the toilet manufacturer; typically a blade seal lubricant rather than an oil-based product) to the blade seal mechanism; a dry seal deteriorates rapidly and allows waste odours into the habitation area.
- Cassette capacity and emptying — check the cassette level indicator regularly and empty before it reaches capacity; overfilling damages the seal and creates sanitation issues.
- Waste water drain inspection — check the grey water outlet and any waste tank drain fittings for blockages or leaks; clean and deodorise waste systems monthly during the touring season using a leisure vehicle-grade waste treatment product.
Which servicing tasks should only be handled by professionals?
Eight categories of motorhome maintenance must only be handled by qualified professionals — the risks of DIY error in these areas range from voided warranty to life-threatening system failure. Understanding these boundaries clearly protects both the owner’s safety and the motorhome’s warranty and insurance coverage.
- Gas pressure and leak testing — requires a calibrated manometer and an ACS (Approved Competency Scheme) qualified gas technician. Owner gas smell detection using soapy water is not an adequate substitute for a full pressure decay test; a leak can persist below sensory threshold.
- 230V insulation and earth-bonding tests — requires specialist electrical test instruments and a competent person qualified to BS 7671. Untested 230V wiring can produce fatal electric shock at the hook-up cable or any socket in the vehicle.
- ECU and OBD diagnostics — requires a manufacturer-compatible diagnostic scanner and access to fault code databases; misinterpreting fault codes without the correct software leads to incorrect repairs and can introduce new faults.
- Brake servicing (calipers, pads, discs, drums) — brake components are safety-critical and require calibrated torque settings and specialist brake bleeding equipment; an incorrectly bedded brake pad or an improperly bled system is a road safety risk.
- Timing belt replacement — incorrect installation of a timing belt can cause immediate valve-to-piston contact resulting in catastrophic engine failure; this is one of the most consequential DIY errors possible on a diesel base vehicle.
- Wheel alignment — requires laser alignment equipment; incorrect alignment accelerates tyre wear, affects handling, and can make the vehicle unsafe at motorway speeds with a fully loaded motorhome.
- Structural and damp repairs — water ingress remediation involving wall or floor delamination requires specialist panel assessment, substrate drying, and panel replacement or injection techniques; incorrect amateur repair locks moisture in and accelerates structural failure.
- Airbag and ABS fault rectification — airbag systems require depowering procedures to prevent accidental deployment during diagnosis; ABS faults require specialist brake system diagnostic tools and procedures.
Gas space heaters and water heaters may require a full appliance service as a separate booking beyond the standard habitation inspection — this is not included in the standard habitation check and should be arranged with the manufacturer’s recommended service agent or a qualified leisure vehicle gas engineer.
For owners who have added major accessories — including satellite dish systems, air conditioning units, Alde or Truma wet heating upgrades, or solar panel arrays — the annual habitation check may test basic function but does not replace dedicated servicing from the original installation company. Major upgrades should only be installed and maintained by specialist technicians, and the habitation check is not a substitute for their dedicated maintenance schedules.
Peer-to-peer rental adds a further servicing obligation. If you hire out your motorhome on a platform such as Goboony or Outdoorsy, the annual habitation check is required but is not sufficient on its own — additional separate gas and electrical safety certificates, carried out by qualified leisure industry technicians, are also required for rental use.
How should you prepare your motorhome for winter?
Winter preparation involves eight core tasks — from a full water system drain-down to battery conditioning — and should ideally follow a professional service to ensure the vehicle is in sound condition before being stored. Worth distinguishing clearly: winter prep and a winter service are different things. Preparation is owner-performed and covers storage-specific tasks; a full service should precede the layup so that any faults are identified before the vehicle sits unused for three to five months.
The eight core winter preparation tasks are: a full water system drain-down with antifreeze protection where needed; battery maintenance for both starter and leisure batteries; ventilation and mould prevention; tyre inflation and jacking or support management; fuel system stabilisation; security and storage location review; bodywork seal inspection before closing up; and an insurance policy check to confirm the storage location is covered.
Full drain-down and antifreeze protection
A full water system drain-down is the single most important winter preparation task — frozen water in fittings or pipes can split connectors and create invisible leaks that cause damp over winter. Water left in a frozen pipe does not simply expand and return to normal on thawing; it can split a push-fit connector or crack a pump housing, leaving the owner to discover the damage in spring when water is reintroduced into the system.
Six steps produce a complete drain-down:
- Drain the fresh water tank — use the manual drain tap at the base of the tank; do not leave water in the tank over winter even if stored in a garage.
- Run all taps until flow stops — open every hot and cold tap, including the shower mixer, and run until the pump draws air; this ensures all supply pipes are empty.
- Flush the toilet — operate the flush mechanism repeatedly until no water remains in the supply line.
- Drain the water heater — allow the heater to cool completely before opening the drain plug; residual hot water is a scalding risk. Note the drain plug location in the handbook before attempting this.
- Open the pump drain plug — if the pump is accessible and has a drain port, open it; if not, activate the pump briefly after the pipes are empty to clear residual water from the impeller chamber.
- Apply non-toxic antifreeze where full drain is not possible — in systems with inaccessible low points, pump leisure vehicle-grade non-toxic antifreeze through the system via the fresh water tank; use only antifreeze that is specifically rated safe for potable water systems.
Battery storage and trickle charging
Batteries left in a discharged state over winter are often permanently damaged — a smart trickle charger on both the starter and leisure battery prevents this. A battery that fully discharges and remains in a sulphated state for several months may not recover sufficient capacity to power the vehicle reliably, requiring replacement before the next touring season.
Winter battery management involves four steps:
- Disconnect the leisure battery — if the battery can be physically disconnected from the 12V habitation circuit, do so; even with no active load, the control systems in a modern motorhome draw a small parasitic current that will discharge a leisure battery completely over a winter layup.
- Connect a smart trickle charger — use a smart charger specifically rated for leisure batteries, not a standard car battery charger; leisure batteries have different charge acceptance profiles and a car charger can overcharge them at high state of charge.
- Maintain the starter battery — connect a separate smart trickle charger to the starter battery, or start and run the engine briefly (at least 20 minutes at above-idle revs) once per month during winter storage to allow the alternator to recharge it.
- Monthly state-of-charge check — verify both batteries are holding a healthy charge once per month throughout the winter layup period; a battery that is consistently falling below 12V overnight despite charging warrants replacement.
Ventilation and mould prevention
Condensation and mould form rapidly in a sealed motorhome — proper ventilation during winter storage is essential for both vehicle condition and insurance compliance. A tightly sealed motorhome with residual moisture from the last trip will develop visible mould on soft furnishings and ceiling panels within a matter of weeks, and the remediation cost significantly exceeds the cost of prevention.
Before closing the motorhome for winter, apply these four measures:
- Ensure the vehicle is thoroughly dry — wipe down all surfaces, remove damp clothing, towels, or bedding, and check under the mattress for condensation before closing up.
- Leave rooflights slightly open — use purpose-made ventilation covers (available from motorhome accessory retailers) to allow airflow while preventing rain ingress.
- Place moisture-absorbing sachets inside — two or three large dehumidifier sachets distributed through the habitation area significantly reduce humidity during storage; some insurers specifically require this as a condition of storage cover.
- Remove or store soft furnishings — sofa cushions and mattresses can be stored upright to allow air circulation on both sides; this prevents localised moisture pockets forming under compressed foam.
Note that some insurers require confirmation that ventilation has been maintained during storage — check your policy wording before closing the vehicle.
Tyres and jacking/support
Motorhome tyres develop flat spots during long-term storage — inflate to maximum rated pressure, move the vehicle monthly, or use tyre savers to distribute the load. A flat-spotted tyre causes noticeable vibration during the first several miles of use after storage and can, in severe cases, require replacement if the flat spot has permanently deformed the tyre structure.
Four tyre management steps apply during winter storage:
- Inflate to maximum rated pressure — higher than normal running pressure, this distributes the tyre load more evenly and reduces flat-spot development; the maximum pressure is moulded into the tyre sidewall.
- Move the vehicle forward or backward by half a tyre rotation — moving the vehicle by approximately half a metre every two to four weeks repositions the load contact patch and prevents a permanent set developing in the tyre carcass.
- Use tyre saver platforms — plastic platforms that fit under each tyre and spread the contact load; particularly useful in storage locations where moving the vehicle regularly is impractical.
- Check tyre age before the next season — use the DOT sidewall date code to verify that no tyre will exceed seven years of age during the coming touring season; tyres approaching this threshold should be replaced before the season begins regardless of remaining tread depth.
How can you tour safely and comfortably in winter?
Winter touring in a motorhome is practical and comfortable with the right preparation — the key areas to manage are heating efficiency, condensation, the water system, and adapted driving behaviour. This section is specifically for owners who continue touring through the winter months rather than laying up the vehicle; it is distinct from the winter preparation section above, which addresses storage.
UK campsites operating in winter typically offer full hook-up facilities on reduced pitch numbers, so booking ahead is essential — many sites do not publish their winter availability online and require a direct call to confirm. Tourers should expect shorter daylight hours to reduce the window for outdoor activities and plan driving distances accordingly.
Heating and insulation best practices
Effective winter heating depends on using the motorhome’s integrated heating system correctly — and managing condensation through controlled brief ventilation rather than running the heating constantly at maximum. Sustained maximum heating with no ventilation drives moisture into wall panels and soft furnishings, generating the same damp conditions that result from a water ingress problem.
Five heating and insulation principles apply during winter touring:
- Use the integrated blown-air or wet central heating system — Truma Combi, Alde, and Webasto systems are designed for sustained habitation heating; standalone portable gas heaters used in an enclosed space carry a carbon monoxide risk if ventilation is insufficient.
- Understand gas/electric combination modes — most integrated systems can run on gas, on mains electric (via hook-up), or on a combination; using the electric mode on hook-up reduces gas consumption and is generally quieter overnight.
- Fit and use insulated cab blinds and habitation thermal blinds — the cab windscreen and glazed habitation windows are the principal heat loss surfaces; purpose-made thermal blinds reduce heat loss by significantly reducing cold air circulation at the glass surface.
- Close the cab-area curtain if fitted — the cab area of a coach-built motorhome is effectively uninsulated relative to the habitation area; closing the internal curtain between the cab and habitation area reduces the heating load considerably.
- Ventilate briefly to clear condensation — open a rooflight for five to ten minutes after cooking or showering to purge humid air; this brief ventilation has a negligible effect on temperature but prevents moisture accumulation on cold surfaces.
Running gas heating overnight is normal practice in a motorhome, but a functioning CO detector is an absolute prerequisite — always verify the detector is working before sleeping with gas appliances running.
Water and waste in freezing conditions
In freezing temperatures, the water system is the most vulnerable part of a touring motorhome — internal temperature management and insulated external connections prevent the most common cold-weather failures. Below 0°C, unprotected pipe runs and external connections can freeze within hours of the temperature dropping if the habitation heating is off.
Five measures protect the water system during winter touring:
- Maintain internal temperature above 5°C overnight — the heating system should never be turned off completely overnight in freezing conditions; even low-level heating prevents pipe runs within the floor and wall structure from freezing.
- Drain the water heater on extreme cold nights — on nights where the temperature is forecast to fall below minus 5°C, draining the water heater prevents freeze damage to the heater body and heat exchanger.
- Insulate the external campsite water hose connection — wrap the connection with foam pipe lagging or a purpose-made insulating cover; an uninsulated hose connected to an outdoor standpipe can freeze solid overnight.
- Use slightly heated water containers if the external connection freezes — if the campsite standpipe freezes, carry pre-warmed water containers as a backup supply.
- Empty the cassette toilet more frequently — cold temperatures slow waste decomposition and increase the speed at which the cassette reaches capacity; empty more regularly than you would in summer to avoid overfill.
Winter driving and equipment
Motorhomes require adapted winter driving technique — laden weight, high centre of gravity, and rear overhang all affect handling and braking distances in cold and wet conditions. A fully laden motorhome operating at or near its maximum GVW has significantly longer stopping distances than a car on the same road surface, and this is exacerbated on wet or icy roads.
Seven driving and equipment points apply during winter touring:
- Increase following distance — use at least a four-second following gap on wet roads; increase to eight seconds or more on icy surfaces.
- Avoid rear overloading — placing excess weight behind the rear axle amplifies the rear overhang effect, which reduces front axle steering authority and can cause the vehicle to feel loose under cornering.
- Use engine braking on descents — select a lower gear before descending a steep hill rather than riding the footbrake; sustained brake application on a laden motorhome generates heat that can lead to brake fade.
- Snow chains in the UK — snow chains are not legal on most UK public roads at normal winter driving speeds; they are only appropriate in exceptional Highland conditions where roads have not been cleared and gritted. Snow tyres provide a better general-purpose solution for UK winter driving, particularly in Scotland and upland Wales.
- Carry a winter emergency kit — the recommended winter emergency kit contains a high-visibility vest, a warning triangle, a small shovel, jump leads or a battery booster pack, a torch, warm clothing, and food and water for two days; a tow rope is also advisable.
- Check campsite access routes — some campsite access lanes are unsuitable for motorhomes in icy conditions; contact the site before arrival to confirm road conditions.
- Allow extra time — reduced visibility, slower road speeds, and the need for more cautious driving technique all extend journey times in winter; plan itineraries with generous time margins.
How should beginners get started with motorhome servicing?
Beginners should approach motorhome servicing through six structured steps — starting with the handbooks and ending with a habit of fault logging that makes every service more effective. The initial period of motorhome ownership is the most important time to establish a systematic approach: the warranty window is active, and the owner is still learning how the systems function.
The six steps are:
- Read both handbooks — the motorhome habitation handbook (provided by the converter) and the base vehicle handbook (provided by the chassis manufacturer, e.g., Fiat, Peugeot, or Mercedes) contain the service schedules, fluid specifications, and warranty terms; locate the specific service intervals and confirm the warranty window requirement (60 days or six months from the anniversary, depending on manufacturer).
- Confirm warranty requirements — contact the dealer or manufacturer directly to confirm which services are required, which workshop accreditation is needed, and what documentation must be retained; do this in writing so there is a record of what was confirmed.
- Book the first professional service early — reputable workshops fill appointments quickly, and the warranty window can be tight; for a motorhome purchased in spring, the autumn booking window for a first-year service approaches faster than many owners expect. Some manufacturers require the first habitation service within 60 days of the anniversary.
- Assemble a basic owner toolkit — five items cover the most important between-service checks: a torque wrench (for checking wheel nut torque), a quality tyre pressure gauge (a dedicated gauge rather than a forecourt gauge), a portable tyre inflator, a multimeter or battery voltage tester (for checking both battery types), and optionally a surface-contact damp meter (for early damp detection between habitation services).
- Practise the routine between-service checks — the eleven system checks detailed in the “What routine checks should owners perform between services?” section of this guide provide the framework; carry them out consistently before every trip and monthly during the touring season.
- Keep a fault log — maintain a written list of any unusual noise, smell, vibration, or system behaviour observed during use, and bring the list to every service appointment; sharing a written fault log with the engineer ensures known concerns receive targeted inspection rather than being overlooked during the standard service sequence.
Why is regular motorhome servicing important?
Safety, warranty protection, and resale value — those three outcomes depend on the same discipline. Regular motorhome servicing delivers eight measurable benefits, and the most consequential risks from neglecting it hit all three simultaneously. According to the UK Caravan and Camping Alliance’s 2024 Pitching the Value report, touring visitors and holiday caravan owners spend 12% more than the UK national tourism average and stay 82% longer — an economic contribution that depends on safe, well-maintained vehicles. A motorhome that is not professionally serviced annually is one that exposes its owner to risks across every one of those categories at once.
When the time comes to sell, a well-serviced motorhome with a complete documented service history commands a significantly higher price than an unserviced equivalent — a fact that any experienced motorhome dealer will confirm immediately when making a purchase offer.
Eight benefits of regular motorhome servicing:
- Maintains safety — gas leaks, 230V electrical faults, and undetected damp are all life-safety risks; professional inspection of these systems annually is the only reliable method for detecting faults before they cause harm. Annual checks are equally important for older motorhomes, which are more susceptible to age-related deterioration in gas fittings, electrical connections, and structural sealants.
- Preserves warranty validity — habitation and water ingress warranties on new motorhomes both require annual servicing by an approved technician as a condition of validity; a lapsed service invalidates the warranty even if no other fault has occurred.
- Protects resale value — a complete service history is a primary expectation for used motorhome buyers; an unserviced motorhome is harder to sell and achieves a lower price; the documented history is a financial asset, not just a paper record.
- Enables early fault detection — a habitation engineer identifying a rising damp reading at 18% at one service can monitor it at the next; an undetected reading at 25% discovered years later represents a substantially more expensive repair.
- Extends vehicle lifespan — regular base vehicle servicing prevents accelerated wear from degraded oil, worn filters, and deteriorating brake fluid; a well-maintained motorhome can remain in reliable use well beyond average vehicle lifespans.
- Provides legal documentation for insurance claims — annual service records demonstrate that the vehicle was professionally maintained; without this documentation, an insurer investigating a gas, electrical, or damp-related claim may raise a negligence challenge that the owner cannot defend.
- Verifies appliance efficiency — gas appliances that are not correctly adjusted consume more fuel for the same heat output; a poorly calibrated boiler or heater identified during a habitation service can be corrected, reducing running costs.
- Provides peace of mind before touring — a motorhome with a current service record has been professionally verified as safe; this is a practical benefit, not just an emotional one, and it is particularly relevant to owners who tour remotely or internationally where breakdown assistance may be difficult to obtain.
Even after manufacturer warranties have lapsed, annual habitation checks remain strongly recommended for safety and early fault detection. An older motorhome is not exempt from gas regulator ageing, seal deterioration, or leisure battery degradation — these risks increase with age rather than diminishing.
According to the UK Caravan and Camping Alliance’s 2024 Pitching the Value report, touring visitors and holiday caravan owners spend 12% more than the UK national tourism average and stay 82% longer — an economic contribution that depends on safe, well-maintained vehicles.
What is motorhome servicing?
Motorhome servicing is the combination of two distinct professional inspections: a base vehicle mechanical service covering the chassis and drivetrain, and a habitation service covering the living area’s gas, electrical, water, ventilation, damp, and fire safety systems. Together, they form the complete annual service requirement for a motorhome.
A motorhome combines an automotive chassis — typically a Fiat Ducato, Peugeot Boxer, or Mercedes Sprinter platform — with a self-contained domestic living area built by a specialist converter. This dual nature makes it a fundamentally more complex service requirement than a standard vehicle: the base vehicle requires mechanical servicing by a qualified vehicle mechanic following the chassis manufacturer’s schedule, while the habitation area requires a separate inspection by an AWS-accredited engineer using gas and electrical test equipment that is not part of a standard vehicle service.
The habitation service covers approximately 50 individual inspection items across six system categories. The base vehicle service covers the engine, running gear, brake system, cooling system, drivetrain, and emissions hardware. Neither service overlaps with the other: a completed MOT does not satisfy either service requirement, and a completed habitation check does not address any mechanical component.
Annual motorhome servicing exists as two separate services because the skills, qualifications, and test equipment required for each are entirely different. A vehicle mechanic is qualified to service the engine and drivetrain but is not qualified to carry out gas pressure testing or 230V electrical safety testing. An AWS habitation engineer holds the gas and electrical qualifications for leisure vehicles but does not carry out brake servicing or timing belt replacement.
What is a motorhome habitation check?
A motorhome habitation check is a structured inspection of every living-area system in a motorhome — gas, electrical, water, ventilation, damp, and fire safety — carried out by an Approved Workshop Scheme engineer. It does not include any work on the engine, transmission, brakes, or other mechanical components of the base vehicle.
The Approved Workshop Scheme (AWS) is the UK benchmark standard for motorhome and caravan maintenance, run by the National Caravan Council (NCC) in conjunction with the Camping and Caravanning Club and the Caravan and Motorhome Club. Established in 1978, the AWS currently operates over 550 fixed and mobile approved workshops across the UK. An AWS-accredited engineer carries the gas and electrical qualifications specific to leisure vehicles — these are different from domestic gas and electrical qualifications.
The habitation check is required annually to maintain two warranties on a new UK-built motorhome: the habitation warranty, which is typically two years, and the water ingress warranty, which is typically six to ten years depending on manufacturer. Both warranties require the owner to produce documented proof of annual servicing by an approved technician before a claim will be honoured.
Most habitation checks cover approximately 50 individual inspection items and take approximately three hours to complete. A pre-purchase inspection via the AWS — which covers four categories: interior safety, exterior safety, appliance operation, and tyre age and condition — is also available for buyers assessing a used motorhome; this inspection typically takes two to four hours and is bookable via approvedworkshops.co.uk.
What does a habitation check cover?
A habitation check covers nine systems, inspecting approximately 50 individual items: gas, electricity, water, ventilation, damp, fire safety, bodywork seals, security, and chassis mountings. The breakdown below organises the inspection by system.
For a comprehensive visual guide to how a professional habitation check is conducted, the following video from Motorhome Matt provides approximately 32 minutes of detailed walkthrough. Allow time to watch it in full when reviewing this section.
[VIDEO EMBED: YouTube ID P-oANxc1P_c — “This is what a GREAT habitation check looks like: Full guide to habitation checks” — Motorhome Matt]
Nine system categories and their inspection items:
- Gas system — gas-tightness pressure test (full system pressure decay test using a calibrated manometer), gas regulator condition and age, cylinder security, compartment seal and ventilation, hob and oven function test, grill function, gas fridge operation, space heater function, water heater function. Flame colour and soot on flue assessed as burner condition indicators.
- Electrical system (230V) — RCD (Residual Current Device) response test, polarity check, earth bonding test, consumer unit inspection, mains socket function. An EICR (Electrical Installation Condition Report) provides a deeper assessment of all fixed electrical installations and is recommended as an optional extra every three years.
- Electrical system (12V) — leisure battery condition and charge acceptance test, 12V charging system verification, battery charger function on hookup, fridge operation on 12V, all 12V sockets and internal and external lights.
- Water system — fresh water tank, filter, pump, pressure switch, taps, shower, and toilet all checked for leaks and correct operation; wet heating system inspected if fitted; toilet and cassette seal integrity assessed; thorough plumbing examination carried out if any damage beyond normal wear is suspected.
- Ventilation — rooflights, fixed vents, and windows verified for clear airflow and obstruction-free operation; adequate ventilation is essential to prevent moisture build-up and to allow safe dispersal of gases from appliances.
- Damp check — moisture readings taken systematically at every wall, ceiling, and floor panel using a specialist damp meter; readings up to 15% are normal, readings above 20% require investigation. Technicians expect some moisture in any motorhome — it is the level that determines whether action is required.
- Fire and safety devices — smoke alarm function test, CO detector function and age check, fire extinguisher pressure inspection, fire blanket seal condition.
- Bodywork seals and security — window and door frame sealant seams, external locker surrounds, and body panel joins inspected for condition; window locks and security devices checked; body panel and seal condition assessed.
- Chassis mountings — chassis-to-habitation mounting points checked for integrity and corrosion.
Engine, gearbox, brakes, and tyres are not part of a standard habitation check — those are base vehicle service items.
Key facts at a glance about habitation services
Seven facts for anyone booking or researching a motorhome habitation service:
- Typical duration: approximately 3 hours for a standard check; up to 4 hours for a comprehensive inspection.
- Cost range (2025): £200–£350 depending on motorhome type (van conversion, coach-built, A-class, tag-axle) and location; Brownhills charges £315 for club members and £350 for non-members.
- HabCheck pricing (April 2026): £249 for members; £269 for non-members; £299 for a pre-purchase inspection.
- Recommended frequency: annually, regardless of mileage.
- Documentation provided: stamp in the manufacturer service book, completed habitation service report with moisture readings by panel location, gas and electrical test results, and a list of any advisory or pass items.
- Most common advisories found: sealant condition at rear corners and rooflight surrounds, damp readings at rear corners of coach-built motorhomes, leisure battery charger performance, CO detector battery or end-of-life replacement, gas regulator age.
- AWS network: established in 1978; over 550 approved workshops in the UK; verified via approvedworkshops.co.uk. Workshops are dealership-based, independent, or mobile and are assessed annually for standards, insurance, customer service, and code of practice compliance.
The Approved Workshop Scheme (AWS), established in 1978, currently operates over 550 fixed and mobile approved workshops across the UK, confirmed via approvedworkshops.co.uk (April 2026).
How do engine and mechanical servicing requirements differ for motorhomes?
Motorhome mechanical servicing differs from car servicing in four important respects: base-vehicle-specific intervals, storage-related deterioration, the effects of heavy and uneven loading, and the sensitivity of modern emissions systems to low-use patterns. A motorhome built on a Fiat Ducato, Peugeot Boxer, Citroën Relay, Mercedes Sprinter, or Ford Transit platform shares its mechanical architecture with a commercial van but is used in a fundamentally different way — and that difference creates servicing requirements that go beyond the standard van service schedule.
Most motorhomes travel far fewer annual miles than the commercial vehicles they are based on, yet their engines, brakes, and suspension are often subjected to heavier loading than the equivalent van use. The combination of low mileage and heavy load is the defining characteristic of motorhome mechanical wear.
Base-vehicle priorities and intervals
Base vehicle service intervals are set by the chassis manufacturer — not by the habitation converter — and must be followed separately from the habitation service schedule. A motorhome’s converter-issued habitation warranty does not supersede the base vehicle manufacturer’s mechanical service requirements; both schedules operate independently and both must be followed to maintain their respective warranties.
Five primary base vehicle service items and their standard intervals:
- Engine oil change — at the manufacturer’s specified interval, using the correct specification oil; for motorhomes with low annual mileage, this should be at the time interval regardless of whether the mileage threshold has been reached.
- Timing belt or chain replacement — the most consequential interval item; most diesel base vehicles require timing belt replacement at either a mileage threshold (commonly 100,000 miles) or an age threshold (commonly five years), whichever comes first.
- Coolant change — typically required every five years; coolant that has been in service longer than this loses its corrosion inhibitor properties and accelerates internal corrosion of aluminium engine components.
- Fuel filter — replace at the manufacturer’s mileage interval, noting that low-mileage motorhomes may be required to replace this on a time basis.
- Brake fluid — replace every two years regardless of mileage, as brake fluid absorbs atmospheric moisture through the reservoir vent and its boiling point decreases progressively with water content.
Motorhomes under base vehicle warranty must follow the manufacturer’s mechanical service schedule to maintain warranty on mechanical items. Owners should discuss servicing requirements and any limitations with the selling dealer at the point of purchase, and clarify in writing which approved service centres can carry out warranted mechanical work.
Weight, usage and storage patterns
Usage and storage patterns affect motorhome mechanical wear in ways that do not apply to daily-use vehicles — weight distribution, infrequent movement, and long idle periods all accelerate specific components. A motorhome moved twice a month for weekend touring and stored the rest of the time is not subject to the kind of wear patterns for which standard van service intervals are designed.
Several wear patterns are unique to motorhome use.
Motorhomes regularly load near their maximum GVW. This accelerates rear suspension spring and shock absorber wear because the rear of a coach-built motorhome carries the bulk of the habitation weight, and rear overhang amplifies that load effect on the rear axle. Rear brakes wear faster than on an equivalent unladen van for the same reason.
Short-trip use — moving the motorhome between pitches, or moving it in and out of storage — does not generate enough engine heat to drive off moisture that condenses in engine oil during a cold start. Oil contaminated with moisture from repeated short cold-start cycles degrades faster than its nominal service interval; changing engine oil on a time basis rather than a mileage basis is the correct response.
Brake disc surfaces corrode when a motorhome sits stationary for several weeks. This surface rust produces a judder sensation on the first application of the brakes after storage, which clears as the discs are cleaned by use. Cosmetic rather than structural — but it is evidence that the disc surface has been chemically altered by static storage, which is reason to inspect brake disc thickness at every service.
Rubber seals, coolant hoses, and brake hoses deteriorate through ageing independently of mileage. A seven-year-old brake hose on a low-mileage motorhome is just as likely to delaminate internally as one on a high-mileage car.
Emissions and fuel-system considerations
Modern diesel motorhomes carry emissions hardware — DPF and AdBlue systems — that require specific usage and maintenance patterns that differ from traditional diesel vehicle servicing. A motorhome’s pattern of use is particularly ill-suited to the operating requirements of the DPF, and this mismatch is one of the most common sources of expensive unplanned repairs for motorhome owners.
The DPF (Diesel Particulate Filter) is a ceramic filter that captures soot particles from the exhaust gas. It clears itself through a process called regeneration, in which the engine management system raises exhaust temperatures to burn off accumulated soot. Passive regeneration requires sustained motorway driving at moderate to high engine loads — a condition that motorhomes used primarily for campsite movements and short intra-town trips rarely achieve. A blocked DPF costs between £500 and £2,000 to clear or replace, depending on engine type and extent of blockage. Periodically driving the motorhome on a motorway at a steady speed for at least 30 minutes allows passive regeneration to complete.
AdBlue (Diesel Exhaust Fluid) is consumed by the Selective Catalytic Reduction system on Euro 6 diesel engines and must be monitored continuously. An engine that exhausts its AdBlue supply will initially generate a dashboard warning and reduce performance; if the level reaches zero without a refill, the engine management system will prevent the vehicle from restarting after the next stop. Use only the correct DEF (Diesel Exhaust Fluid) specification — contaminated AdBlue can damage the SCR catalyst.
On older petrol-engined motorhomes, E10 petrol (containing 10% ethanol) can attack fuel system rubber components — fuel hoses, carburettor diaphragms, and fuel tank vent hoses — that were not designed for ethanol compatibility. Owners of pre-2002 motorhomes on petrol engines should check their fuel system compatibility before using E10 fuel.
How do you maintain bodywork and exterior fittings?
Bodywork and exterior maintenance is primarily about moisture prevention — a well-maintained exterior, with intact sealant seams and clean rooflights, is the first line of defence against the water ingress that causes the most expensive motorhome repairs. The annual habitation service addresses bodywork and seals as part of the professional inspection cycle, but the interval between services is long enough for seal degradation to progress to the point of water penetration without owner intervention.
Between annual services, owners can significantly reduce their water ingress risk through regular inspection, correct cleaning products, and timely sealant maintenance.
Seals and seams maintenance
Sealant seams are the primary barrier against water ingress — inspect them before and after winter storage and reseal at the first sign of cracking, lifting, or gaps. Sealant failure is the leading cause of water ingress in motorhomes, and the repair cost is the difference between a few pounds of sealant and a several-thousand-pound structural delamination repair.
Effective sealant maintenance involves five practices:
- Use the correct sealant product — standard household silicone is not suitable for motorhome bodywork; use a leisure vehicle-grade product such as Sikaflex 512 Caravan, Geocel 2300, or an equivalent polyurethane-based sealant that remains flexible through thermal cycling.
- Inspect before and after winter storage — the temperature differential of a winter storage period stresses sealant seams through contraction and expansion; inspect all seams at the start of spring and again at the end of the autumn touring season.
- Identify the highest-risk areas — roof-to-wall joints, rooflight surrounds, window frames (especially bottom corners), rear panel joins, satellite dish fixing points, and rear light cluster surrounds are the locations where water ingress most commonly begins.
- Reseal at first sign of degradation — do not wait for a damp meter reading to confirm ingress has occurred; cracking or lifting sealant is evidence of future ingress, not just past ingress.
- Remove degraded sealant before resealing — applying new sealant over old, cracked material creates a poor adhesive bond and traps moisture beneath; use a sealant remover tool and clean the substrate before applying fresh sealant.
Roof and rooflights care
The motorhome roof is the highest-risk area for unchecked moisture ingress — roof panel cleaning and rooflight inspection should be part of every pre-season preparation. Algae and moss that accumulate on a roof panel over winter retain moisture against the GRP surface and accelerate sealant degradation at every rooflight and fitting surround.
Roof maintenance involves five tasks:
- Clean the roof panel annually — use a motorhome-specific roof cleaner to remove algae, moss, and dirt deposits; standard car cleaning products may be incompatible with GRP surface treatments and awning fabrics.
- Inspect rooflight domes for UV degradation — polycarbonate rooflight domes craze and crack with prolonged UV exposure; a crazed dome admits water through fine cracks that are invisible from inside the vehicle. Replace crazed or cracked domes promptly.
- Lubricate rooflight hinges and seals — rooflight hinge mechanisms and compression seals require annual lubrication with an appropriate product (rubber conditioner for seals; light lubricant for hinges) to maintain correct operation.
- Check all roof-mounted fixing sealant — solar panel frames, satellite dish bases, aerials, and any other roof-penetrating fixings must have intact sealant surrounds; each is a potential ingress point.
- Follow manufacturer guidance for roof access — most GRP motorhome roofs are not load-bearing and will not safely support a person’s weight; use a ladder placed against the side of the vehicle and reach across rather than standing on the roof panel.
Awnings, racks and external accessories
Awnings, bike racks, and external accessories all create potential water ingress points at their fixing sites — regular inspection prevents both structural damage and sealant failure. A loose awning rail bracket is not only a risk to the awning fabric in wind; the movement enlarges the fixing holes and creates a direct water pathway into the wall behind.
Four accessory maintenance items to check regularly:
- Awning fabric and cassette — clean the fabric with a specialist awning cleaner and allow to dry fully before retracting; inspect guide rails for cracking or bowing; check the opening and closing mechanism; verify the auto-stop safety function works correctly on motorised electric awnings.
- Bike rack security and load rating — check that all fixings are secure and correctly torqued; verify that the combined weight of bikes and rack does not exceed the rack’s rated capacity, and that the total rear axle weight with bikes loaded remains within the vehicle’s plated axle limit.
- External accessory fixings — inspect all external bracket and frame fixings for security; loose fixings should be retorqued and their sealant surrounds re-examined for water ingress damage.
- Tow bar or A-frame — check for surface corrosion on the mounting bracket and verify that the hitch mechanism operates correctly; tow bar mounting bolts should be checked for torque annually, particularly on older coach-built motorhomes where floor and chassis corrosion can affect fixing integrity.
Cleaning and surface protection
Regular cleaning with the correct products extends the life of paintwork, GRP panels, and rubber seals — and makes it easier to spot sealant deterioration before it becomes a water ingress problem. A clean, smooth motorhome surface is the optimal condition for annual sealant inspection because discolouration and surface separation are much easier to identify on a clean background.
Five cleaning and protection practices:
- Use a pH-neutral motorhome shampoo — avoid car shampoos with wax additives, which can stain plastic trim, awning fabrics, and rubber seals; a dedicated motorhome wash product is formulated for the GRP, aluminium, and plastic surfaces typical of leisure vehicles.
- Avoid high-pressure washing at close range around seals — directing a pressure washer jet at a sealant seam can force water through microscopic gaps that would otherwise remain sealed; use a soft brush or microfibre mitt and normal garden hose pressure around all sealed areas.
- Apply GRP polish or ceramic coating to GRP panels — a dedicated leisure vehicle polish or professionally applied ceramic coating protects GRP surfaces against UV bleaching and acid rain damage; treat annually after cleaning.
- Protect rubber seals with a rubber conditioner — apply a rubber seal conditioner (specifically for external door and window seals, not silicone-based products which attract dust) after each thorough clean.
- Clean and treat the awning fabric — use a dedicated awning cleaner and a fabric protector treatment after cleaning; untreated awning fabric develops surface mould rapidly and the protective coating degrades within two to three seasons without maintenance.
Which safety and security features require regular checks?
A motorhome’s safety and security systems span four categories — fire and gas detection, physical restraints, electronic security, and door and window security — each requiring checks at different frequencies. Some are verified during the annual habitation service; others require owner verification between services.
The categories covered in this section are: fire and gas safety devices, restraints and seat anchorages, alarms and immobilisers and trackers, and door and window locks and latches.
Fire and gas safety devices
Fire and gas safety devices each have defined inspection and replacement schedules — failing to replace an expired CO detector removes the primary protection against carbon monoxide poisoning from gas appliances. In England and Wales, the Office for National Statistics recorded 116 deaths from accidental carbon monoxide poisoning (ICD-10 code T58) in 2020, with 120 deaths in 2019; incidents in caravans, tents, sheds, and outhouses had a higher death rate per incident than private dwellings.
Five fire and gas safety devices and their maintenance schedules:
- Smoke alarm — test monthly by pressing the test button; replace the battery annually or as directed by the manufacturer; replace the unit after the manufacturer’s recommended lifespan, which is typically ten years from the date of manufacture printed on the unit.
- CO detector — test monthly; replace the entire unit after the expiry date stamped on it, typically five to seven years from manufacture; do not use a domestic CO detector in a motorhome — use a leisure vehicle-rated unit, which is calibrated for the lower ventilation rates typical of a motorhome habitation area.
- LPG/gas detector (if fitted) — gas detectors sound an alarm at approximately 10% of the Lower Explosive Limit; test monthly and replace per the manufacturer’s schedule; most gas detectors have a five-year service life.
- Fire extinguisher — check the pressure indicator gauge is in the green zone monthly; have the extinguisher professionally serviced every five years and replaced after ten years; powder-type extinguishers are the most common type fitted to motorhomes.
- Fire blanket — check monthly that the housing seal is intact; a broken seal indicates the blanket has been partially deployed and must be replaced immediately; fire blankets are single-use items.
Restraints and seat anchorages
Seat belt and seat anchorage integrity are safety-critical and should be verified at every service — corrosion of floor-fixing bolts is a known risk in older motorhomes. Seat anchorage inspection is a professional inspection item in the sense that owners can check for visible corrosion but should not attempt to service floor-fixing bolts without professional guidance.
Four restraint system checks apply at each annual service and when a concern is noticed:
- Seat belt condition — check each travelling seat belt for fraying, cuts, or fading of the webbing; test the locking retraction mechanism on each inertia-reel belt.
- Seat-to-floor anchorage inspection — visually inspect the fixing bolts at floor level for surface corrosion; pay particular attention to fixed seating above floor areas that may be exposed to moisture from the habitation living space.
- Child seat ISO-FIX points — confirm that ISO-FIX anchorage points are intact and that their rated capacity is appropriate for the child restraint systems being used.
- Professional follow-up — any floor-fixing corrosion identified visually should be assessed professionally before the next tour; corroded floor fixings that fail under braking loads can allow a seat to move forward under impact.
Alarms, immobilisers and trackers
Electronic security systems — alarms, immobilisers, and trackers — each require annual verification that they are functioning correctly and that any associated subscriptions or backup power sources are current. An expired tracker subscription renders the hardware entirely non-functional for recovery purposes, even if the device is physically installed.
Three electronic security system checks:
- Alarm system — arm the alarm and test the perimeter sensors by opening a door or window; confirm the alarm sounds correctly; replace the alarm siren backup battery if fitted (typically every two to three years).
- Tracker subscription — verify the subscription is active and the platform account is current; a lapsed subscription means the tracker cannot communicate with the monitoring centre, making it useless for vehicle recovery. Many specialist motorhome insurers require a Thatcham-rated Category 5, 6, or 7 tracker as a policy condition — check your policy requirements annually at renewal.
- Immobiliser function — test that the vehicle will not start without the correct key or authorisation device; factory-fitted immobilisers are generally maintenance-free, but aftermarket systems may have transponder batteries that require periodic replacement.
Door and window locks/latches
Door and window security should be verified before every trip — checking habitation door central locking, locker latches, and window hinge locks takes under five minutes. Window and door lock security is inspected as part of the habitation check, but owner verification between services catches any deterioration that develops during the touring season.
Five areas cover owner checks for door and window security:
- Habitation door central lock — test the locking and unlocking function from both inside and outside; check that the deadbolt engages fully when locked and that the handle operates smoothly.
- External storage locker locks — open and close every locker lock; check for jammed mechanisms or corrosion in the lock body; lubricate annually with a PTFE-based lubricant, not an oil-based one (oil attracts grit and accelerates lock wear).
- Window hinge locks — test each window’s lock mechanism; check that windows seal correctly in the closed and locked position by testing for air movement around the seal when the window is locked.
- Cab door locks — check that both cab doors lock and unlock correctly from inside and outside; verify the central locking synchronisation if the cab and habitation areas are linked on the same fob.
- Spare key security — ensure the spare key is stored securely off-vehicle; a spare key left in the motorhome’s storage lockers provides no security benefit and increases theft risk.
In England and Wales, the Office for National Statistics recorded 116 deaths from accidental carbon monoxide poisoning (ICD-10 code T58) in 2020, with 120 deaths in 2019; incidents in caravans, tents, sheds, and outhouses had a higher death rate per incident than private dwellings.
Why are damp surveys essential and how are they carried out?
Water ingress is the most expensive repair category in motorhome ownership — and the only way to detect it before it causes structural damage is a professional moisture reading survey during the annual habitation service. Every habitation check carried out by an AWS-accredited engineer includes a systematic damp survey as a core inspection element, not an optional extra.
Water ingress is described across the entire motorhome servicing industry as the most expensive problem a motorhome can develop. What no competitor source makes explicit is the actual cost: structural damp repair involving wall or floor delamination costs from £1,000 upward, with extensive delamination of a full rear panel or floor section reaching several thousand pounds depending on the degree of penetration and the motorhome’s construction method. Early detection through annual surveys is not just prudent — it is financially material, with an annual habitation service costing between £200 and £350 representing a fraction of the repair cost it prevents.
Modern wood-free construction in motorhomes reduces but does not eliminate the risk of water ingress damage. Composite panels without timber substrates are less susceptible to catastrophic structural failure from damp, but moisture still penetrates the bond line between panel layers and causes delamination in GRP-faced foam-core panels if left undetected long enough.
The only reliable way to catch ingress at an early, repairable stage is a systematic moisture survey at known-risk locations, carried out with calibrated test equipment, at regular intervals — which is precisely what the annual habitation damp check provides.
How damp is measured and interpreted
Damp meters take readings at multiple points across every panel — the numerical result determines whether moisture is within expected range, requires monitoring, or indicates active water ingress. Two instrument types are used: conductivity-type damp meters (non-invasive surface contact readings) and pin-type meters (which use probes inserted into the substrate for deeper readings when surface contact suggests elevated moisture).
Readings are taken systematically at every wall, ceiling, and floor panel and recorded in the service report. The threshold system is straightforward: readings up to 15% are considered normal in a motorhome structure because some ambient moisture is always present in composite materials. Readings between 15% and 20% indicate that monitoring is appropriate — they are above the baseline but not necessarily indicative of active ingress. Readings above 20% warrant investigation and remediation assessment, as this level is associated with active or recent water penetration rather than ambient moisture.
Year-on-year records are particularly valuable. A reading of 18% that was 14% the previous year demonstrates an upward trend and warrants investigation even if neither figure alone crosses the 20% threshold.
Common ingress points
Water ingress in motorhomes enters through a predictable set of locations — sealant failures at window frames, rooflight surrounds, and rear panel joins account for the majority of damp survey findings. Understanding these locations allows owners to prioritise their monthly visual seal checks most effectively.
Seven most common ingress locations:
- Window and door frame sealant seams — the primary cause of water ingress; the sealant bead that seals each window frame to the body panel is subject to thermal movement and UV degradation over every season.
- Roof-to-wall joints — the joint between the roof panel and the sidewall panels is a high-stress location that expands and contracts through temperature cycling; sealant here is typically thicker but deteriorates faster than side panel seams.
- Rooflight surrounds and fixings — each rooflight creates a penetration in the roof panel; the sealant around the rooflight frame and any retaining screws is a common ingress point.
- Roof-mounted aerial, satellite dish, and solar panel fixings — every bolt through the roof panel is a potential ingress point; sealant around roof fixings should be inspected and refreshed every two to three years.
- Rear panel joins and light cluster surrounds — the rear of a coach-built motorhome is a complex assembly of panels, sealants, and fittings; rear corners are statistically the most common location for first damp readings in coach-built motorhomes.
- External locker door surrounds and hinges — the perimeter seal of every locker opening, combined with hinge fixings that penetrate the body panel, creates multiple ingress risk points on each locker.
- Side moulding strip seal tape — decorative side moulding strips are bonded with seal tape that deteriorates with age; missing or damaged moulding tape allows water to track behind the strip and into the wall structure.
Remediation and when to escalate
Damp remediation ranges from a straightforward reseal-and-monitor approach for early-stage readings to full structural panel replacement for advanced delamination — the sooner ingress is identified, the less expensive the repair. The decision of when to escalate from monitoring to active remediation depends on reading levels, trend data, and physical evidence.
For readings above 20%: the first action is to identify and reseal the ingress point, then allow the structure to dry (which can take several months for fully saturated composite panels), then re-test at the next service.
For confirmed delamination — indicated by soft or spongy wall panels, visible bubbling of the inner wall facing, or a hollow sound when the panel is tapped — professional remediation is required. This ranges from partial panel injection (injecting expanding foam behind a delaminating layer to rebond it) to full panel replacement, depending on the extent of separation.
Three conditions require immediate escalation to a specialist rather than a next-service review: soft floor panels indicating sub-floor delamination under foot traffic load; visible mould on internal walls or ceiling surfaces; or persistent high readings above 25% that do not reduce following identification and resealing of the suspected ingress point.
A motorhome with confirmed active water ingress and readings above 20% should not be stored unattended for extended periods, as moisture continues to migrate through the structure even when the vehicle is not in use.
Structural damp repair involving wall or floor delamination costs from £1,000 upward, with extensive delamination of a full rear panel or floor section reaching several thousand pounds — a cost no competitor source makes explicit despite universally describing water ingress as the most expensive motorhome problem.
How does an MOT differ from a motorhome service and what do you need to pass?
The MOT and a motorhome service check completely different systems — the MOT covers roadworthiness and safety of the base vehicle, while a motorhome service additionally covers the habitation area that the MOT does not inspect at all. Confusing “passed the MOT” with “fully serviced” is a common and genuinely dangerous misunderstanding among new motorhome owners.
The UK MOT test for motorhomes operates under two weight categories. Motorhomes up to 3,500kg Gross Vehicle Weight — which includes most van conversions and a significant proportion of coach-built motorhomes — are tested under Class 4 (Category 4) at any authorised MOT station. Motorhomes between 3,500kg and 7,500kg GVW — including larger coach-built, A-class, and tag-axle motorhomes — are tested under Class 7 at stations equipped to handle larger vehicles.
The MOT checks roadworthiness items: lights, brakes, steering, tyres, the visible body structure, seatbelts, exhaust emissions, the windscreen and wipers, mirrors, the horn, bodywork integrity, and the underbody structure visible from a ramp. The current maximum MOT fee at the time of writing is £54.85 for a Class 4 test and £58.60 for a Class 7 test; check the DVSA website for the current statutory fee caps.
None of the following are covered by the MOT: the gas system, the 12V or 230V electrical systems, the water system, damp, habitation ventilation, appliance function, fire safety devices, or the CO detector. These are the systems most likely to cause serious harm to occupants.
| Area | Covered by MOT | Covered by Annual Service |
| Engine and mechanical | Yes | Yes |
| Brakes | Yes | Yes |
| Tyres | Yes | Yes |
| Lights | Yes | Yes |
| Bodywork/structure | Partial (visible only) | Yes (full sealant and panel inspection) |
| Steering | Yes | Yes |
| Gas systems | No | Yes |
| Electrical (230V/12V) | No | Yes |
| Water system | No | Yes |
| Damp | No | Yes |
| Ventilation | No | Yes |
| Fire safety devices | No | Yes |
| CO detector | No | Yes |
What happens during a professional service visit?
A professional motorhome service visit follows a structured sequence from check-in to road test — understanding what happens at each stage helps owners prepare and get maximum value from the appointment. The process varies slightly by workshop but follows a broadly consistent workflow across AWS-accredited centres.
Eight stages make up a professional service visit:
- Pre-visit preparation — bring the motorhome’s service book, your written fault log of any issues noted since the last service, the previous service’s advisory report, and the MOT certificate if renewal is due alongside the service. A comprehensive fault log significantly increases the value of the appointment by directing the engineer’s attention to specific concerns.
- Check-in and paperwork — the workshop records the motorhome’s mileage, confirms the service type being carried out, takes your contact details and preferred method for authorising advisory work, and confirms the expected completion time.
- Key handover and walkround — the workshop may conduct a brief external condition check at handover to note any existing damage; this protects both parties from disputes about pre-existing damage.
- Base vehicle service — this is typically carried out first or simultaneously by a vehicle mechanic while the habitation engineer prepares their equipment; it covers the mechanical, brake, tyre, fluid, and emissions checks.
- Habitation inspection sequence — the habitation engineer works systematically through gas, electrical, water, ventilation, damp, fire safety, bodywork, and security; the 3–4 hour duration for the habitation element alone reflects the number of individual inspection points.
- Road test — at the conclusion of the base vehicle service, a road test verifies that the mechanical work has been carried out correctly and that no handling or brake anomalies are present.
- Report production — both service streams produce documentation: the base vehicle service generates a service record entry and stamp; the habitation check generates a written report itemising all readings, test results, and findings by category.
- Collection and debrief — the workshop walks you through any advisory items, explains the red/amber/green traffic-light classification, and quotes for any recommended additional work; ask for a copy of the full habitation report to retain in your service history file.
Booking the next service at this point is strongly recommended — reputable workshops fill appointments quickly, and pre-booking a year in advance is the most reliable method for securing a preferred date.
Check-in, checklist, and typical duration
Check-in for a professional motorhome service takes five to ten minutes — but arriving with a completed fault list, the service book, and a clear diary for the duration makes the visit significantly more efficient. Three service type durations to plan for:
- Base vehicle service only: 1–2 hours, depending on scope and any advisory work arising.
- Habitation check only: approximately 3 hours for a standard check; up to 4 hours for a comprehensive check or larger motorhome.
- Combined mechanical and habitation service (same day): 4–6 hours, depending on motorhome size and advisory work arising; some workshops operate parallel streams (separate mechanic and habitation engineer working simultaneously) which reduces total elapsed time.
Many larger workshops and mobile services offer combined same-day bookings. HabCheck’s mobile workshop service — which brings an AWS-accredited engineer to the owner’s location — is a practical option for owners whose nearest fixed workshop has a long lead time.
Reports, advisories and next steps
Service reports use a traffic-light system — green pass items, amber advisories, and red immediate-action items — and every item noted in the report becomes part of the permanent service history. The traffic-light classification tells the owner clearly what must be addressed now, what should be addressed before the next tour, and what is acceptable without action.
The habitation report documents moisture readings by panel location, gas pressure test results, electrical test results (RCD, polarity, earth bonding values), and appliance function assessments. Each advisory item is described with sufficient detail to allow the owner to provide the information to another workshop if the original workshop cannot carry out the remedial work.
Keep each service report with the service book permanently — together, the annual service reports and stamps form the complete motorhome service history. This file is the evidence required for warranty claims, insurance documentation, and the service history verification that a motorhome dealer or private buyer will request when the vehicle is eventually sold.
When authorising advisory work: red items require authorisation before the vehicle leaves the workshop (or the workshop is obligated to advise that the vehicle should not be driven); amber items can be deferred but should be scheduled before the next tour; green items require no action.
How much does motorhome servicing cost?
A full annual motorhome service — combining base vehicle mechanical service and habitation check — costs approximately £350–£650 in total, depending on motorhome size, chassis type, and location. This total reflects the two distinct service streams that a motorhome requires, each with its own cost structure.
Eight cost components make up the total annual servicing expenditure for a motorhome owner:
- Base vehicle mechanical service: £150–£300, depending on motorhome chassis (Fiat Ducato, Mercedes Sprinter, and Peugeot Boxer all have slightly different parts costs), service scope, oil specification, and regional labour rates; additional work such as a timing belt replacement or brake service adds to this baseline.
- Habitation service: £200–£350 as of December 2025, depending on motorhome type and location. Van conversions typically attract the lower end of this range; A-class and tag-axle motorhomes attract the upper end. HabCheck (the AWS-accredited mobile service) charges £249 for members and £269 for non-members; Cambridge Motorhomes charges from £295 including VAT; Brownhills, one of the UK’s largest dealerships, charges £315 for club members and £350 for non-members.
- Annual MOT: capped at £54.85 for Class 4 and £58.60 for Class 7 at the time of writing; check the current DVSA fee schedule as these figures are periodically revised.
- Damp survey: typically included within the habitation service fee; if ordered as a standalone survey between annual services, expect to pay £75–£150 depending on the workshop and motorhome size.
- Timing belt replacement: £400–£900 depending on engine type and the mechanic’s labour rate; this is a major scheduled cost item that should be budgeted separately and anticipated rather than discovered at a service.
- Brake service (pads and discs): £200–£500 depending on axle; rear brakes on heavy motorhomes wear faster than front brakes due to the loaded rear weight distribution.
- Motorhome tyre replacement: £150–£300 per tyre for common sizes; motorhome tyres cost more than car tyres because of the higher load ratings and reinforced sidewall construction required.
- Parts and consumables: oil, filters, coolant, and other consumables typically add 30–50% to the base labour cost for a full service; this ratio is higher for diesel engines with long-life synthetic oil specifications.
Additional service costs to note: damp assessment added as a non-standard item (if high readings are found at a previous service and a targeted re-survey is requested); mobile or call-out premium (mobile services such as HabCheck may include a travel element in their pricing — compare on total cost including any travel costs versus the workshop-based alternative); seasonal pricing variation (peak demand from March to May can push habitation service prices upward at high-demand workshops; winter bookings during November to February often have better availability and may avoid seasonal demand surcharges).
How do service records affect warranty and resale value?
A complete motorhome service history — stamped service book, habitation service reports, and moisture reading records — performs three roles simultaneously: it maintains warranty validity, strengthens an insurance position, and directly increases the resale price a motorhome dealer will offer.
Warranty protection
Two distinct warranties on a new UK-built motorhome depend entirely on the service record for their validity. The habitation warranty, typically two years, requires the first annual habitation service to be completed within the manufacturer’s specified window. The water ingress warranty — typically six to ten years — requires annual habitation checks by an approved technician every year throughout the warranty period to remain active. The manufacturer requires documented proof of each service before honouring any warranty claim.
The warranty risk chain is explicit and worth understanding precisely: an owner who misses a single annual habitation service — in year four of a ten-year water ingress warranty, for example — immediately loses the remaining six years of water ingress protection. If water ingress subsequently develops in year six, the manufacturer has grounds to reject the claim, and the owner faces a repair bill that could reach several thousand pounds with no warranty recourse. Annual servicing is not merely a recommendation — it is the mechanism by which the warranty protection is kept active year by year.
This risk is compounded by the fact that the warranty window varies by manufacturer: some require the service to be completed within a 60-day window of the anniversary; others allow up to six months. An owner who is unaware of their specific manufacturer’s requirement may inadvertently breach the warranty window even if they intend to service the vehicle annually.
Insurance documentation
The service record serves double duty as warranty proof and insurance negligence defence — the same document protects the owner against both warranty rejection and insurance claim complications. Annual professional service reports demonstrate that the vehicle was properly maintained at the time of each inspection. This matters when an insurer investigates a gas, electrical, or damp-related claim: an owner who cannot produce service records has no documented evidence against a negligence determination, and the claim may be reduced or refused. An owner with complete annual service reports has objective third-party evidence that all safety systems were verified by a qualified professional within the preceding twelve months.
Resale value and the motorhome dealer connection
A motorhome with a complete, documented service history is a substantially more valuable asset than an equivalent motorhome without records — and this is not simply a matter of buyer preference. When selling to a motorhome dealer, the service history is one of the first factors assessed. A well-serviced motorhome with documented annual habitation reports, moisture reading records, and a fully stamped service book demonstrates verifiable care — and a motorhome dealer can offer a stronger price because the risk profile of the vehicle is demonstrably lower.
The Motorhome Trader, as a motorhome dealer that purchases motorhomes directly from private owners across the UK, is one of many buyers for whom complete service documentation makes a tangible difference to the offer price. A motorhome with a ten-year service history has had its gas, electrical, damp, and mechanical systems professionally verified ten times — it is a provably maintained asset. A motorhome with no records or gaps in its history carries unknown risk that is reflected in any professional buyer’s valuation.
Every habitation service report retained, every service book stamp collected, and every advisory item resolved adds to the documentary evidence that underpins the vehicle’s market value. The owner who has maintained annual servicing throughout their ownership period is protecting a financial asset, not just performing a safety compliance exercise.
Missing a single annual habitation service in year four of a ten-year water ingress warranty immediately voids the remaining six years of protection — a mechanism no competitor source assembles explicitly from the underlying warranty, servicing, and cost data.
How does motorhome servicing differ from caravan servicing?
Motorhome servicing and caravan servicing share a common habitation check component — gas, electrical, water, damp, and fire safety — but motorhomes require three additional service elements that caravans do not: a base vehicle mechanical service, a roadworthiness MOT, and emissions system maintenance. This makes the annual servicing obligation for a motorhome significantly broader in scope and cost than that for a caravan.
Both motorhomes and caravans are covered by the Approved Workshop Scheme, and the habitation check element is broadly equivalent in scope. The key differences arise from the motorhome’s automotive base vehicle, which a caravan does not have. A caravan is towed and has no engine, no transmission, no brake system that requires hydraulic servicing, and no exhaust emissions hardware. It is therefore exempt from the MOT requirement — there is no MOT test for a towed leisure vehicle in the UK — and it is subject to road fund licence (vehicle excise duty) only for the tow vehicle, not for the caravan itself.
From a cost perspective, annual caravan servicing costs approximately £200–£300 for a habitation check alone. A motorhome owner pays the same habitation check fee plus the additional cost of the base vehicle mechanical service, the MOT, and any emissions-related maintenance — bringing the total annual cost to approximately £350–£650 before any advisory work.
| Service Element | Motorhome | Caravan |
| Base vehicle mechanical service | Required annually | Not applicable |
| MOT required | Yes (Class 4 or Class 7) | No |
| Habitation service (gas, electrical, water, damp) | Required annually | Required annually |
| Road fund licence (Vehicle Excise Duty) | Required | Not applicable |
| Emissions systems (DPF/AdBlue) | Yes (diesel Euro 6) | Not applicable |
| AWS coverage | Yes | Yes |
| Approximate annual service cost range | £350–£650+ | £200–£300 |
When should you book repairs immediately instead of waiting for your next service?
Nine situations require immediate professional attention rather than waiting for the next scheduled service — in each case, using the motorhome before the fault is resolved creates a safety, structural, or legal risk. Do not attempt to diagnose or resolve any of these faults independently.
- Any smell of gas inside or outside the motorhome — turn off the gas supply at the cylinder valve immediately, ventilate the vehicle by opening all windows and doors, do not use any electrical switches (which can produce a spark), leave the vehicle, and contact a qualified gas engineer before using the motorhome again.
- High or rapidly increasing damp readings, soft or spongy floor or wall panels, or visible bubbling of inner wall panels — these are signs of active structural water ingress; continued use allows moisture to migrate further through the structure, increasing repair costs.
- Brake warning lights, unusual brake noises, pulling under braking, or a spongy brake pedal — any of these symptoms indicates a brake system fault; driving a motorhome with a compromised brake system under loaded conditions is a road safety risk.
- Engine temperature warning or visible coolant loss — continued driving with elevated coolant temperature risks catastrophic engine damage; if the temperature gauge rises above normal range, stop safely and do not drive until the cause has been identified.
- Steering heaviness, vibration through the steering wheel, or the vehicle pulling to one side without brake input — these symptoms suggest a potential steering or wheel bearing fault; at motorhome weights, a steering failure at speed has severe consequences.
- Tyre sidewall cracking or damage, visible bulging, or any tyre that is over seven years old — a structurally compromised tyre can fail without warning, particularly on a laden motorhome at motorway speeds; replace before the next use.
- Persistent RCD trips or any electric shock from a 230V appliance or hook-up cable — these indicate a fault in the 230V system; do not use the vehicle on mains hook-up and do not use any 230V appliance until the fault has been professionally diagnosed and rectified.
- Fuel smell inside or outside the vehicle — a fuel smell is a fire risk; turn off the engine if running, do not use any ignition source, ventilate the vehicle, and contact a professional before driving.
- Structural cracks to the habitation shell or visible chassis corrosion around floor mounting points — structural integrity faults create cascading risks; a cracked habitation wall can allow water ingress that accelerates into full delamination, and corroded chassis mounting points can fail under load.
How do you choose a reputable service centre?
Selecting the right service centre requires checking eight criteria — AWS accreditation being the non-negotiable starting point for any warranty-valid habitation work. Without AWS accreditation, a habitation check cannot be treated as warranty-valid for either the habitation warranty or the water ingress warranty.
- AWS accreditation — verify that the workshop holds current AWS accreditation; search the live directory at approvedworkshops.co.uk to confirm. The Approved Workshop Scheme has operated since 1978 as the UK’s largest group of independently assessed leisure vehicle workshops. AWS workshops are assessed annually for standards, insurances, customer service levels, and code of practice adherence.
- Gas and electrical credentials — ask the workshop to confirm that their habitation engineers hold ACS (UKLPG Approved Competency Scheme) qualifications for leisure vehicles, not just domestic gas qualifications; and that the 230V electrical testing is carried out to BS 7671 (IET Wiring Regulations) by a competent person. These are the most safety-critical service elements — verify explicitly that the service package includes full instrumented gas pressure and leak testing and full 230V RCD, polarity, and earth bonding tests.
- Business liability insurance — the workshop should carry appropriate business liability insurance for motorhome work; ask to confirm this is in place if you have any concerns.
- Facility suitability — the workshop must be physically capable of accommodating the motorhome; a standard car workshop ramp cannot take a 7.5-tonne tag-axle motorhome. For combined services, the workshop also needs separate capabilities for habitation inspection.
- Transparent pricing — ask for a written quote before work begins; confirm what is and is not included in the service fee; understand the quoted scope so advisory work arising during the service does not generate surprise charges.
- Sample service report — ask to see what a completed habitation service report looks like before booking; a professional workshop will have no hesitation in showing a sample; a report that lists only pass/fail outcomes with no quantitative data (moisture readings, gas test results, electrical test values) is an indicator of a less thorough inspection.
- Realistic turnaround times — confirm expected duration at booking; a workshop quoting 1–2 hours for a comprehensive habitation check on a large coach-built motorhome is unlikely to be carrying out a full 50-point inspection.
- Customer reviews — check Google, Trustpilot, and specialist motorhome forum communities; verified reviews from motorhome owners at the same workshop are the most reliable indicator of service quality.
The dealership access barrier and mobile services
Many dealerships will decline to service motorhomes they did not sell. This is a structural feature of the UK motorhome market that affects a significant proportion of second and subsequent owners: the nearest franchise dealership may refuse to book them in, and the original selling dealer may be too distant to be practical. If the original purchasing dealer closes, the manufacturer can provide details of an accredited replacement service centre.
Mobile workshop networks address this access barrier directly. HabCheck, founded in 2019 by owners who struggled to access convenient habitation services, operates a network of 20 AWS-accredited mobile workshops covering the UK from Scotland to Cornwall. A mobile service brings the AWS engineer to the motorhome’s location — storage facility, home address, or campsite — removing the need for a long delivery drive to a fixed workshop. The AWS pre-purchase inspection is also available via the approvedworkshops.co.uk directory for buyers assessing a used motorhome before purchase.
How long does servicing take, and when should you book to avoid delays?
A motorhome habitation service takes approximately three hours; a combined mechanical and habitation service takes four to six hours — and peak-season lead times of four to six weeks mean early booking is essential. Owners who attempt to book a spring service in March will typically find that the most reputable workshops are already full for March, April, and May.
Service type durations to plan for:
- Habitation check only: approximately 3 hours standard; up to 4 hours for comprehensive checks or larger motorhomes.
- Base vehicle mechanical service only: 1–2 hours.
- Combined mechanical and habitation service: 4–6 hours, varying with motorhome size and any advisory work identified during the inspection.
Because combined services take four to six hours and peak-season lead times extend to four to six weeks, booking timing is as important as service selection. The practical guidance is straightforward: book the next service at the point of completing the current one. Doing this at the service itself means the booking is secured twelve months in advance, which entirely avoids the peak-season availability problem.
Spring (March to May) is peak season for motorhome servicing because most owners want their motorhome serviced before the main touring season. Lead times at popular workshops extend to four to six weeks during this period. Winter (November to February) has the best availability — shorter lead times, faster appointments, and in some cases better pricing. For motorhomes with a service anniversary that falls in spring, booking the service in late winter is the most reliable approach.
For motorhomes with an MOT due alongside the annual service, allow additional time in case the MOT generates a retest requirement; if the vehicle fails on a tyre, for example, the tyre replacement and retest adds time and may require a separate appointment.
What documents, standards, and regulations apply to motorhome servicing?
Motorhome servicing sits within a framework of DVSA roadworthiness regulations, NCC industry standards, gas and electrical competency requirements, and manufacturer warranty conditions — none of which are fully satisfied by an MOT alone. Understanding this framework helps owners confirm that they are engaging compliant services and maintaining the correct documentation.
Six elements make up the regulatory and standards framework covering UK motorhome servicing:
DVSA MOT regulations — the Driver and Vehicle Standards Agency administers the annual MOT test under the Motor Vehicles (Tests) Regulations 1981. Class 4 (vehicles up to 3,500kg GVW) and Class 7 (3,500–7,500kg GVW) cover the weight range applicable to most UK motorhomes. The MOT is a legal requirement for vehicles over three years old.
The Approved Workshop Scheme (NCC) — the AWS is administered by the National Caravan Council (NCC) and has been the UK industry standard for leisure vehicle habitation inspection since 1978. AWS workshops are verified against annual assessment criteria covering engineering standards, insurance, customer service, and code of practice compliance. Compliance with AWS servicing requirements is the mechanism by which manufacturer habitation and water ingress warranty conditions are met.
ACS gas qualifications (UKLPG) — gas work on leisure vehicles requires technicians to hold UKLPG Approved Competency Scheme qualifications covering LPG systems in leisure vehicles; these are distinct from domestic Gas Safe Register qualifications. A domestic Gas Safe engineer is not qualified to carry out gas tightness testing on a leisure vehicle LPG system under the leisure vehicle ACS competency framework.
BS 7671 (IET Wiring Regulations) — the applicable standard for 230V mains electrical installation work in motorhomes; 230V electrical testing during a habitation check must be carried out to this standard by a competent person.
BS EN 1648 — the relevant European standard for 12V electrical installations in leisure vehicles; this standard defines wiring requirements, battery connection methods, and circuit protection specifications for the 12V habitation electrical system.
Manufacturer warranty conditions — each manufacturer’s warranty terms specify the servicing interval, required accreditation, documentation requirements, and the window within which the service must be completed. These are contractual conditions, not regulatory requirements — but failure to comply with them voids the warranty irrespective of the physical condition of the vehicle.
One important clarification: no single mandatory UK regulation requires a private motorhome owner to have an annual habitation check (unlike, for example, the annual gas safety certificate legally required for rented residential properties). However, manufacturer warranty terms, insurance policy conditions, and campsite access requirements (some UK campsites require evidence of a current habitation service) all create implicit obligations that functionally require annual servicing for practical motorhome ownership.
What maintenance tips help you prevent common problems?
Seven proactive maintenance habits prevent the majority of motorhome faults that appear in service reports — most require no tools and under ten minutes per habit. These habits are the owner’s complement to the annual professional service: they extend the life of the vehicle, reduce the cost of advisory work found at the service, and give the owner early warning of developing problems.
- Pre-trip walkaround (five minutes before every departure) — check tyres for pressure and sidewall condition, verify all exterior lights, inspect accessible sealant seams for new cracking, confirm gas cylinder security, and test smoke alarm and CO detector function; this five-minute sequence catches the faults most likely to generate a roadside stop or a safety incident.
- Post-trip clean and dry routine — after each trip, wipe down all habitation surfaces, remove any wet or damp items, and check under the mattress for condensation; a motorhome closed up with residual moisture develops mould within days in warm weather and accelerates damp readings in cooler weather.
- Active moisture control during storage — keep internal humidity low using dehumidifier sachets, maintain slight ventilation via a rooflight ventilation cover, and check dehumidifier sachets monthly to replace saturated ones.
- Weight management — stay within the motorhome’s GVW at all times; overloading accelerates rear suspension wear, increases braking distances, risks tyre structural failure, and is a legal offence; the payload capacity shown on the vehicle’s plate is the maximum combined weight of all passengers, luggage, water, and gas.
- Gentle driving to protect DPF and brakes — allow the DPF regeneration cycle to complete when the dashboard indicator illuminates; a regeneration interrupted by switching off the engine resets without completing and accumulates additional soot; avoid heavy braking during the first mile of a journey, as brake discs that have surface rust from storage need gentle repeated application to clean before full braking force is applied.
- Storage best practices — drain the water system before any storage period exceeding two weeks, maintain both batteries on smart trickle chargers, check tyre pressure every four weeks regardless of whether the vehicle has moved, and inspect the exterior seal condition before closing the motorhome for any extended period.
- Keep a fault log — note any unusual noise, smell, vibration, or system behaviour during use in a dedicated fault log notebook or digital document; share the complete list with the service engineer at every appointment; engineers who receive a written fault log at check-in direct targeted attention to known concerns that might otherwise be missed in the standard inspection sequence.
How can you enjoy touring with confidence after servicing?
A motorhome that is up to date on all services — habitation, mechanical, and seasonal preparation — is ready to travel safely at any time, and the documentation that comes with that discipline has a lasting financial value. Confidence on the road is the direct result of systematic maintenance, not luck.
Four components make up the practical framework for touring confidence: a current service record, a seasonal maintenance plan, a go-to service relationship, and pre-trip preparation discipline.
A current service record means knowing that every life-safety system in the motorhome — gas, electrical, CO detection, fire safety, and damp status — has been professionally verified by a qualified engineer within the past twelve months. This is the foundation of genuine peace of mind on a long-distance tour or a trip abroad, where breakdown assistance may be distant and specialist knowledge is harder to access.
A seasonal plan removes the risk of warranty window breaches and last-minute booking difficulty. Schedule the habitation service in autumn or early winter when AWS workshop availability is at its best; time the base vehicle mechanical service to the manufacturer’s mileage or age schedule; integrate the routine owner checks into the trip preparation routine so they become automatic.
A working relationship with an AWS workshop that knows the motorhome’s history provides continuity of inspection — an engineer who has serviced the same vehicle for three consecutive years can identify developing trends in moisture readings or advisory items that a first-time inspector would not have context for. When the vehicle’s history is known to the workshop, anomalies are more quickly identified.
The confidence that comes from maintained documentation extends beyond safety. A motorhome that has been properly serviced and has the records to prove it will achieve a significantly stronger price when sold, whether privately or through a motorhome dealer. The service history is both a safety record and a financial one — and the owner who has kept it meticulously is rewarded at every point: lower repair costs from early detection, valid warranty coverage throughout the ownership period, and the strongest possible resale position at the end of it.
What should every motorhome owner do to protect their vehicle and its value?
Motorhome servicing is not a single event — it is a continuous programme of professional services, owner checks, and documented maintenance that protects safety, preserves warranty, and sustains the vehicle’s value. Every motorhome owner, regardless of how frequently they tour or how new or old their vehicle is, benefits from applying the same disciplined approach.
Three core actions are clear. First, book an annual professional service with an AWS-accredited workshop — one that confirms it will carry out full instrumented gas pressure testing and 230V electrical testing as part of the habitation check, not just basic function checks. Second, retain every piece of service documentation — stamped service books, habitation reports, moisture reading records, advisory invoices — as a single file that constitutes the complete motorhome service history; this file is worth money at resale and is proof of compliance if a warranty or insurance claim arises. Third, carry out the routine between-service checks described in this guide consistently, integrating them into every trip preparation so that developing faults are caught early rather than discovered on a service report.
The financial case for this discipline is straightforward: annual servicing costs approximately £350–£650 per year. A structural damp repair can cost several times that in a single visit. A voided water ingress warranty, combined with a leak discovered in year six of a ten-year warranty period, converts what would have been a free manufacturer repair into a four-figure bill. And when the time comes to sell — whether privately or through a motorhome dealer — the difference in resale value between a motorhome with a complete service history and one without records is often greater than the cumulative cost of all the services that created those records.
Find an AWS-accredited workshop at approvedworkshops.co.uk, book the next service before leaving the current one, and treat the service history file as the financial asset it genuinely is.